Difference between revisions of "Half-Life"
From PCGamingWiki, the wiki about fixing PC games
SirYodaJedi (talk | contribs) m (Cleanup) |
|||
| Line 53: | Line 53: | ||
===Skip intro videos=== | ===Skip intro videos=== | ||
{{ii}} Steam release already skips intro videos. | {{ii}} Steam release already skips intro videos. | ||
| − | {{Fixbox|description=Use the | + | {{Fixbox|description=Use the [[Glossary:Command line arguments|{{code|-nointro]]|ref={{cn|date=October 2016}}|fix= |
}} | }} | ||
| Line 63: | Line 63: | ||
{{Game data/config|Linux|{{P|game}}/Half-Life/valve/}} | {{Game data/config|Linux|{{P|game}}/Half-Life/valve/}} | ||
}} | }} | ||
| − | {{ii}} {{File|*.cfg}} store the configuration. | + | {{ii}} {{File|*.cfg}} files store the configuration. |
{{XDG|false}} | {{XDG|false}} | ||
| Line 91: | Line 91: | ||
|ultrawidescreen wsgf award = incomplete | |ultrawidescreen wsgf award = incomplete | ||
|4k ultra hd wsgf award = incomplete | |4k ultra hd wsgf award = incomplete | ||
| − | |widescreen resolution = | + | |widescreen resolution = true |
| − | |widescreen resolution notes= Game is {{term|Vert-}} | + | |widescreen resolution notes= Game is {{term|Vert-}}; see [[#Field of view (FOV)|Field of view (FOV)]] for a workaround.<br>Use [https://community.pcgamingwiki.com/files/file/1228-half-life-won-resolution-fov-mp3-patch/ Half-Life WON Resolution FOV MP3 Patch] for non-Steam versions. |
|multimonitor = false | |multimonitor = false | ||
|multimonitor notes = | |multimonitor notes = | ||
| − | |ultrawidescreen = | + | |ultrawidescreen = true |
| − | |ultrawidescreen notes = See [[#Field of view (FOV)|Field of view (FOV)]]. | + | |ultrawidescreen notes = See [[#Field of view (FOV)|Field of view (FOV)]] to avoid narrow vertical FOV. |
| − | |4k ultra hd = | + | |4k ultra hd = true |
| − | |4k ultra hd notes = | + | |4k ultra hd notes = Both in-game and menu UI become too small. |
|fov = hackable | |fov = hackable | ||
|fov notes = See [[#Field of view (FOV)|Field of view (FOV)]]. | |fov notes = See [[#Field of view (FOV)|Field of view (FOV)]]. | ||
| Line 104: | Line 104: | ||
|windowed notes = | |windowed notes = | ||
|borderless windowed = hackable | |borderless windowed = hackable | ||
| − | |borderless windowed notes = Use | + | |borderless windowed notes = Use [[Glossary:Command line arguments|{{code|-window -noborder}}]]. |
| − | |anisotropic = | + | |anisotropic = true |
| − | |anisotropic notes = 16 samples by default in Steam version. Use | + | |anisotropic notes = 16 samples by default in Steam version. Use {{code|gl_ansio X}} in the console, with X as number of samples. <br/> See [[#OpenGL texture filtering|OpenGL texture filtering]] to disable texture filtering altogether. |
| − | |antialiasing = | + | |antialiasing = true |
| − | |antialiasing notes = 4x MSAA by default in Steam version. Use | + | |antialiasing notes = 4x MSAA by default in Steam version. Use [[Glossary:Command line arguments|{{code|-nomsaa}}]] to force off. |
|vsync = true | |vsync = true | ||
|vsync notes = | |vsync notes = | ||
| Line 117: | Line 117: | ||
|hdr = false | |hdr = false | ||
|hdr notes = See [[#OpenGL overbright lighting|OpenGL overbright lighting]] to increase the rendering dynamic range. | |hdr notes = See [[#OpenGL overbright lighting|OpenGL overbright lighting]] to increase the rendering dynamic range. | ||
| − | |color blind = | + | |color blind = false |
|color blind notes = | |color blind notes = | ||
}} | }} | ||
| Line 128: | Line 128: | ||
{{Fixbox|description=Field of view|ref={{cn|date=October 2016}}|fix= | {{Fixbox|description=Field of view|ref={{cn|date=October 2016}}|fix= | ||
# While in game, open the console ({{key|~}}). | # While in game, open the console ({{key|~}}). | ||
| − | # Type | + | # Type {{code|default_fov ###}} and press {{key|Enter}}, replacing {{code|###}} with the desired FOV. |
| + | |||
| + | ''Notes'' | ||
| + | {{ii}} To maintain identical vertical FOV to the 4:3 FOV at 16:9 resolutions, use {{code|106.270273206}}. | ||
}} | }} | ||
===[[Glossary:Frame rate (FPS)|High frame rate]]=== | ===[[Glossary:Frame rate (FPS)|High frame rate]]=== | ||
| − | {{Fixbox|description=Use | + | {{Fixbox|description=Use [[Glossary:Command line arguments|{{code|+developer 1 +fps_override 1 +fps_max ###}}]]|ref=<ref name="highfps">[https://steamcommunity.com/app/70/discussions/0/864973577972636754/#c412449508277202160 How to get 144hz/fps?]</ref>|fix= |
{{--}} Disabling the cap affects physics of objects and NPCs.<ref name="highfps"/> | {{--}} Disabling the cap affects physics of objects and NPCs.<ref name="highfps"/> | ||
}} | }} | ||
| Line 139: | Line 142: | ||
{{ii}} By default the filtering is enabled (not in Software rendering mode). | {{ii}} By default the filtering is enabled (not in Software rendering mode). | ||
{{Fixbox|description=Disable OpenGL texture filtering<ref>[https://steamcommunity.com/sharedfiles/filedetails/?id=244861148 How to remove texture filtering in OpenGL]</ref>|fix= | {{Fixbox|description=Disable OpenGL texture filtering<ref>[https://steamcommunity.com/sharedfiles/filedetails/?id=244861148 How to remove texture filtering in OpenGL]</ref>|fix= | ||
| − | # Go to | + | # Go to {{code|{{P|game}}}}. |
| − | # Create a file called | + | # Create a file called {{file|autoexec.cfg}}. |
| − | # Add new line | + | # Add new line {{code|gl_texturemode gl_nearest}}. |
# Save the file. | # Save the file. | ||
'''Notes''' | '''Notes''' | ||
| − | {{ii}} Using the line | + | {{ii}} Using the line {{code|gl_texturemode gl_nearest_mipmap_linear}} instead will enable mipmapping to prevent some textures from flickering at a distance. |
}} | }} | ||
===OpenGL overbright lighting=== | ===OpenGL overbright lighting=== | ||
{{ii}} Overbright lighting increases the rendering [[Glossary:High dynamic range (HDR)|dynamic range]], resulting in a primitive "bloom" effect. | {{ii}} Overbright lighting increases the rendering [[Glossary:High dynamic range (HDR)|dynamic range]], resulting in a primitive "bloom" effect. | ||
| − | {{ | + | {{--}} Overbright lighting normally only works on the Direct3D and software renderers.<ref>[https://www.vogons.org/viewtopic.php?f=5&t=47313 VOGONS • View topic - Half-Life overbright compatibility]</ref> |
{{Fixbox|description=Nvidia cards: Enable the GL extension limiter|ref=<ref>[https://www.reddit.com/r/HalfLife/comments/8uitxw/halflife_with_openal_efx_surround_sound_and_hrtf/ Half-Life with OpenAL (EFX, Surround Sound, and HRTF!) : HalfLife]</ref>|fix= | {{Fixbox|description=Nvidia cards: Enable the GL extension limiter|ref=<ref>[https://www.reddit.com/r/HalfLife/comments/8uitxw/halflife_with_openal_efx_surround_sound_and_hrtf/ Half-Life with OpenAL (EFX, Surround Sound, and HRTF!) : HalfLife]</ref>|fix= | ||
# Download and run [[Nvidia Profile Inspector]]. | # Download and run [[Nvidia Profile Inspector]]. | ||
| − | # On the Half-Life profile, set | + | # On the Half-Life profile, set {{code|Extension limit}} to {{code|On}}. Apply changes. |
| − | # Go to | + | # Go to {{code|{{P|game}}}}. |
| − | # Create a file called | + | # Create a file called {{file|autoexec.cfg}}. |
| − | # Add new line | + | # Add new line {{code|gl_overbright "1"}}. |
# Save the file. | # Save the file. | ||
| Line 352: | Line 355: | ||
|dedicated notes = Servers are hosted using a separate "hlds.exe," which can be downloaded with SteamCMD. | |dedicated notes = Servers are hosted using a separate "hlds.exe," which can be downloaded with SteamCMD. | ||
|self-hosting = true | |self-hosting = true | ||
| − | |self-hosting notes = Only LAN, by default. Use sv_lan 0 in the main menu and, if you have port forwarding set up, others can connect with the | + | |self-hosting notes = Only LAN, by default. Use {{code|sv_lan 0}} in the main menu and, if you have port forwarding set up, others can connect with the {{code|connect "ip address"}} command. |
|direct ip = hackable | |direct ip = hackable | ||
| − | |direct ip notes = Open the console ({{key|~}}) and use | + | |direct ip notes = Open the console ({{key|~}}) and use {{code|connect}} followed by the IP and port. |
}} | }} | ||
| Line 395: | Line 398: | ||
{{Fixbox|description=Install Half-Life-VR Mod|ref=<ref>[https://www.reddit.com/r/Vive/comments/76afk8/halflife_vr_goldsrc_newest_release_with_working/ Half-Life VR (goldsrc) newest release with working weapon models]</ref>|fix= | {{Fixbox|description=Install Half-Life-VR Mod|ref=<ref>[https://www.reddit.com/r/Vive/comments/76afk8/halflife_vr_goldsrc_newest_release_with_working/ Half-Life VR (goldsrc) newest release with working weapon models]</ref>|fix= | ||
# Install [https://github.com/rorincloud/Half-Life-VR/releases Half-Life VR Mod] into game root. | # Install [https://github.com/rorincloud/Half-Life-VR/releases Half-Life VR Mod] into game root. | ||
| − | # Add | + | # Add {{code|-game vr -dev -env -insecure -nomouse -nojoy +sv_lan 1 +sv_maxspeed 125}} to launch options. |
| − | # Set | + | # Set {{file|opengl32.dll}} to {{code|Read-Only}} in the installation folder. |
# Set game to windowed. | # Set game to windowed. | ||
}} | }} | ||
| Line 407: | Line 410: | ||
===Input Lag in Direct3D=== | ===Input Lag in Direct3D=== | ||
{{ii}} On certain graphics cards, using the D3D renderer can result in severe input lag, even with disabled VSync. | {{ii}} On certain graphics cards, using the D3D renderer can result in severe input lag, even with disabled VSync. | ||
| − | {{Fixbox|description=Set | + | {{Fixbox|description=Set {{code|gl_d3dflip 1}}|ref=<ref>[http://valvearchive.com/web_archive/sierrastudios.com/games/half-life/issues.html]</ref>|fix= |
}} | }} | ||
===Missing Decals in Direct3D=== | ===Missing Decals in Direct3D=== | ||
| − | {{Fixbox|description=Use | + | {{Fixbox|description=Use {{code|gl_polyoffset -0.01}}|ref={{cn|date=April 2018}}|fix= |
}} | }} | ||
===Color depth in the retail version=== | ===Color depth in the retail version=== | ||
{{ii}} The retail version defaults to 16-bit color depth. | {{ii}} The retail version defaults to 16-bit color depth. | ||
| − | {{Fixbox|description=Run game with | + | {{Fixbox|description=Run game with {{code|-32bpp}} argument|ref={{cn|date=April 2018}}|fix= |
}} | }} | ||
| Line 428: | Line 431: | ||
# Open Half-Life. | # Open Half-Life. | ||
# Press {{key|Ctrl|Esc|Shift}} in order to open the Task Manager. | # Press {{key|Ctrl|Esc|Shift}} in order to open the Task Manager. | ||
| − | # Under the | + | # Under the {{code|Processes}} tab, find {{file|HL.exe}} and right click it. |
# Set its priority to high. | # Set its priority to high. | ||
}} | }} | ||
| Line 434: | Line 437: | ||
===Missing Voice and Multiplayer Tabs under Options=== | ===Missing Voice and Multiplayer Tabs under Options=== | ||
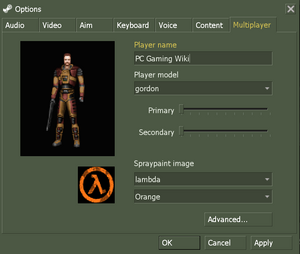
{{Fixbox|description=Replace the liblist.gam file|ref=<ref>[https://web.archive.org/web/20141205151038/http://forums.steampowered.com/forums/showthread.php?t=74037 "IF you are Missing Voice and Multiplayer Tabs under Options" Steam Users' Forum Thread] (retrieved)</ref>|fix= | {{Fixbox|description=Replace the liblist.gam file|ref=<ref>[https://web.archive.org/web/20141205151038/http://forums.steampowered.com/forums/showthread.php?t=74037 "IF you are Missing Voice and Multiplayer Tabs under Options" Steam Users' Forum Thread] (retrieved)</ref>|fix= | ||
| − | # Make | + | # Make Half-Life is not currently running. |
| − | # Download the replacement | + | # Download the replacement {{file|liblist.gam}} file from [http://qsextreme.com/SteamyThings/valve/liblist.gam here] (Download starts immediately). |
| − | # Extract into the | + | # Extract into the {{code|valve}} folder in the installation folder, replacing the existing file when prompted. |
}} | }} | ||
| Line 447: | Line 450: | ||
|directdraw notes = | |directdraw notes = | ||
|opengl versions = 2.1 | |opengl versions = 2.1 | ||
| − | |opengl notes = 3DFX MiniGL included | + | |opengl notes = 3DFX MiniGL included in retail version. |
|glide versions = | |glide versions = | ||
|glide notes = | |glide notes = | ||
| Line 487: | Line 490: | ||
{{ii}} Alternative audio pipeline for GoldSrc. Re-implements 3D audio without replacing entire rendering pipeline. Combines A3D’s HRTF and Occlusion with EAX’s reverb.<ref>[https://www.youtube.com/watch?v=RgNndtga3zY Half-Life w/ EAX and 3D spatial sound in MetaAudio (OpenAL Soft HRTF) - YouTube]</ref> | {{ii}} Alternative audio pipeline for GoldSrc. Re-implements 3D audio without replacing entire rendering pipeline. Combines A3D’s HRTF and Occlusion with EAX’s reverb.<ref>[https://www.youtube.com/watch?v=RgNndtga3zY Half-Life w/ EAX and 3D spatial sound in MetaAudio (OpenAL Soft HRTF) - YouTube]</ref> | ||
{{--}} Not compatible with software renderer.<ref>[https://www.youtube.com/watch?v=puSijPco_bw Half-Life - 3D spatial sound comparison: Stereo, CMSS-3D, DSOAL, MetaAudio HRTF - YouTube]</ref> | {{--}} Not compatible with software renderer.<ref>[https://www.youtube.com/watch?v=puSijPco_bw Half-Life - 3D spatial sound comparison: Stereo, CMSS-3D, DSOAL, MetaAudio HRTF - YouTube]</ref> | ||
| − | {{--}} Must use | + | {{--}} Must use [[Glossary:Command line arguments|{{code|-insecure}}]]. Do not use on VAC secured server. |
====Higher definition models==== | ====Higher definition models==== | ||
| Line 504: | Line 507: | ||
{{ii}} Enabling developer mode will allow use of in-game cheats and various console commands. | {{ii}} Enabling developer mode will allow use of in-game cheats and various console commands. | ||
| − | {{Fixbox|description=Use the | + | {{Fixbox|description=Use the {{code|developer 1}} in console|ref={{cn|date=October 2016}}|fix= |
'''Notes''' | '''Notes''' | ||
{{ii}} The developer console can be opened by pressing {{key|~}}. You may have to turn it on in the in-game settings first. | {{ii}} The developer console can be opened by pressing {{key|~}}. You may have to turn it on in the in-game settings first. | ||
| − | {{ii}} You can use the console command | + | {{ii}} You can use the console command {{code|sv_cheats 1}} to allow the usage of console commands such as {{code|god}} and {{code|noclip}}. |
{{ii}} You might have to reload a save-game after enabling cheat-mode for certain commands to work. | {{ii}} You might have to reload a save-game after enabling cheat-mode for certain commands to work. | ||
}} | }} | ||
Revision as of 16:54, 9 January 2019
 |
|
| Developers | |
|---|---|
| Valve Corporation | |
| Publishers | |
| Sierra Entertainment | |
| Valve Corporation | |
| Engines | |
| GoldSrc | |
| Release dates | |
| Windows | November 19, 1998 |
| macOS (OS X) | January 25, 2013 |
| Linux | January 25, 2013 |
Warnings
- The macOS (OS X) version of this game does not work on macOS Catalina (version 10.15) or later due to the removal of support for 32-bit-only apps.
| ⤏ Go to series page | |
| Half-Life mods and fangames (series) | |
| Half-Life | 1998 |
| Half-Life: Opposing Force | 1999 |
| Half-Life: Blue Shift | 2001 |
| Codename: Gordon | 2004 |
| Half-Life: Source | 2004 |
| Half-Life 2 | 2004 |
| Half-Life 2: Deathmatch | 2004 |
| Half-Life 2: Lost Coast | 2005 |
| Half-Life Deathmatch: Source | 2006 |
| Half-Life 2: Episode One | 2006 |
| Half-Life 2: Episode Two | 2007 |
| Portal (series) | |
| Half-Life: Decay (unofficial port) | 2008 |
| Half-Life: Alyx | 2020 |
This page is for the original game. For the Source engine port, see Half-Life: Source. For the unofficial remake, see Black Mesa.
General information
- Unofficial Half-Life Wiki
- GitHub Issue Tracker for Half-Life and other GoldSrc-based games
- Steam Community Discussions
Availability
| Source | DRM | Notes | Keys | OS |
|---|---|---|---|---|
| Retail | Disc only needed to play CD music, and in previous versions; authenticate. | |||
| Steam |
- All non-Steam releases can be redeemed on Steam.
- Soundtrack is available for free here.
- Steam Edition has been updated to have full OpenGL support with texture filtering and smooth dynamic lighting.
Demos
Half-Life: Uplink
- The official public demo that includes an exclusive chapter (and a training level) with content not found in the full release. It can be downloaded here.
- The demo uses an older version of GoldSrc and may have compatibility issues with modern systems. For full compatibility, the SteamLink mod reworks the demo as a Half-Life mod.
Half-Life: Day One
- A pre-release demo exclusive to OEMs. It contains the chapters from the full release up to and including "We've Got Hostiles" (5 chapters and a training level). It can be downloaded here.
- Note that the demo uses an older version of GoldSrc and may have compatibility issues with modern systems.
Version differences
- Half-Life: Game of the Year Edition comes with both the base game and Team Fortress Classic.
- Half-Life: Dreamcast is an unreleased port of Half-Life to the Sega Dreamcast. It includes various differences from the PC release (ex. modified levels, new models, adjusted difficulty, etc.). A mod that ports the Dreamcast version as a Half-Life mod is available on Mod DB.
Essential improvements
Skip intro videos
- Steam release already skips intro videos.
{{Fixbox|description=Use the -nointro
Game data
Configuration file(s) location
| System | Location |
|---|---|
| Windows | <path-to-game>\Half-Life\valve\[Note 1] |
| macOS (OS X) | <path-to-game>/Half-Life/valve/ |
| Linux | <path-to-game>/Half-Life/valve/ |
-
*.cfgfiles store the configuration.
- This game does not follow the XDG Base Directory Specification on Linux.
Save game data location
| System | Location |
|---|---|
| Windows | <path-to-game>\Half-Life\valve\SAVE\[Note 1] |
| macOS (OS X) | <path-to-game>/Half-Life/valve/SAVE |
| Linux | <path-to-game>/Half-Life/valve/SAVE/ |
Save game cloud syncing
| System | Native | Notes |
|---|---|---|
| Steam Cloud |
Video settings
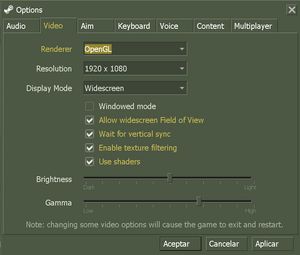
- For a list of console commands, see here.
Field of view (FOV)
- FOV adjustment may be necessary at widescreen resolutions.
| Field of view[citation needed] |
|---|
Notes
|
High frame rate
Use +developer 1 +fps_override 1 +fps_max ###[1]
|
|---|
|
OpenGL texture filtering
- By default the filtering is enabled (not in Software rendering mode).
| Disable OpenGL texture filtering[2] |
|---|
Notes
|
OpenGL overbright lighting
- Overbright lighting increases the rendering dynamic range, resulting in a primitive "bloom" effect.
- Overbright lighting normally only works on the Direct3D and software renderers.[3]
| Nvidia cards: Enable the GL extension limiter[4] |
|---|
Notes
|
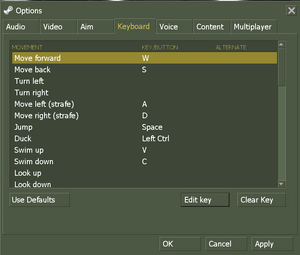
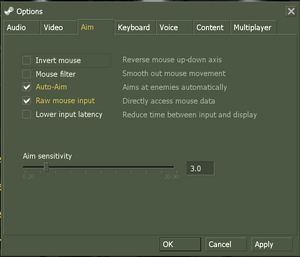
Input settings
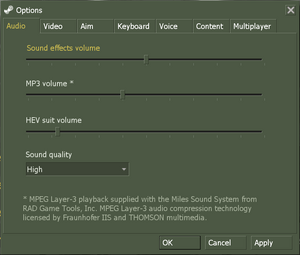
Audio settings
Localizations
| Language | UI | Audio | Sub | Notes |
|---|---|---|---|---|
| English | ||||
| French | ||||
| German | Censored (enemy soldiers replaced with robots, gore removed). Uncut on the Steam version after April 29, 2017. | |||
| Italian | ||||
| Korean | ||||
| Spanish | ||||
| Simplified Chinese | ||||
| Traditional Chinese | ||||
| Russian |
Network
- For more information, see the "Half-Life Dedicated Server" section of our GoldSrc article.
- Steam Edition actively supported via Steamworks with a small but dedicated community.
Multiplayer types
| Type | Native | Players | Notes | |
|---|---|---|---|---|
| LAN play | 32 | Versus, Co-op Use Sven Co-op for co-op (see the FAQ). |
||
| Online play | 32 | Versus, Co-op Use Sven Co-op for co-op (see the FAQ). |
||
Connection types
| Type | Native | Notes |
|---|---|---|
| Matchmaking | ||
| Peer-to-peer | ||
| Dedicated | Servers are hosted using a separate "hlds.exe," which can be downloaded with SteamCMD. | |
| Self-hosting | Only LAN, by default. Use sv_lan 0 in the main menu and, if you have port forwarding set up, others can connect with the connect "ip address" command. |
|
| Direct IP | Open the console (~) and use connect followed by the IP and port. |
Ports
| Protocol | Port(s) and/or port range(s) |
|---|---|
| UDP | 6003, 7002, 27010, 27015, 27025 |
- Universal Plug and Play (UPnP) support status is unknown.
VR support
| Headsets | State | Notes | |
|---|---|---|---|
| SteamVR | See VR. | ||
| Oculus VR (LibOVR) | See VR. | ||
| Windows Mixed Reality | See VR. | ||
| OSVR | |||
| Devices | |||
|---|---|---|---|
| Tracked motion controllers | |||
| Traditional controller | |||
| Keyboard/Mouse | |||
| Novint Falcon | The official game-specific 3D Touch Add On is required. | ||
| Play area | |||
|---|---|---|---|
| Seated | |||
| Standing | |||
| Room-scale | |||
VR
| Install Half-Life-VR Mod[5] |
|---|
|
Issues fixed
Missing Blood & Gore on Steam Version
- There is an issue with the current Steam release of Half Life, put short you can end up downloading the censored version regardless of your location.
Download this file to restore the lost gore https://www.moddb.com/downloads/hl-steam-gore-fix[citation needed]
|
|---|
Input Lag in Direct3D
- On certain graphics cards, using the D3D renderer can result in severe input lag, even with disabled VSync.
Set gl_d3dflip 1[6]
|
|---|
Missing Decals in Direct3D
Use gl_polyoffset -0.01[citation needed]
|
|---|
Color depth in the retail version
- The retail version defaults to 16-bit color depth.
Run game with -32bpp argument[citation needed]
|
|---|
Fatal Error - Available memory less than 15MB
Run the game in compatibility mode for Windows XP[citation needed]
|
|---|
Windows 7/Vista Performance Fix
- In Windows 7 or Vista, some users may experience extremely low frame rates during gameplay, even if their PC can run modern games perfectly.
| Set HL.exe to high priority[citation needed] |
|---|
|
Missing Voice and Multiplayer Tabs under Options
| Replace the liblist.gam file[7] |
|---|
|
Other information
API
| Technical specs | Supported | Notes |
|---|---|---|
| Direct3D | 7 | Lost with Linux update.[8] |
| OpenGL | 2.1 | 3DFX MiniGL included in retail version. |
| Software renderer |
| Executable | 32-bit | 64-bit | Notes |
|---|---|---|---|
| Windows | |||
| macOS (OS X) | |||
| Linux |
Middleware
| Middleware | Notes | |
|---|---|---|
| Audio | Miles Sound System | |
| Multiplayer | World Opponent Network, Steamworks | WON for retail, Steamworks for Steam. WON has been shut down on July 31, 2004; fans have since recreated the network as WON2.[9] |
Mods
Xash3D
- Xash3D is a custom GoldSrc build made to overcome the limit of the GoldSrc engine and fix compatibility issues on modern systems.
- It also brings back features that were removed from the recent update for Half Life through alternative means such as using OpenAL Soft for the 3D sound and include options fit for modern systems, including HUD scaling.
- Some modifications for the original game may not work unless required files are converted to support it.
MetaAudio
- Alternative audio pipeline for GoldSrc. Re-implements 3D audio without replacing entire rendering pipeline. Combines A3D’s HRTF and Occlusion with EAX’s reverb.[10]
- Not compatible with software renderer.[11]
- Must use
-insecure. Do not use on VAC secured server.
Higher definition models
- The High Definition Pack replaces most weapon and player/enemy models with higher polygon versions. For other options follow this guide.
- The option to enable the pack in-game is in the options menu, and the game must be restarted for it to take effect.
- The effect changes the art style dramatically, and whether or not it's desirable is up to personal preference.
Restoring Original Menu
- Half-Life's main menu was changed with the game's transition from the WON (World Opponent Network) system to Steam. This mod restores the look of the original menus and adds the PlayStation 2 version of the menu music. An alternate GameBanana download link can be found here.
- Menus are 4:3 by default and cannot be stretched to fullscreen. In-game is untouched.
Crosshair
- See Half-Life Crosshair Changer to customize the crosshairs.
Enabling developer mode
- Enabling developer mode will allow use of in-game cheats and various console commands.
Use the developer 1 in console[citation needed]
|
|---|
|
Notes
|
Console commands
- Games running on the GoldSrc engine can utilize GoldSrc Engine Console Commands for various tasks.
- The console is enabled by default in GoldSrc games, press ~ to open it.
System requirements
| Windows | ||
|---|---|---|
| Minimum | Recommended | |
| Operating system (OS) | 95 | 98, NT |
| Processor (CPU) | Intel Pentium 133 MHz | Intel Pentium 166 MHz |
| System memory (RAM) | 24 MB | 32 MB |
| Hard disk drive (HDD) | 400 MB | |
| Video card (GPU) | SVGA, high color (16-bit) | |
| Sound (audio device) | Windows-compatible sound card | |
| macOS (OS X) | ||
|---|---|---|
| Minimum | ||
| Operating system (OS) | 10.6.3 | |
| Processor (CPU) | Intel Core 2 Duo | |
| System memory (RAM) | 1 GB | |
| Hard disk drive (HDD) | 4 GB | |
| Video card (GPU) | Nvidia GeForce 8xxx series ATI Radeon X1600 Intel HD 3000 |
|
| Linux | ||
|---|---|---|
| Minimum | ||
| Operating system (OS) | Ubuntu 12.04 | |
| Processor (CPU) | 2.8 GHz Dual Core | |
| System memory (RAM) | 1 GB | |
| Hard disk drive (HDD) | 4 GB | |
| Video card (GPU) | Nvidia GeForce 8600/9600 GT ATI/AMD Radeon HD 2600/3600 OpenGL 2.1 compatible |
|
| Sound (audio device) | OpenAL Compatible Sound Card | |
| Other | Graphic Drivers: Nvidia 310, AMD 12.11 | |
Notes
- ↑ 1.0 1.1 When running this game without elevated privileges (Run as administrator option), write operations against a location below
%PROGRAMFILES%,%PROGRAMDATA%, or%WINDIR%might be redirected to%LOCALAPPDATA%\VirtualStoreon Windows Vista and later (more details).
References
- ↑ 1.0 1.1 How to get 144hz/fps?
- ↑ How to remove texture filtering in OpenGL
- ↑ VOGONS • View topic - Half-Life overbright compatibility
- ↑ Half-Life with OpenAL (EFX, Surround Sound, and HRTF!) : HalfLife
- ↑ Half-Life VR (goldsrc) newest release with working weapon models
- ↑ [1]
- ↑ "IF you are Missing Voice and Multiplayer Tabs under Options" Steam Users' Forum Thread (retrieved)
- ↑ Steam HL1 5.1 sound - Steam discussions forums.
- ↑ WON2 Server Network
- ↑ Half-Life w/ EAX and 3D spatial sound in MetaAudio (OpenAL Soft HRTF) - YouTube
- ↑ Half-Life - 3D spatial sound comparison: Stereo, CMSS-3D, DSOAL, MetaAudio HRTF - YouTube

