Key points
- Some users have reported the game only being able to run when installed on the C: drive.
- Performance on multi-core systems may be improved significantly by changing core affinity. See Issues fixed.
- Multiplayer and coop mode are offline. Some DLC enabled before this date remains accessible[1] [Note 1]. Some DLC enabled before this date remains accessible.
General information
- TweakGuides Far Cry 3 Tweak Guide.
- Ubisoft Forums - PC Discussion
- Ubisoft Forums - Technical Community Help
- Steam Community Discussions
Availability
- All versions require Ubisoft Connect DRM.
Version differences
- The Deluxe Edition is a complete edition containing the base game and all DLC.
Monetization
Microtransactions
DLC and expansion packs
| Name |
Notes |
|
| High Tides Pack |
Free. |
|
| The Monkey Business Pack |
Included in the Deluxe Edition. |
|
| Lost Expeditions |
Included in the Deluxe Edition. |
|
| The Warrior Pack |
Included in the Deluxe Edition. |
|
| The Predator Pack |
Included in the Deluxe Edition. |
|
| Original Soundtrack |
Included in the Deluxe Edition. |
|
Essential improvements
Skip intro videos
Disable Server Messages
- Disable Server Messages is required if you want to turn off those unpleasant reminders that the server is no longer active due to shutting down in late 2022.
Restore access to Ubisoft Connect in-game rewards
- Even though the rewards appear as claimed in the Ubisoft Connect launcher, they can't be found in the game, remained locked or aren't working correctly.
- This mod reactivates two of the rewards for single player, the Testing Unit mission and the Cannon Revolver (found in any shop, at a free price, in the newly restored "Signature Weapons" section).
Play through the Co-Op Missions, locally and offline (self-sufficiently and independent of Ubisoft's servers)
- This mod adds an "Offline Co-Op" section to the Multiplayer mode.
- This allows experiencing the Co-Op Missions alone, without the need to team-up with other players, which is very useful, since the multiplayer scene is very inactive and the Ubisoft servers mayb be shut down again and forever, at some point in time.
- It has been tested and confirmed that it allows unlocking achievements related to the Co-Op experience, through normal gameplay of the Missions.
- The game doesn't support teammate bots, so the player using this mod is left to "solo" what's usually designed to be the work of 4 players.
- No ability to play in local splitscreen, either.
Game data
Configuration file(s) location
-
GamerProfile.xml contains User profile settings.
-
InputUserActionMap.xml contains keybindings and input settings.
Save game data location
- Far Cry 3 has a maximum of 3 player profiles. Each player profile contains 1 automatic autosave, and 1 manual save that can be used to bookmark the current checkpoint.
Video
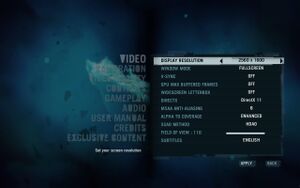
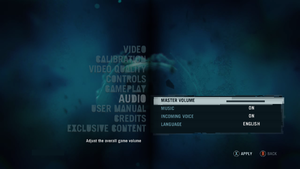
In-game general video settings.
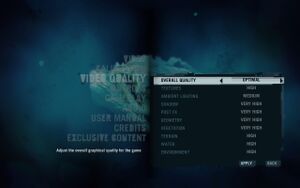
In-game advanced video settings.
Use the -RenderProfile_MaxFPS X command line argument where X is the preferred max FPS[citation needed]
|
|
Notes
- This is the best method to eliminate micro stuttering - especially with the DX11 executable.[citation needed]
- This method is better than adding the command in GamerProfile.xml because you won't have to set the properties to 'read-only', so you can change this parameter without having to lock graphics settings or gameplay settings.
- No longer works at least through Ubisoft Connect and desktop shortcut for some users[9]
|
- Custom/unlisted resolutions can be set manually in
GamerProfile.xml.
|
Edit GamerProfile.xml[citation needed]
|
- Go to the configuration file(s) location.
- Open
GamerProfile.xml with a text editor.
- Change
ResolutionX= and ResolutionY= to the desired values.
Notes
- Changing graphical settings in-game will reset
ResolutionX= and ResolutionY= to 800x600.
|
Disabling post-processing effects separately
- Depth of field, FXAA, and motion blur are all combined under the "Post FX" graphics setting.
|
Edit GamerProfile.xml[citation needed]
|
- Go to the configuration file location.
- Open
GamerProfile.xml with a text editor.
- Search (Ctrl+F) for
</CustomQuality> and paste the following to a new line after it: <Post>
<quality GameDepthOfField="0" CinematicDepthOfField="0" MotionBlur="0" FXAALevel="0" id="x" />
</Post>
- Change the "0" to "1" for each effect as desired or leave it at "0" to keep the effect disabled.
- Change the x in
<id=x> within the newly added section to the same Post FX setting set in-game, for example <id=ultrahigh>. The possible settings are low, medium, high, veryhigh and ultrahigh.
- Save the file and make it read-only.
Notes
- Making the file read-only prevents the game from saving other settings changed in-game.
|
Ambient occlusion
- Ambient occlusion can't be fully disabled through the in-game settings under DirectX 11, only switched between the different techniques available (SSAO, HBAO, HDAO).
|
Disable ambient occlusion
|
- Go to the configuration file(s) location.
- Open
GamerProfile.ini with a text editor.
- Locate
SSAOLevel="x" and change x to 0.
- Save the file and make it read only.
Notes
- Making the file read-only prevents the game from saving other settings changed in-game.
- Whenever graphical settings are changed in-game, SSAOLevel="0" is changed back to the default 1 (SSAO).
|
|
Force HBAO+ (Nvidia only)[10][11]
|
- Download and run Nvidia Profile Inspector.
- Select the Far Cry 3 profile.
- Change
Ambient Occlusion compatibility value to 0x00090000.
- Change
Ambient Occlusion setting to High Quality.
- Change
Ambient Occlusion usage to Enabled.
- Press "Apply Changes" in the top-right corner.
Notes
- In-game AO needs to be disabled.
- Using HBAO+ instead of the in-game AO options gets rid of the dark halo effect that is present around objects and characters due to the low accuracy of the native implementations.
|
|
Use Better HBAO
|
- Download Far Cry 3 Mod Installer and the mod.
- Locate the "Mod Installer" folder in the mod's archive and extract
Better HBAO.a3 to "ModifiedFilesFC3".
- Run the Mod Installer and install Better HBAO from the list of available mods.
Notes
- Makes HBAO less intrusive, reduces haloing and over-shadowing.
- Has no impact on performance.
|
Disable HDR
- Might improve performance.
- Breaks hair rendering.
|
Edit GamerProfile.xml[citation needed]
|
- Go to the configuration file(s) location.
- Open
GamerProfile.xml with a text editor.
- Find
Hdr="x" and change x to 0.
|
Input
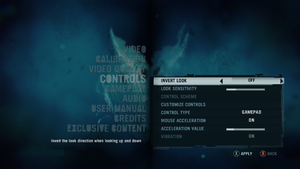
In-game general control settings.
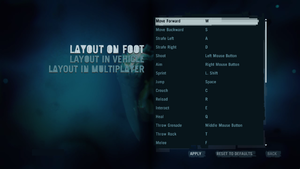
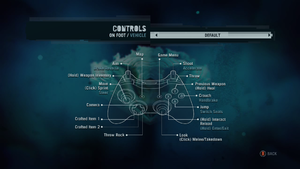
In-game key map settings.
In-game gamepad layout settings.
Bind Enter key
|
Manually bind Enter key to an action[citation needed]
|
- Go to the configuration file(s) location.
- Open
InputUserActionMap.xml with a text editor.
- Locate and replace, or append the following code:
<ActionMap name="common_use_remap">
   <MassRename MergeKey="remap">
      <Rename hexInput="0x646CA0E7:0xA79E3F0F" hexToInput="0x646CA0E7:0xEFDA7A5A" />
   </MassRename>
</ActionMap>
- The hex codes are CRC32B hashes of key names. The first half corresponds to either "kb" (0x646CA0E7) or "mouse" (0xAF35B6ED). The second half is the name of the key or button.
- To bind Keypad Enter, replace 0xA79E3F0F ("return") with 0x949D9DA2 ("numpadreturn") in the example above.
- To bind Keypad Dot/Comma, replace 0xA79E3F0F ("return") with 0x5AFDB393 ("decimal") in the example above.
|
Toggle aiming down sights (ADS) for weapons
Negative mouse acceleration
- Negative mouse acceleration prevents fast mouse movements. The mouse acceleration option in the Options menu does not fix the negative effect.
|
Follow the manual instruction[citation needed]
|
- Download the latest version of the Far Cry 3 Mod tools
- Extract the file
- Go into
<path-to-game>\data_win32
- Right click on
Common.fat and select Open with.
- Select browse, then go into the "bin" folder you just extracted and select
Gibbed.Dunia2.Unpack.EXE.
- If there's no folder, wait a few seconds. The program is only finished once it exits, and it does not indicate it has not finished extracting.
- Open the newly created Common_Unpack folder and go into the actionmaps folder.
- Open
Inputactionmapcommon.xml with a text editor.
- Find and replace all instances of
maxOutput="10" with maxOutput="999".
- Save the file.
- Go back to Data_win32 folder.
- Now open another Window and head over to the bin folder.
- Drag the common_Unpack folder and place it onto
Gibbed.Dunia2.Pack.EXE.
- Delete
Common.dat and Common.fat.
- Rename
Common_Unpack.dat and Common_Unpack.fat to Common.dat and Common.fat respectively.
|
Custom mouse sensitivity
- The sensitivity slider might be too high, even in the lowest setting (specially on high-DPI mice).
|
Edit GamerProfile.xml
|
- Go to the configuration file(s) location.
- Open
GamerProfile.xml with a text editor.
- Change
Sensitivity="X.X" inside ProfileSpecificGameProfile with your desired value.
|
Audio
| Audio feature |
State |
Notes |
| Separate volume controls |
|
|
| Surround sound |
|
Up to 5.1 output[14][15] |
| Subtitles |
|
Under video settings. |
| Closed captions |
|
|
| Mute on focus lost |
|
|
| Royalty free audio |
|
|
Localizations
| Language |
UI |
Audio |
Sub |
Notes |
| English |
|
|
|
|
| Simplified Chinese |
|
|
|
|
| Traditional Chinese |
|
|
|
|
| Czech |
|
|
|
|
| Danish |
|
|
|
|
| Dutch |
|
|
|
|
| French |
|
|
|
|
| German |
|
|
|
|
| Hungarian |
|
|
|
Fan translation |
| Indonesian |
|
|
|
Fan translation by IGTC Team, download. |
| Italian |
|
|
|
|
| Japanese |
|
|
|
|
| Korean |
|
|
|
|
| Norwegian |
|
|
|
|
| Polish |
|
|
|
|
| Brazilian Portuguese |
|
|
|
|
| Russian |
|
|
|
|
| Spanish |
|
|
|
|
| Swedish |
|
|
|
|
| Turkish |
|
|
|
Fan translation, Rockerdem. |
| Arabic |
|
|
|
Fan translation, Arabic Subtitles. |
Network
Multiplayer types
| Type |
Native |
Players |
Notes |
| Local play |
|
Not included despite being advertised.[16] Only available on consoles.[17] |
| LAN play |
| |
| Online play |
| 18 |
Versus, Co-op
Servers has been mysteriously put back online and this means the multiplayer services has been revived. |
Connection types
Ports
| Protocol |
Port(s) and/or port range(s) |
| TCP |
80, 443, 13000, 13005, 13200 |
| UDP |
9000-9005, 21800-21845 |
- Universal Plug and Play (UPnP) support status is unknown.
VR support
Issues unresolved
Crash after first cutscene and random crashing
- Crashes can randomly happen in all parts of the game.[18]
- Crashes are more frequent after first -unskippable- cutscene.[19]
|
Switch to DirectX 9[20]
|
|
Changing from DirectX 11 to 9 in the video settings may solve this problem.
|
|
Disable any sort of forced AA[20]
|
|
Nvidia GeForce 500-series cards[21]
|
|
Raising your GPU Core Voltage by 25/50 mV may fix crashes. For step-by-step instructions see reference
|
Textures and artifacting
Artifact blocks appear on screen.
Escaping to the menu and returning and geometry has failed to load correctly.
Stretched, hollow blocks of the ground appearing randomly. Sometimes fixed by changing to DirectX 9 or going offline in Uplay.
Low GPU and CPU usage (~60%)
|
Enable D3D11MultithreadedRendering[22]
|
- Go to the configuration file(s) location.
- Open
GamerProfile.xml with a text editor.
- Find
D3D11MultithreadedRendering="0" and change 0 to 1.
|
- Note: This causes crash issues with the Uplay version of the game (not recommended.) Also the Ubisoft forums admit it's broken. [citation needed]
|
Inject DXVK
|
- Injecting DXVK to use the Vulkan API seems to improve the multithreading performance of the renderer.
- Some AMD/NVIDIA driver profile settings (Like AO or AA) won't work while in Vulkan.
- Some alpha effects might seem corrupted (for example waterfalls). This can be fixed by disabling in-game MSAA.
|
Very low FPS in pre-rendered cutscenes
|
Lower your resolution to 800x600 and/or set Post FX to medium or low
|
- The game should start to work normally after the first unskippable cutscenes (the last one is after escape). You can press ESC to go to main menu to change details.
|
Game crashes with MSVCR100.dll on Windows 10
|
Change renderer to DX9[23]
|
- Happens also on DX9 with some demanding mods like Mud's Mod.
|
Shadows flicker while moving camera
- There are many places in the game, where shadows flicker while moving the camera. Mostly observed on the grass and vegetation.[24][25][26]
- Changing settings or API doesn't seem to affect the issue
Issues fixed
Change UI language
- For some reason Far Cry 3 will sometimes have a (poorly) translated interface.
Microstutter
- These forms of V-Sync can reduce micro-stuttering.[27][28]
- Capping the framerate in RTSS or Nvidia Inspector can cause a visual bug that makes NPCs shake/twitch randomly to happen more frequently. Use the in-game v-sync option to cap your framerate instead as a workaround.
|
Adaptive and dynamic V-sync[citation needed]
|
- For Nvidia cards, Adaptive V-Sync can be enabled through the driver control panel. Set 'Vertical sync' to Adaptive.
- For Nvidia cards and G-Sync monitors, a 60 fps cap in Nvidia Inspector or RTSS will greatly reduce micro-stuttering (if not all of it), only as long as the framerate doesn't drop below 60. GPU Max Buffer Frames set to anything but Off can also help.
- For AMD cards, Dynamic V-Sync can be enabled using the third-party program RadeonPro. Click the Add new profile icon and find the Far Cry 3 executable (farcry3_d3d11.exe or farcry3.exe). Click the newly created profile and click the Tweaks tab. Set 'VSync Control' to Always on. Enable 'Dynamic Framerate Control' and set 'Keep up to' to 60.
|
|
CPU Affinity in Windows 8.1[citation needed]
|
- For Windows 8.1 users, toggle off the core with max usage in the CPU affinity settings. For Core i7 CPUs, toggle the hijacking core and its corresponding logical thread.
|
Frame drops and Graphical Issues
- The Built-in Anti-aliasing causes Frame drops and Graphical Issues.
|
Opting for an external Anti-aliasing method[citation needed]
|
- Disable the in-game Anti-aliasing option.
- Open Nvidia Control Panel or AMD Radeon Settings.
- Enable the desired Anti-aliasing method from the Graphics Card's application.
- Save configuration.
|
|
Rename renderer libraries[29][30]
|
- Rename FC3_d3d11.dll to FC3.dll and FC3.dll to FC3_d3d11.dll in bin folder
- Set your renderer in options to DX11
- The game will launch in DX9 but will have all in game graphic options open. In the cost of some graphical downgrade, it may result in much better performance (especially on weak CPUs and AMD GPUs).
- After long times of gameplay, it can lead to some glitches (none of a save affecting).
|
|
Use Low spec patch
|
- It uses edited game files to decrease draw distance to increase stability of FPS on old CPUs or for players with high refresh rates
- Can be used online with current 1.05 player base
|
Low FPS on modern multi-core CPUs
|
Set CPU affinity[citation needed]
|
- set 4 core affinity, see Affinity Settings
Notes
- You can install a program such as Process Lasso to make the affinity permanent per application.
|
|
Alternative fix[31]
|
- May cause significant issues and instability. Experiment to your liking.
- Go to the configuration file(s) location.
- Set
D3D11MultithreadedRendering from 0 to 1.
|
Multi-GPU crash
- If your game freezes and crashes when entering a saved game, you must disable the Post FX option.
|
Lowering the Post FX option[citation needed]
|
- Enter the game and enter the Options menu.
- Enter the Video Quality menu.
- Set the graphics quality to
Custom
- Set all parameters to your personal preference.
- Set the Post FX options to
Low
|
Game stuck on splash screen
- Game splash screen pops up on desktop and freezes, doing nothing until the process is ended.
|
Edit GamerProfile.xml[citation needed]
|
- Go to the configuration file(s) location.
- Open
GamerProfile.xml with a text editor.
- Find
VSync="x" and change x to 0
Notes
- If this does not work, delete
%USERPROFILE%\Documents\My Games\Far Cry 3\GamerProfile.xml
|
Game stuck on first skill tree
|
Select the takedown skill by double-clicking on it, then select another skill[32]
|
Parachute will not open
The game reports the wrong button for opening a parachute when jumping with a wing-suit. There seems to be a link between the Crouch and Switch seat keybindings. Make sure that these actions are bound to the same key.[33]
Multiplayer weapons will not level up
- Weapons earn EXP and level up during matches, but do no retain EXP post-game; weapons stay at level 1 indefinitely.
|
Copy the save file to alternate path[citation needed]
|
- Copy folder
46 from: C:\Program Files (x86)\Ubisoft\Ubisoft Game Launcher\savegames\0c7ddfbe-d92d-4270-8cf9-3493a81f0c2d\
- Go to
%PROGRAMDATA%\ and make a folder called Orbit (if it does not already exist).
- Make sure
Orbit is set to hidden (right-click, Properties, Hidden).
- Paste folder
46 into Orbit.
|
Installation issues
When using a C:\ drive with limited space such as an SSD, the game will not install onto a secondary drive even if you have sufficient free space.
|
Copy temporary files[citation needed]
|
- Go to the temporary files
%temp%
- Find the Far Cry 3 install folder
- Copy these folder to your secondary drive, then start the setup process
|
|
Change temp folders location to different drive[citation needed]
|
- Prepare new folder for temp files in different drive.
- Right click on top of start button and select System
- From left column open Advanced system settings
- From Advanced tab click Environment Variables button.
- In user variable list, change both
TEMP and TMP to newly created folder.
- Save changes and restart computer.
Notes
- To access enviroment variables more quickly, simply search for Enviroment variables with Windows search.
|
First loading screen stalls or takes excessive amounts of time
|
Kill WmiPrvSE.exe[citation needed]
|
- Open the game
- Once the loading screen comes up, press Ctrl+Alt+Delete to open the Task Manager.
- Click processes and make sure "show all processes" is selected at the bottom of the screen.
- Find
WmiPrvSE.exe, right click it, end procress.
- The loading screen should end shortly afterwards.
|
Crash when installed in a Windows 8 Storage Space
The Game will refuse to run when installed on a drive which is managed by a Windows 8/8.1 Storage Space.
|
Installing the game on a drive that is not a Storage Space will fix this issue[citation needed]
|
NPC shaking/vibrate animation bug
- Limiting the game to 60fps with both in-game vsync and external tools like Rivaturner causes the game to have shaky NPC animations
|
Limit fps to lower or higher than 60fps[citation needed]
|
|
If you limit fps with vsync use any refresh rate other than 60hz so that the game is not limited to 60fps[citation needed]
|
Game crashes on Windows 10
The game tends to crash after about 20 minutes of playing on Windows 10 devices
|
Edit registry[20]
|
|
Exit all Windows based programs.
Click Start, type regedit in the Search box, and then double-click regedit.exe from the results above. If you are prompted for an administrator password or confirmation,
type the password or provide confirmation.
Browse to and then click the following registry subkey:
HKEY_LOCAL_MACHINE \ SYSTEM \ CurrentControlSet \ Control \ GraphicsDrivers
On the Edit menu, click New, and then select the following registry value from the drop-down menu specific to your version of Windows (32 bit, or 64 bit):
- For 32 bit Windows
- Select DWORD (32-bit) value.
- Type TdrDelay as the Name and click Enter.
- Double-click TdrDelay and add 8 for the Value data and click OK.
- For 64 bit Windows
- Select QWORD (64-bit) value.
- Type TdrDelay as the Name and click Enter.
- Double-click TdrDelay and add 8 for the Value data and click OK.
Close the registry editor and then restart your computer for the changes to take effect.
|
|
Disable TabletInputService in Task Manager[20]
|
- Press Ctrl+⇧ Shift+Esc to open the Task Manager.
- Click on Services.
- Find
TabletInputService (Touch Keyboard and Handwriting Panel Service).
- Stop the service.
Update: be aware that in a Windows 10 update, Microsoft has "patched" this "issue" and now the disabling of TabletInputService is much more difficult as without the steps below the service will start even if set to Disabled.
- Launch regedit and navigate to
HKEY_LOCAL_MACHINE\SYSTEM\CurrentControlSet\Services\TabletInputService
- Set the Start DWORD value to 4
- Change the Owner to the local Administrators group, check Replace owner on sub containers and objects and click Apply and OK, OK
- Right-click the TabletInputService key again, select Permissions… and then click Advanced
- Click Disable inheritance and then select Convert inherited permissions into explicit permissions on this object
- Change all permissions to Read Only and then click Apply, OK, OK
- Restart and confirm the Touch Keyboard and Handwriting Panel Service a.k.a.
TabletInputService is disabled and not running
I have done the steps and indeed the service figures as Stopped upon restart.
source of fix: https://learn.microsoft.com/en-us/answers/questions/1321908/not-possible-to-disable-the-service-tabletinputser
|
|
Additional solution[citation needed]
|
|
Launch the game in Win8 or Win7 compatibility mode.
|
|
Last possible Step[citation needed]
|
|
The last possible step is to copy the game to your C: Drive.
|
Resolution issues before launching
|
Create GamerProfile.xml[citation needed]
|
- Go to
%USERPROFILE%\Documents\My Games\Far Cry 3\
2. Create a GamerProfile.xml and insert this into it: <GamerProfile>
<SoundProfile
MusicEnabled="1"
MasterVolume="100"
MicEnabled="1"
IncomingVoiceEnabled="1"
Language="english"
/>
<RenderProfile
MSAALevel="2"
AlphaToCoverage="2"
SSAOLevel="6"
SDSM="0"
ResolutionX="1280"
ResolutionY="720"
Quality="custom"
QualityEditor="editor_pc"
Fullscreen="0"
Borderless="0"
seD3D11="1"
D3D11MultithreadedRendering="1"
WidescreenLetterbox="0"
UseWidescreenFOV="1"
OVScaleFactor="1.0275"
EnableSubResolution="0"
SubResolutionX="960"
ubResolutionY="540"
VSync="0"
RefreshRate="0"
DisableMip0Loading="0"
GPUMaxBufferedFrames="2"
ShowFPS="1"
Brightness="1"
Contrast="1"
GammaRamp="1"
AllowAsynchShaderLoading="1">
<CustomQuality>
<quality
ResolutionX="1280"
ResolutionY="720"
EnvironmentQuality="low"
AntiPortalQuality="default"
PortalQuality="low"
PostFxQuality="false"
TextureQuality="low"
TextureResolutionQuality="low"
WaterQuality="low"
DepthPassQuality="low"
VegetationQuality="low"
TerrainQuality="low"
GeometryQuality="low"
AmbientQuality="low"
DeferredAmbientQuality="low"
ShadowQuality="low"
EditorQuality=""
Hdr="1"
HdrFP32="0"
ReflectionHdr="1"
EnableVertexBinding="1"
id="custom"
/>
</CustomQuality>
</RenderProfile>
<NetworkProfile
VoiceChatEnabled="1"
CustomMapMaxUploadRateInBitsOnline="10240000"
OnlineEnginePort="9000"
OnlineServicePort="9001"
FileTransferHostPort="9002"
FileTransferClientPort="9003"
LanHostBroadcastPort="9004"
LanClientBroadcastPort="9005"
ScanFreePorts="1"
ScanPortRange="1000"
ScanPortStart="9000"
SessionProvider=""
MaxUploadInbpsOnline="10240000">
<Accounts />
</NetworkProfile>
<GameProfile
Hour = "16"
Minutes = "40"
Seconds = "0"
TimeScale = "1"
WindForce = "80"
WindDir = "0"
DelayShadowMovement = "180"
IgnorePlayer = "0"
GatherEntitiesForMap = "0"
ShowAIInMap = "0"
ShowDiamondsInMap = "0"
DifficultyLevel = "1"
Machete = "0"
UseAimingHelpers = "0"
HelpCrosshair = "1"
/>
<ProfileSpecificGameProfile
Sensitivity="1"
Invert_x="0"
Invert_y="0"
DefaultFlickFireDirection_y="0"
UseMouseSmooth="1"
Smoothness="0.2"
Smoothness_Ironsight="0.2"
HelpCrosshair="1"
Gamepad_vibration="1"
UseRoadSignHilight="1"
UseSubtitles="1"
TaggingEnabled="0"
UseAmbx="0"
UseGamePad="1"
GamepadAnswered="1"
Autosave="1"
Machete="0"
IronsightToggleMode="0">
<FireConfig
QualitySetting="Low"
/>
</ProfileSpecificGameProfile>
<RealTreeProfile
Quality="Low"
/>
<EngineProfile>
<PhysicConfig
QualitySetting="Low"
/>
<QcConfig
GatherFPS="1"
GatherAICnt="1"
GatherDialogs="0"
IsQcTester="0"
/>
<InputConfig />
<ZoneConfig />
</EngineProfile>
<UplayProfile
LockString=""
/>
</GamerProfile>
|
Crashes on launch on Windows 10 Boot Camp
The Game may refuse to start up when run on Windows 10 via Boot Camp.
|
Run in compatibility mode[34]
|
- Enable Compatibility with "Windows 98/ Windows Me" and "Run as administrator" in the properties of
farcry3.exe
|
Low performance when moving camera
Lower your mouse poll rate e.g. from 1000hz to 500hz. Please check your mouse settings for more info.
Coop/multiplayer issues
|
Follow each step until you are connected (if you can connect to Ubisoft services)[35]
|
- You may not be able to connect to Ubisoft services in the game using some internet providers. Use VPN to compare[Note 3], you might need to change your provider, as VPN can introduce too big pings and lagging
- Try to join your friend via friends options in Ubisoft Connect instead of dedicated game option of invitation[36]
- Try to ask a friend to be a host or vice versa
- Make sure you have only your internet network adapter enabled and all others are disabled
- Try to join public lobby instead of a private one[37]
- Disable Avast Premier Security's firewall in its options,[38] so Windows Defender's firewall will be used
- Check whether inbound rules for farcry3.exe and farcry3_d3d11.exe are set to "Allow the connection" in Windows Defender firewall[39]
- Make sure you didn't run your game directly from game executable in the bin folder of the game, otherwise game invitations in Ubisoft Connect may not show up
- From now on, the solution will rely on using Radmin VPN (not necessary in all cases and can be even harmful at times)
- join the same network, and after that - repeat all the steps above
At least private matches should work now (also public ones in some cases)[40]. Although, be aware that since it's P2P connection, all players trying to connect each other, cannot be behind NAT (e.g. turning on UPnP on your router advised), otherwise, you won't join such lobby, or anyone join you.
- Unlike in public lobby, two people to start a private coop lobby is enough.
- Players can encounter game-breaking bugs in the coop: 1) when no one can collect bombs on quads (lobby restart required) 2) When there is no correct objective on minimap after you fall from the waterfall (players need to commit suicide, and correct objective appears) 3) You can fall under map going too far from main road during escorting the truck in Rush Hour mission.
- Since people started to commonly use downgraders, it started to frequently happen that everybody are kicked in public full lobby multiplayer session. It's safer to host private sessions from now on, but it will prevent you from gathering XP.
- If you install Radmin, it always runs its network adapter in the background, even if you're not connected to any server. Whenever you disable the adapter, it enables itself till you disable Radmin service in Services in the Services. It can be a case, when Radmin or any other adapter than your current internet connection, can prevent you from joining into lobby.
|
|
Downgrading Steam versions from 1.06 to 1.05
|
- Might not work giving "Host migration in progress" after 1 minute
- Necessary step to bring back multiplayer functionality since the current 1.06 Steam version deleted it completely
- Download and replace these files in your bin folder (for your safety, you can try out without the attached files listed with 1 or 2/62 positives[41])
- If it doesn't work, reinstall the game and repeat the step above
- Copy these files to potentially fix kicking from sessions
- There is an official way to downgrade on Steam. It might be more reliable than above (app id: 220241, possible manifest: 5441742905267980403 - from before 2018 1.06 update)
- If the game still kicks you from matches, install Ubisoft Connect version instead (the game on Ubisoft Connect will redirect you to Steam anyway, if the game was bought on Steam, so you'll need to buy your game again, but on Ubisoft Connect)
|
Other information
API
| Technical specs |
Supported |
Notes |
| Direct3D |
9.0c, 11 |
|
| Shader Model support |
3, 5 |
|
| Executable |
32-bit |
64-bit |
Notes |
| Windows |
|
|
|
Middleware
Mods
- Adds unused and E3 content, multiple QoLs (such as FOV modifier and removing startup videos), improvements over vanilla game and much more.
- Every change in the mod is optional and can be chosen individually.
- Requires the Far Cry Mod Installer.
- Restores fake skin self shading effect seen in the demo version of the game.
- HD textures pack. Reflective mud and puddles cover the island and shimmer in the game engine’s lighting system. Characters have been re-coded to have sweaty skin. Jason's hands and arms are hyperrealistic. Grass and many other world textures have been updated in high resolution.
- Quadruples the size of the game's texture files through various upscaling methods.
System requirements
| Windows |
|
Minimum |
Recommended |
| Operating system (OS) |
XP SP3 |
Vista SP2, 7 SP1, 8 |
| Processor (CPU) |
Intel Core 2 Duo E6700 2.6 GHz
AMD Athlon 64 X2 6000+ 3.0 GHz |
Intel Core i3-530 2.9 GHz
AMD Phenom II X2 565 3.1 GHz |
| System memory (RAM) |
2 GB (XP)
4 GB (all others) | |
| Hard disk drive (HDD) |
15 GB | |
| Video card (GPU) |
Nvidia GeForce 8800 GTX
ATI Radeon HD 2900
512 MB of VRAM
DirectX 9.0c compatible
Shader model 3.0 support |
Nvidia GeForce GTX 480
ATI Radeon HD 5770
1 GB of VRAM
DirectX 11 compatible
Shader model 5 support |
| Sound (audio device) |
DirectX compatible |
Surround Sound 5.1 capable |
Notes
- ↑ Online services were brought back on July 15, 2023 for undisclosed period, but they got shortly shut down again on January 30, 2024 and later brought back day later, then were shutdown again on March 7, 2024.[2]
- ↑ 2.0 2.1 Notes regarding Steam Play (Linux) data:
- ↑ To verify connection to the online services without opening the game, open CMD and write:
tracert public-ubiservices.ubi.com
and later:
tracert static3.cdn.ubi.com.
Wait a moment - few first hops might be not listed. If tracert stops listing addresses, giving only your local gateway address, and it doesn't occur using VPN or other provider, you'll need to change it or report the issue to the provider or Ubi (although they might refuse to support the game, as officially, online services should be closed by now)
References


