Difference between revisions of "DiRT 3"
m (moved video mods to Video section) |
Brigandier (talk | contribs) (→Audio) |
||
| (30 intermediate revisions by 13 users not shown) | |||
| Line 35: | Line 35: | ||
|lutris = dirt-3-complete-edition | |lutris = dirt-3-complete-edition | ||
|strategywiki = DiRT 3 | |strategywiki = DiRT 3 | ||
| − | |mobygames = | + | |mobygames = 52121 |
|wikipedia = Dirt 3 | |wikipedia = Dirt 3 | ||
|winehq = 13122 | |winehq = 13122 | ||
| Line 42: | Line 42: | ||
{{Introduction | {{Introduction | ||
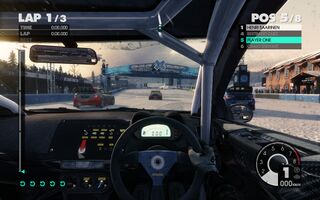
| − | |introduction = | + | |introduction = '''''{{PAGENAME}}''''' is a {{Glossary:singleplayer}} and {{Glossary:multiplayer}} {{Glossary:racing}} game developed and published by [[Company:Codemasters|Codemasters]]. It is part of the ''[[Series:Colin McRae Rally|Colin McRae Rally]]'' series and the first game in the series to drop the Colin McRae naming. Just like ''[[Colin McRae: DiRT 2|DiRT 2]]'', it include a benchmark mode. |
| − | |release history = | + | |
| − | |current state = | + | |release history = The game was released on May 24, 2011. The ''Complete Edition'' release, which includes all of the DLC, was released on March 9, 2012 in European countries and on March 20 in North America. The MacOS version of the ''Complete Edition'' of the game, ported and published by [[Company:Feral Interactive|Feral Interactive]], was released on January 29, 2015. |
| + | |||
| + | On Steam, the ''Complete Edition'' was treated as a separate game from the original release (Which is noted to have [[Games for Windows - LIVE]] DRM), and owners who owns the original release on Steam had received the ''Complete Edition'' for free. | ||
| + | |||
| + | |current state = Both the original game and the ''Complete Edition'' were delisted from all storefronts on December 31, 2016. | ||
}} | }} | ||
| − | |||
| − | |||
| − | |||
| − | |||
| − | |||
'''General information''' | '''General information''' | ||
| Line 59: | Line 58: | ||
{{Availability| | {{Availability| | ||
{{Availability/row| Retail | | GFWL, activation | {{DRM|SecuROM PA||SecuROM|8}}. | Steam | Windows }} | {{Availability/row| Retail | | GFWL, activation | {{DRM|SecuROM PA||SecuROM|8}}. | Steam | Windows }} | ||
| + | {{Availability/row| Games for Windows Marketplace | GFWL | GFWL | <ref>{{Refurl|url=https://web.archive.org/web/20110619202057/http://www.gamesforwindows.com:80/en-US/Games/dirt-3/|title=dirt-3 - Games For Windows|date=2022-11-16}}</ref> | | Windows | unavailable }} | ||
{{Availability/row| MacApp | id910949621 | MacApp | Complete Edition. Does not support online multiplayer.<ref name="Mac App Store">[https://www.feralinteractive.com/en/news/453/ Released! DiRT™ 3® Complete Edition pulls its best stunt yet. | Feral News]</ref> | | OS X | unavailable }} | {{Availability/row| MacApp | id910949621 | MacApp | Complete Edition. Does not support online multiplayer.<ref name="Mac App Store">[https://www.feralinteractive.com/en/news/453/ Released! DiRT™ 3® Complete Edition pulls its best stunt yet. | Feral News]</ref> | | OS X | unavailable }} | ||
{{Availability/row| Steam | 44320 | Steam, GFWL | | | Windows | unavailable }} | {{Availability/row| Steam | 44320 | Steam, GFWL | | | Windows | unavailable }} | ||
| Line 64: | Line 64: | ||
}} | }} | ||
{{ii}} All non-Steam Windows versions require {{DRM|GFWL|SSA=yes|ZDPP=no|local=yes}} [[SecuROM]] activation limit unknown. A [https://support.securom.com/pop_dirt3.html revoke tool] is available. | {{ii}} All non-Steam Windows versions require {{DRM|GFWL|SSA=yes|ZDPP=no|local=yes}} [[SecuROM]] activation limit unknown. A [https://support.securom.com/pop_dirt3.html revoke tool] is available. | ||
| − | {{ii}} Retail product keys activate on [[Steam]].<ref> | + | {{ii}} Retail product keys activate on [[Steam]].<ref>{{Refurl|url=https://steamcommunity.com/app/321040/discussions/0/611702631209231799/|title=DiRT 3 Complete Edition Available Now [Free upgrade for existing DiRT 3 owners] :: DiRT 3 Complete Edition General Discussions|date=9 June 2023}}</ref> |
==Essential improvements== | ==Essential improvements== | ||
| Line 136: | Line 136: | ||
|antialiasing = true | |antialiasing = true | ||
|antialiasing notes = 2x-8x [[MSAA]], 8x-16x [[CSAA]], and 8x [[QCSAA]]. | |antialiasing notes = 2x-8x [[MSAA]], 8x-16x [[CSAA]], and 8x [[QCSAA]]. | ||
| + | |upscaling = unknown | ||
| + | |upscaling tech = | ||
| + | |upscaling notes = | ||
|vsync = true | |vsync = true | ||
|vsync notes = | |vsync notes = | ||
| Line 183: | Line 186: | ||
</gallery> | </gallery> | ||
| − | ===Disable | + | ===Disable and replace post-processing filter=== |
| − | + | {{ii}} The game has a controversial post-processing filter which can only be disabled by deleting a file in the game's installation folder. Without the filter, the game looks even less vibrant than it did prior, but as the original filter is disabled, it can now be replaced entirely. | |
| − | + | # Copy the following text and paste it into a new file named <code>Dirt3_HFX.ini</code> (click "Expand" on the right to show the text): | |
| − | === | + | <div class="mw-collapsible mw-collapsed"> |
| − | + | <pre>PreprocessorDefinitions= | |
| − | + | Techniques=AmbientLight@AmbientLight.fx,DPX@DPX.fx,HDR@FakeHDR.fx,LiftGammaGain@LiftGammaGain.fx,Curves@Curves.fx,Tonemap@Tonemap.fx | |
| − | + | TechniqueSorting=AmbientLight@AmbientLight.fx,DPX@DPX.fx,HDR@FakeHDR.fx,LiftGammaGain@LiftGammaGain.fx,Curves@Curves.fx,AdaptiveFog@AdaptiveFog.fx,AdaptiveSharpen@AdaptiveSharpen.fx,AdvancedCRT@CRT.fx,After@Splitscreen.fx,ContrastAdaptiveSharpen@CAS.fx,ASCII@ASCII.fx,AspectRatioPS@AspectRatio.fx,Before@Splitscreen.fx,BloomAndLensFlares@Bloom.fx,Border@Border.fx,CA@ChromaticAberration.fx,Cartoon@Cartoon.fx,Chromakey@Chromakey.fx,ChromaticAberration@Prism.fx,CinematicDOF@CinematicDOF.fx,Clarity@Clarity.fx,ColorMatrix@ColorMatrix.fx,Colourfulness@Colourfulness.fx,Daltonize@Daltonize.fx,Deband@Deband.fx,Depth3D@Depth3D.fx,DepthHaze@DepthHaze.fx,DisplayDepth@DisplayDepth.fx,Emphasize@Emphasize.fx,EyeAdaption@EyeAdaption.fx,FilmGrain@FilmGrain.fx,FilmGrain2@FilmGrain2.fx,FilmicAnamorphSharpen@FilmicAnamorphSharpen.fx,FilmicPass@FilmicPass.fx,FXAA@FXAA.fx,GaussianBlur@GaussianBlur.fx,GlitchB@Glitch.fx,GP65CJ042DOF@DOF.fx,HighPassSharp@HighPassSharpen.fx,HQ4X@HQ4X.fx,HSLShift@HSLShift.fx,KNearestNeighbors@Denoise.fx,Layer@Layer.fx,LeiFx_Tech@3DFX.fx,Levels@Levels.fx,LevelsPlus@LevelsPlus.fx,LightDoF_AutoFocus@LightDoF.fx,LightDoF_Far@LightDoF.fx,LightDoF_Near@LightDoF.fx,LumaSharpen@LumaSharpen.fx,LUT@LUT.fx,MagicBloom@MagicBloom.fx,MagicDOF@DOF.fx,MartyMcFlyDOF@DOF.fx,MatsoDOF@DOF.fx,Mode1@FineSharp.fx,Mode2@FineSharp.fx,Mode3@FineSharp.fx,Monochrome@Monochrome.fx,MotionBlur@FakeMotionBlur.fx,MultiLUT@MultiLUT.fx,MXAO@MXAO.fx,Nightvision@NightVision.fx,NonLocalMeans@Denoise.fx,Nostalgia@Nostalgia.fx,PerfectPerspective@PerfectPerspective.fx,PPFXBloom@PPFX_Bloom.fx,PPFX_Godrays@PPFX_Godrays.fx,PPFXSSDO@PPFX_SSDO.fx,ReflectiveBumpmapping@ReflectiveBumpMapping.fx,RingDOF@DOF.fx,SMAA@SMAA.fx,StageDepth@StageDepth.fx,SurfaceBlur@SurfaceBlur.fx,Technicolor@Technicolor.fx,Technicolor2@Technicolor2.fx,TiltShift@TiltShift.fx,Tint@Sepia.fx,Tonemap@Tonemap.fx,UIDetect@UIDetect.fx,UIDetect_After@UIDetect.fx,UIDetect_Before@UIDetect.fx,UIMask_Bottom@UIMask.fx,UIMask_Top@UIMask.fx,Vibrance@Vibrance.fx,Vignette@Vignette.fx | |
| − | + | ||
| − | + | [AmbientLight.fx] | |
| − | + | alAdapt=0.700000 | |
| + | alAdaptBaseBlackLvL=2 | ||
| + | alAdaptBaseMult=1.000000 | ||
| + | alDebug=0 | ||
| + | alDirtInt=1.000000 | ||
| + | alDirtOVInt=1.000000 | ||
| + | alInt=10.150000 | ||
| + | alLensInt=2.000000 | ||
| + | alLensThresh=0.500000 | ||
| + | alThreshold=15.000000 | ||
| + | AL_Adaptation=1 | ||
| + | AL_Adaptive=2 | ||
| + | AL_Dirt=0 | ||
| + | AL_DirtTex=0 | ||
| + | AL_Dither=0 | ||
| + | AL_Lens=0 | ||
| + | AL_Vibrance=1 | ||
| + | |||
| + | [Curves.fx] | ||
| + | Contrast=0.650000 | ||
| + | Formula=4 | ||
| + | Mode=0 | ||
| + | |||
| + | [DPX.fx] | ||
| + | Colorfulness=2.500000 | ||
| + | Contrast=0.100000 | ||
| + | RGB_C=0.360000,0.360000,0.340000 | ||
| + | RGB_Curve=8.000000,8.000000,8.000000 | ||
| + | Saturation=3.000000 | ||
| + | Strength=0.200000 | ||
| + | |||
| + | [FakeHDR.fx] | ||
| + | HDRPower=1.300000 | ||
| + | radius1=0.793000 | ||
| + | radius2=0.870000 | ||
| + | |||
| + | [FXAA.fx] | ||
| + | EdgeThreshold=0.125000 | ||
| + | EdgeThresholdMin=0.000000 | ||
| + | Subpix=0.250000 | ||
| + | |||
| + | [LiftGammaGain.fx] | ||
| + | RGB_Gain=1.000000,1.000000,1.000000 | ||
| + | RGB_Gamma=1.300014,1.300014,1.300014 | ||
| + | RGB_Lift=1.000000,1.000000,1.000000 | ||
| + | |||
| + | [Tonemap.fx] | ||
| + | Bleach=0.000000 | ||
| + | Defog=0.000000 | ||
| + | Exposure=0.404000 | ||
| + | FogColor=0.000000,0.000000,1.000000 | ||
| + | Gamma=1.000000 | ||
| + | Saturation=0.000000 | ||
| + | </pre> | ||
| + | </div> | ||
| + | |||
| + | # Go to <code>{{p|game}}\postprocess</code>, and rename <code>effects.xml</code> to <code>effects.xml.bak</code>. This will backup the original post-processing filter while also preventing the game from recognizing it, thus disabling the filter. | ||
| + | # Download and run the setup for [https://reshade.me/ ReShade] | ||
| + | # In the ReShade setup, select <code>{{p|game}}\dirt3_game.exe</code> as the target executable, select <code>{{p|game}}\Dirt3_HFX.ini</code> as the preset, select DirectX 11 for the API, and select the following effects packages: | ||
| + | #* Standard Effects (should be selected by default) | ||
| + | #* SweetFX by CeeJay.dk | ||
| + | #* Legacy effects | ||
| + | # Make sure you complete the ReShade installation. | ||
| + | # Rename <code>{{p|game}}\dxgi.dll</code> to <code>{{p|game}}\d3d11.dll</code>. ReShade might not start properly otherwise. | ||
| + | # Start the game, press the Home key. You should see the effects have been applied. If you don't, select 'Dirt3_HFX.ini' as the ReShade preset file from the drop-down menu. You can configure the individual filter settings to your personal liking, as well as add more. | ||
| + | {{ii}} Before and after comparison pictures here: [https://sfx.thelazy.net/games/preset/11810/] | ||
==Input== | ==Input== | ||
| Line 199: | Line 267: | ||
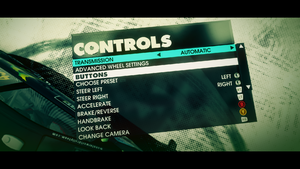
{{Image|Dirt 3 - Controller.png|Controller settings.}} | {{Image|Dirt 3 - Controller.png|Controller settings.}} | ||
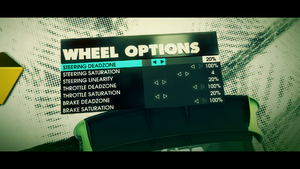
{{Image|Dirt 3 - Wheel.png|Driving wheel settings.}} | {{Image|Dirt 3 - Wheel.png|Driving wheel settings.}} | ||
| + | {{ii}} The game can send telemetry data to supported software like [https://www.simhubdash.com/ SimHub] and devices like motion platforms, bass shakers and telemetry displays through the UDP protocol, but the ''Complete Edition'' version have broken UDP support, requiring a [https://github.com/RoccoC/DiRTTelemetryErrorFix third-party fix]. Also support D-Box haptic/motion platforms through a proprietary protocol.<ref>{{refurl|url=https://catalogue.d-box.com/en/video-games/195404/|title=DiRT 3 - D-Box Catalogue|date=November 5, 2023}}</ref> Requires editing the <code>hardware_settings_config.xml</code> file to enable them. (See [[#Enable telemetry|Enable telemetry]]) | ||
{{Input | {{Input | ||
|key remap = true | |key remap = true | ||
| Line 226: | Line 295: | ||
|xbox prompts = true | |xbox prompts = true | ||
|xbox prompts notes = | |xbox prompts notes = | ||
| − | |impulse triggers = | + | |impulse triggers = hackable |
| − | |impulse triggers notes = | + | |impulse triggers notes = Use [https://github.com/araghon007/X1nput/releases X1nput] |
|dualshock 4 = true | |dualshock 4 = true | ||
|dualshock 4 notes = | |dualshock 4 notes = | ||
| Line 241: | Line 310: | ||
|tracked motion prompts notes = | |tracked motion prompts notes = | ||
|other controllers = true | |other controllers = true | ||
| − | |other controllers notes = | + | |other controllers notes = See [[#Controller support|Controller support]] for sim-racing device support. |
| − | |other button prompts = Generic | + | |other button prompts = Generic |
|other button prompts notes= | |other button prompts notes= | ||
|controller hotplug = true | |controller hotplug = true | ||
| Line 260: | Line 329: | ||
|steam cursor detection = n/a | |steam cursor detection = n/a | ||
|steam cursor detection notes = Mouse cursor is always on the screen. | |steam cursor detection notes = Mouse cursor is always on the screen. | ||
| + | }} | ||
| + | ===[[Controller|Controller support]]=== | ||
| + | {{ii}} Supported devices are based on what was found in the devicesetup.xml file. | ||
| + | {{ii}} Running game on PC set in Japanese language will rename the Logitech racing wheels to Logicool. | ||
| + | {{Standard table|Compatible steering wheels|Notes|content= | ||
| + | {{Standard table/rowalt2| '''[[Controller:Fanatec Porsche 911 Wheel|Fanatec Porsche 911 Turbo/Turbo S/Carrera/GT2/GT3 RS]]''' | }} | ||
| + | {{Standard table/rowalt2| '''[[Controller:Logitech Driving Force|Logitech Driving Force Pro]]''' | }} | ||
| + | {{Standard table/rowalt2| '''[[Controller:Logitech MOMO|Logitech MOMO]]''' | }} | ||
| + | {{Standard table/rowalt2| '''[[Controller:Logitech MOMO|Logitech MOMO Racing]]''' | }} | ||
| + | {{Standard table/rowalt2| '''[[Controller:Logitech Driving Force GT|Logitech Driving Force GT]]''' | }} | ||
| + | {{Standard table/rowalt2| '''[[Controller:Logitech G25|Logitech G25]]''' | }} | ||
| + | {{Standard table/rowalt2| '''[[Controller:Logitech G27|Logitech G27]]''' | }} | ||
| + | {{Standard table/rowalt2| '''[[Controller:Microsoft SideWinder Force Feedback Wheel|Microsoft SideWinder Force Feedback Wheel]]''' | }} | ||
| + | {{Standard table/rowalt2| '''Thrustmaster Ferrari GT Experience Steering Wheel 3-in-1''' | }} | ||
| + | {{Standard table/rowalt2| '''Thrustmaster Rally GT Force Feedback Pro''' | }} | ||
| + | {{Standard table/rowalt2| '''Thrustmaster Ferrari F430 Force Feedback''' | }} | ||
| + | {{Standard table/rowalt2| '''[[Controller:Thrustmaster T500|Thrustmaster T500]]''' | Default GT rim only.}} | ||
| + | }} | ||
| + | |||
| + | ===Enable telemetry=== | ||
| + | {{Fixbox|description=Enable telemetry|ref=<ref>{{Refcheck|user=Yuuyatails|date=November 5, 2023}}</ref>|fix= | ||
| + | # Open the <code>hardware_settings_config.xml</code> file located in {{folder|<user>\Documents\My Games\Dirt3\hardwaresettings\}} with a text editior. | ||
| + | # Search for a line of text with the word "motion enabled". | ||
| + | # Set the "motion enabled" parameter to "true" and change the "ip" and "port" fields to match that of what was set on the supported telemetry software. For example, <code><nowiki><motion enabled="true" ip="127.0.0.1" port="20777" delay="1" extradata="3" /></nowiki></code> | ||
| + | # Save the file. | ||
}} | }} | ||
| Line 276: | Line 370: | ||
|mute on focus lost notes = | |mute on focus lost notes = | ||
|eax support = | |eax support = | ||
| − | |eax support notes = | + | |eax support notes = |
| + | |royalty free audio = unknown | ||
| + | |royalty free audio notes = | ||
}} | }} | ||
| Line 303: | Line 399: | ||
|notes = | |notes = | ||
|fan = | |fan = | ||
| + | }} | ||
| + | {{L10n/switch | ||
| + | |language = Hungarian | ||
| + | |interface = hackable | ||
| + | |audio = false | ||
| + | |subtitles = false | ||
| + | |notes = Fan translation, [https://magyaritasok.hu/games/dirt-3 download]. | ||
| + | |fan = true | ||
}} | }} | ||
{{L10n/switch | {{L10n/switch | ||
| Line 310: | Line 414: | ||
|subtitles = false | |subtitles = false | ||
|notes = | |notes = | ||
| + | |fan = | ||
| + | }} | ||
| + | {{L10n/switch | ||
| + | |language = Polish | ||
| + | |interface = hackable | ||
| + | |audio = false | ||
| + | |subtitles = false | ||
| + | |notes = Fan translation, [https://www.portal24h.pl/gry/spolszczenia-gier/df/Dirt-3-1340/ Download]. | ||
| + | |fan = true | ||
| + | }} | ||
| + | {{L10n/switch | ||
| + | |language = Russian | ||
| + | |interface = true | ||
| + | |audio = false | ||
| + | |subtitles = false | ||
| + | |notes = Russian retail release only.<ref>{{Refurl|url=https://www.zoneofgames.ru/games/dirt_3/|title=DiRT 3 - Игровой архив|date=2022-12-27}}</ref> | ||
|fan = | |fan = | ||
}} | }} | ||
| Line 319: | Line 439: | ||
|notes = | |notes = | ||
|fan = | |fan = | ||
| + | }} | ||
| + | {{L10n/switch | ||
| + | |language = Brazilian Portuguese | ||
| + | |interface = hackable | ||
| + | |audio = false | ||
| + | |subtitles = false | ||
| + | |notes = Fan translation, [https://tribogamer.com/traducoes/301_traducao-do-dirt-3-complete-edition-para-portugues-do-brasil.html Tribo Gamer] | ||
| + | |fan = true | ||
}} | }} | ||
}} | }} | ||
| Line 341: | Line 469: | ||
==Network== | ==Network== | ||
{{ii}} The [[Games for Windows - LIVE]] version requires a [https://live.xbox.com/Account/Signin Microsoft account] for online play (optional for offline play). | {{ii}} The [[Games for Windows - LIVE]] version requires a [https://live.xbox.com/Account/Signin Microsoft account] for online play (optional for offline play). | ||
| − | {{ii}} The Mac App Store version does not support online multiplayer.<ref name="Mac App Store"/> | + | {{ii}} The Mac App Store version does not support online multiplayer.<ref name="Mac App Store"/> |
| − | |||
{{Network/Multiplayer | {{Network/Multiplayer | ||
|local play = true | |local play = true | ||
| Line 416: | Line 543: | ||
===Black/Green screen after selecting [[QCSAA]]=== | ===Black/Green screen after selecting [[QCSAA]]=== | ||
{{ii}} This can happen on post-Kepler GPUs such as GTX 750 Ti, GTX 900, GTX 1000 series and newer due to their lack of support for the anti-aliasing method. The original anti-aliasing this method improves upon, [[CSAA]], is not selectable in-game by such GPUs and as such not covered here. | {{ii}} This can happen on post-Kepler GPUs such as GTX 750 Ti, GTX 900, GTX 1000 series and newer due to their lack of support for the anti-aliasing method. The original anti-aliasing this method improves upon, [[CSAA]], is not selectable in-game by such GPUs and as such not covered here. | ||
| − | {{Fixbox|description=Force MSAA|ref=<ref>{{Refcheck|user= | + | {{Fixbox|description=Force MSAA|ref=<ref>{{Refcheck|user=SargeCassidy|date=2022-01-14|comment=Tested on a GTX 1060 3GB. After selecting QCSAA, I was greeted with the letterboxed green screen that made playing the game impossible, confirming the issue. After making the change described below, I was able to play again.}}</ref>|fix= |
# Go to the [[#Game data|configuration file(s) location]]. | # Go to the [[#Game data|configuration file(s) location]]. | ||
# Open the <code>hardware_settings_config.xml</code> file. | # Open the <code>hardware_settings_config.xml</code> file. | ||
| Line 426: | Line 553: | ||
VSR is supported if your native resolution is FHD or QHD. Dirt 3 may achieve noticeable FPS boost then. Game is generally not very demanding. | VSR is supported if your native resolution is FHD or QHD. Dirt 3 may achieve noticeable FPS boost then. Game is generally not very demanding. | ||
}} | }} | ||
| + | |||
| + | ===Game never opens but sits in the process list using cpu on Windows 10/11=== | ||
| + | This is caused by HDR, turn it off in the display settings or use Alt+Winkey+B. | ||
| + | |||
| + | Using the keybind to turn it back on after starting will severely impact the framerate if using a FSE mode lower than the desktop resolution. | ||
| + | |||
| + | ===Change difficulty=== | ||
| + | {{ii}} After selecting your difficulty upon first creating a new profile, it isn't obvious as to how to adjust the difficulty for all races moving forward. | ||
| + | # Start a single-player race, either in the "DiRT TOUR" career mode or regular single-player. | ||
| + | # Wait for the pre-race menu to appear. | ||
| + | # In the pre-race menu, go to "Difficulty and Assists". Here, you'll be able to adjust the difficulty to your liking. Under the Advanced settings, you'll be able to fine tune difficulty settings, such as driving assists and AI opponent difficulty. | ||
==Other information== | ==Other information== | ||
===API=== | ===API=== | ||
{{API | {{API | ||
| − | |direct3d versions = 9, 11 | + | |direct3d versions = 9.0c, 11 |
|direct3d notes = | |direct3d notes = | ||
|directdraw versions = | |directdraw versions = | ||
| Line 454: | Line 592: | ||
|windows 32-bit exe = true | |windows 32-bit exe = true | ||
|windows 64-bit exe = false | |windows 64-bit exe = false | ||
| − | |windows arm app = | + | |windows arm app = unknown |
|windows exe notes = | |windows exe notes = | ||
| + | |mac os x powerpc app = unknown | ||
|macos intel 32-bit app = true | |macos intel 32-bit app = true | ||
|macos intel 64-bit app = false | |macos intel 64-bit app = false | ||
| − | |macos arm app = | + | |macos arm app = unknown |
|macos app notes = | |macos app notes = | ||
|linux 32-bit executable= unknown | |linux 32-bit executable= unknown | ||
|linux 64-bit executable= unknown | |linux 64-bit executable= unknown | ||
| + | |linux arm app = unknown | ||
|linux executable notes = | |linux executable notes = | ||
}} | }} | ||
====Force DirectX 9==== | ====Force DirectX 9==== | ||
| − | {{Fixbox|description=Change line in config file|ref=<ref>{{Refcheck|user= | + | {{Fixbox|description=Change line in config file|ref=<ref>{{Refcheck|user=SargeCassidy|date=2022-01-21|comment=}}</ref>|fix= |
# Go to the [[#Game data|configuration file(s) location]]. | # Go to the [[#Game data|configuration file(s) location]]. | ||
# Open {{file|hardware_settings_config.xml}}. | # Open {{file|hardware_settings_config.xml}}. | ||
| Line 505: | Line 645: | ||
{{Fixbox|description=Use [https://community.pcgamingwiki.com/files/file/1893-dirt-3-ce-super-fast-menus-mod/ DiRT 3 CE Super Fast Menus Mod]|ref=|fix= | {{Fixbox|description=Use [https://community.pcgamingwiki.com/files/file/1893-dirt-3-ce-super-fast-menus-mod/ DiRT 3 CE Super Fast Menus Mod]|ref=|fix= | ||
}} | }} | ||
| − | |||
| − | |||
==System requirements== | ==System requirements== | ||
Latest revision as of 06:18, 25 February 2024
 |
|
| Developers | |
|---|---|
| Codemasters | |
| macOS (OS X) | Feral Interactive |
| Publishers | |
| Codemasters | |
| OS X | Feral Interactive |
| Engines | |
| EGO 2.0 | |
| Release dates | |
| Windows | May 24, 2011 |
| macOS (OS X) | January 29, 2015 |
| Reception | |
| Metacritic | 86 |
| IGDB | 86 |
| Taxonomy | |
| Monetization | One-time game purchase |
| Modes | Singleplayer, Multiplayer |
| Pacing | Real-time |
| Controls | Direct control |
| Genres | Racing, Simulation |
| Vehicles | Automobile, Off-roading |
| Art styles | Realistic |
| Series | Colin McRae Rally |
| ⤏ Go to series page | |
| Colin McRae Rally | 1998 |
| Colin McRae Rally 2.0 | 2000 |
| Colin McRae Rally 3 | 2003 |
| Colin McRae Rally 04 | 2004 |
| Colin McRae Rally 2005 | 2004 |
| Colin McRae: DiRT | 2007 |
| Colin McRae: DiRT 2 | 2009 |
| DiRT 3 | 2011 |
| DiRT Showdown | 2012 |
| Colin McRae Rally (2014) | 2014 |
| DiRT Rally | 2015 |
| DiRT 4 | 2017 |
| DiRT Rally 2.0 | 2019 |
| DIRT 5 | 2020 |
Warnings
- For Games for Windows - LIVE on Windows 8 or later, install the latest Games for Windows - LIVE software.
- The macOS (OS X) version of this game does not work on macOS Catalina (version 10.15) or later due to the removal of support for 32-bit-only apps.
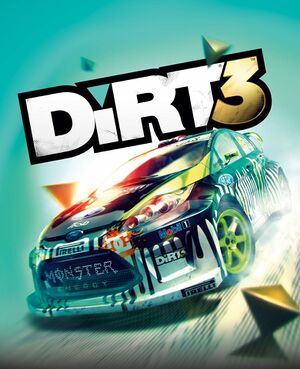
DiRT 3 is a singleplayer and multiplayer racing game developed and published by Codemasters. It is part of the Colin McRae Rally series and the first game in the series to drop the Colin McRae naming. Just like DiRT 2, it include a benchmark mode.
The game was released on May 24, 2011. The Complete Edition release, which includes all of the DLC, was released on March 9, 2012 in European countries and on March 20 in North America. The MacOS version of the Complete Edition of the game, ported and published by Feral Interactive, was released on January 29, 2015.
On Steam, the Complete Edition was treated as a separate game from the original release (Which is noted to have Games for Windows - LIVE DRM), and owners who owns the original release on Steam had received the Complete Edition for free.
Both the original game and the Complete Edition were delisted from all storefronts on December 31, 2016.
General information
- Steam Community Discussions (Complete Edition)
- Steam Community Discussions
Availability
| Source | DRM | Notes | Keys | OS |
|---|---|---|---|---|
| Retail | SecuROM PA and SecuROM 8 DRM. | |||
| Games for Windows Marketplace (unavailable) | [1] | |||
| Mac App Store (unavailable) | Complete Edition. Does not support online multiplayer.[2] | |||
| Steam (unavailable) | ||||
| Steam (unavailable) | Complete Edition |
- All non-Steam Windows versions require Games for Windows - LIVE DRM.[Note 1] SecuROM activation limit unknown. A revoke tool is available.
- Retail product keys activate on Steam.[3]
Essential improvements
Skip intro videos
| Replace files[4] |
|---|
|
Game data
Configuration file(s) location
| System | Location |
|---|---|
| Windows | %USERPROFILE%\Documents\My Games\DiRT3\hardwaresettings\ |
| macOS (OS X) | |
| Steam Play (Linux) | <SteamLibrary-folder>/steamapps/compatdata/44320/pfx/[Note 2] |
- Some other non user-specific configuration files are stored with the game data. See the Field of view (FOV) section for more information.
Save game data location
| System | Location |
|---|---|
| Windows | %USERPROFILE%\Documents\My Games\DiRT3\savegame\ |
| macOS (OS X) | |
| Steam | <Steam-folder>/userdata/<user-id>/321040/ |
| Steam Play (Linux) | <SteamLibrary-folder>/steamapps/compatdata/44320/pfx/[Note 2] |
- Saves are not compatible between the Steam and Games for Windows - LIVE versions.
- Steam saved game data location appears to be a placeholder and remains empty; look for files in the My Games folder
- Replay data is stored in
%PROGRAMDATA%\Codemasters\DiRT3\(can take few gigabytes).
Save game cloud syncing
| System | Native | Notes |
|---|---|---|
| OneDrive | Requires enabling backup of the Documents folder in OneDrive on all computers. | |
| Steam Cloud | Complete Edition only. Approx. 38 MB available. |
Video
| Graphics feature | State | WSGF | Notes |
|---|---|---|---|
| Widescreen resolution | |||
| Multi-monitor | |||
| Ultra-widescreen | |||
| 4K Ultra HD | |||
| Field of view (FOV) | See Field of view (FOV). | ||
| Windowed | Toggle with Alt+↵ Enter. Window is fully resizable. | ||
| Borderless fullscreen windowed | See the glossary page for potential workarounds. | ||
| Anisotropic filtering (AF) | See the glossary page for potential workarounds. | ||
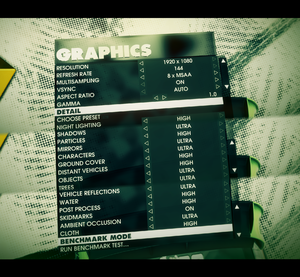
| Anti-aliasing (AA) | 2x-8x MSAA, 8x-16x CSAA, and 8x QCSAA. | ||
| Vertical sync (Vsync) | |||
| 60 FPS and 120+ FPS | |||
| High dynamic range display (HDR) | See the glossary page for potential alternatives. | ||
Field of view (FOV)
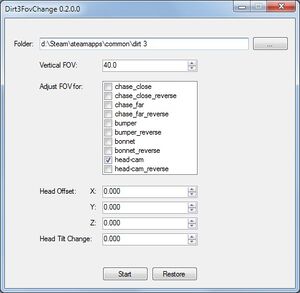
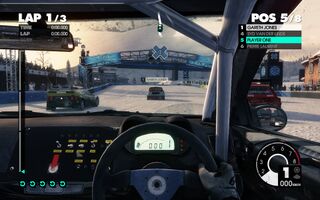
- The parameters concerning the field of view as well as the point of view of each of the in-game cameras are stored in a binary file named
cameras.xml. There is one such file for each car in the game. They are located with other car-related data in the subfolders of:<path-to-game>\cars\models. These files can be batch edited using Dirt3FovChange although DLC cars may prove problematic as their data is reportedly stored in a different location. Conveniently, a backup of the binary files will be made in text format before attempting to modify them. This allows a quick restore of the most recent state. - This method is reliable and stable: modifications can be made on-the-fly, while in a race.
| Using Dirt3FovChange |
|---|
Notes
|
Result
Disable and replace post-processing filter
- The game has a controversial post-processing filter which can only be disabled by deleting a file in the game's installation folder. Without the filter, the game looks even less vibrant than it did prior, but as the original filter is disabled, it can now be replaced entirely.
- Copy the following text and paste it into a new file named
Dirt3_HFX.ini(click "Expand" on the right to show the text):
PreprocessorDefinitions=
Techniques=AmbientLight@AmbientLight.fx,DPX@DPX.fx,HDR@FakeHDR.fx,LiftGammaGain@LiftGammaGain.fx,Curves@Curves.fx,Tonemap@Tonemap.fx
TechniqueSorting=AmbientLight@AmbientLight.fx,DPX@DPX.fx,HDR@FakeHDR.fx,LiftGammaGain@LiftGammaGain.fx,Curves@Curves.fx,AdaptiveFog@AdaptiveFog.fx,AdaptiveSharpen@AdaptiveSharpen.fx,AdvancedCRT@CRT.fx,After@Splitscreen.fx,ContrastAdaptiveSharpen@CAS.fx,ASCII@ASCII.fx,AspectRatioPS@AspectRatio.fx,Before@Splitscreen.fx,BloomAndLensFlares@Bloom.fx,Border@Border.fx,CA@ChromaticAberration.fx,Cartoon@Cartoon.fx,Chromakey@Chromakey.fx,ChromaticAberration@Prism.fx,CinematicDOF@CinematicDOF.fx,Clarity@Clarity.fx,ColorMatrix@ColorMatrix.fx,Colourfulness@Colourfulness.fx,Daltonize@Daltonize.fx,Deband@Deband.fx,Depth3D@Depth3D.fx,DepthHaze@DepthHaze.fx,DisplayDepth@DisplayDepth.fx,Emphasize@Emphasize.fx,EyeAdaption@EyeAdaption.fx,FilmGrain@FilmGrain.fx,FilmGrain2@FilmGrain2.fx,FilmicAnamorphSharpen@FilmicAnamorphSharpen.fx,FilmicPass@FilmicPass.fx,FXAA@FXAA.fx,GaussianBlur@GaussianBlur.fx,GlitchB@Glitch.fx,GP65CJ042DOF@DOF.fx,HighPassSharp@HighPassSharpen.fx,HQ4X@HQ4X.fx,HSLShift@HSLShift.fx,KNearestNeighbors@Denoise.fx,Layer@Layer.fx,LeiFx_Tech@3DFX.fx,Levels@Levels.fx,LevelsPlus@LevelsPlus.fx,LightDoF_AutoFocus@LightDoF.fx,LightDoF_Far@LightDoF.fx,LightDoF_Near@LightDoF.fx,LumaSharpen@LumaSharpen.fx,LUT@LUT.fx,MagicBloom@MagicBloom.fx,MagicDOF@DOF.fx,MartyMcFlyDOF@DOF.fx,MatsoDOF@DOF.fx,Mode1@FineSharp.fx,Mode2@FineSharp.fx,Mode3@FineSharp.fx,Monochrome@Monochrome.fx,MotionBlur@FakeMotionBlur.fx,MultiLUT@MultiLUT.fx,MXAO@MXAO.fx,Nightvision@NightVision.fx,NonLocalMeans@Denoise.fx,Nostalgia@Nostalgia.fx,PerfectPerspective@PerfectPerspective.fx,PPFXBloom@PPFX_Bloom.fx,PPFX_Godrays@PPFX_Godrays.fx,PPFXSSDO@PPFX_SSDO.fx,ReflectiveBumpmapping@ReflectiveBumpMapping.fx,RingDOF@DOF.fx,SMAA@SMAA.fx,StageDepth@StageDepth.fx,SurfaceBlur@SurfaceBlur.fx,Technicolor@Technicolor.fx,Technicolor2@Technicolor2.fx,TiltShift@TiltShift.fx,Tint@Sepia.fx,Tonemap@Tonemap.fx,UIDetect@UIDetect.fx,UIDetect_After@UIDetect.fx,UIDetect_Before@UIDetect.fx,UIMask_Bottom@UIMask.fx,UIMask_Top@UIMask.fx,Vibrance@Vibrance.fx,Vignette@Vignette.fx

[AmbientLight.fx]
alAdapt=0.700000
alAdaptBaseBlackLvL=2
alAdaptBaseMult=1.000000
alDebug=0
alDirtInt=1.000000
alDirtOVInt=1.000000
alInt=10.150000
alLensInt=2.000000
alLensThresh=0.500000
alThreshold=15.000000
AL_Adaptation=1
AL_Adaptive=2
AL_Dirt=0
AL_DirtTex=0
AL_Dither=0
AL_Lens=0
AL_Vibrance=1

[Curves.fx]
Contrast=0.650000
Formula=4
Mode=0

[DPX.fx]
Colorfulness=2.500000
Contrast=0.100000
RGB_C=0.360000,0.360000,0.340000
RGB_Curve=8.000000,8.000000,8.000000
Saturation=3.000000
Strength=0.200000

[FakeHDR.fx]
HDRPower=1.300000
radius1=0.793000
radius2=0.870000

[FXAA.fx]
EdgeThreshold=0.125000
EdgeThresholdMin=0.000000
Subpix=0.250000

[LiftGammaGain.fx]
RGB_Gain=1.000000,1.000000,1.000000
RGB_Gamma=1.300014,1.300014,1.300014
RGB_Lift=1.000000,1.000000,1.000000

[Tonemap.fx]
Bleach=0.000000
Defog=0.000000
Exposure=0.404000
FogColor=0.000000,0.000000,1.000000
Gamma=1.000000
Saturation=0.000000
- Go to
<path-to-game>\postprocess, and renameeffects.xmltoeffects.xml.bak. This will backup the original post-processing filter while also preventing the game from recognizing it, thus disabling the filter. - Download and run the setup for ReShade
- In the ReShade setup, select
<path-to-game>\dirt3_game.exeas the target executable, select<path-to-game>\Dirt3_HFX.inias the preset, select DirectX 11 for the API, and select the following effects packages:- Standard Effects (should be selected by default)
- SweetFX by CeeJay.dk
- Legacy effects
- Make sure you complete the ReShade installation.
- Rename
<path-to-game>\dxgi.dllto<path-to-game>\d3d11.dll. ReShade might not start properly otherwise. - Start the game, press the Home key. You should see the effects have been applied. If you don't, select 'Dirt3_HFX.ini' as the ReShade preset file from the drop-down menu. You can configure the individual filter settings to your personal liking, as well as add more.
- Before and after comparison pictures here: [1]
Input
- The game can send telemetry data to supported software like SimHub and devices like motion platforms, bass shakers and telemetry displays through the UDP protocol, but the Complete Edition version have broken UDP support, requiring a third-party fix. Also support D-Box haptic/motion platforms through a proprietary protocol.[5] Requires editing the
hardware_settings_config.xmlfile to enable them. (See Enable telemetry)
| Keyboard and mouse | State | Notes |
|---|---|---|
| Remapping | Combined with controller rebinding. | |
| Mouse acceleration | ||
| Mouse sensitivity | ||
| Mouse input in menus | ||
| Mouse Y-axis inversion | ||
| Controller | ||
| Controller support | XInput and DirectInput. | |
| Full controller support | False for DirectInput. Buttons have to be rebound in settings and controller can only be used in game, not in menus. | |
| Controller remapping | Fully remappable. Combined with keyboard rebinding. | |
| Controller sensitivity | ||
| Controller Y-axis inversion |
| Controller types |
|---|
| XInput-compatible controllers | ||
|---|---|---|
| Xbox button prompts | ||
| Impulse Trigger vibration | Use X1nput |
| PlayStation controllers | ||
|---|---|---|
| PlayStation button prompts | ||
| Light bar support | ||
| Adaptive trigger support | ||
| DualSense haptic feedback support | ||
| Connection modes | ||
| Generic/other controllers | See Controller support for sim-racing device support. | |
|---|---|---|
| Button prompts |
| Additional information | ||
|---|---|---|
| Controller hotplugging | ||
| Haptic feedback | XInput only. | |
| Digital movement supported | ||
| Simultaneous controller+KB/M |
| Steam Input | ||
|---|---|---|
| Steam Input API support | ||
| Hook input (legacy mode) | ||
| Official controller preset(s) | ||
| Steam Controller button prompts | ||
| Cursor detection | Mouse cursor is always on the screen. |
Controller support
- Supported devices are based on what was found in the devicesetup.xml file.
- Running game on PC set in Japanese language will rename the Logitech racing wheels to Logicool.
| Compatible steering wheels | Notes |
|---|---|
| Fanatec Porsche 911 Turbo/Turbo S/Carrera/GT2/GT3 RS | |
| Logitech Driving Force Pro | |
| Logitech MOMO | |
| Logitech MOMO Racing | |
| Logitech Driving Force GT | |
| Logitech G25 | |
| Logitech G27 | |
| Microsoft SideWinder Force Feedback Wheel | |
| Thrustmaster Ferrari GT Experience Steering Wheel 3-in-1 | |
| Thrustmaster Rally GT Force Feedback Pro | |
| Thrustmaster Ferrari F430 Force Feedback | |
| Thrustmaster T500 | Default GT rim only. |
Enable telemetry
| Enable telemetry[6] |
|---|
|
Audio
| Audio feature | State | Notes |
|---|---|---|
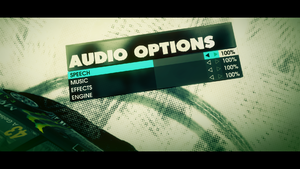
| Separate volume controls | Speech, Music, Effects and Engine. | |
| Surround sound | Support for 5.1 and 7.1.[7] | |
| Subtitles | ||
| Closed captions | ||
| Mute on focus lost | ||
| Royalty free audio |
Localizations
| Language | UI | Audio | Sub | Notes |
|---|---|---|---|---|
| English | ||||
| French | ||||
| German | ||||
| Hungarian | Fan translation, download. | |||
| Italian | ||||
| Polish | Fan translation, Download. | |||
| Russian | Russian retail release only.[8] | |||
| Spanish | ||||
| Brazilian Portuguese | Fan translation, Tribo Gamer |
Install Rapture3D for 3-dimensional sound (on headphones)
- Unlike Colin McRae: DiRT 2, Rapture3D is not included by default.
| Instructions |
|---|
Notes
|
Network
- The Games for Windows - LIVE version requires a Microsoft account for online play (optional for offline play).
- The Mac App Store version does not support online multiplayer.[2]
Multiplayer types
| Type | Native | Players | Notes | |
|---|---|---|---|---|
| Local play | 2 | Split-screen. | ||
| LAN play | 8 | |||
| Online play | 8 | |||
Connection types
| Type | Native | Notes |
|---|---|---|
| Matchmaking | ||
| Peer-to-peer | ||
| Dedicated | ||
| Self-hosting | ||
| Direct IP |
VR support
| 3D modes | State | Notes | |
|---|---|---|---|
| Native 3D | AMD HD3D | ||
| Nvidia 3D Vision | |||
| vorpX | G3D Officially supported game, see official vorpx game list. |
||
| Devices | |||
|---|---|---|---|
| TrackIR | Supports: Yaw, Pitch, Roll, X, Y, Z. | ||
Issues fixed
Black/Green screen after selecting QCSAA
- This can happen on post-Kepler GPUs such as GTX 750 Ti, GTX 900, GTX 1000 series and newer due to their lack of support for the anti-aliasing method. The original anti-aliasing this method improves upon, CSAA, is not selectable in-game by such GPUs and as such not covered here.
| Force MSAA[9] |
|---|
|
Low game performance
| Set QHD or 4K resolution with DSR/VSR enabled[citation needed] |
|---|
|
VSR is supported if your native resolution is FHD or QHD. Dirt 3 may achieve noticeable FPS boost then. Game is generally not very demanding. |
Game never opens but sits in the process list using cpu on Windows 10/11
This is caused by HDR, turn it off in the display settings or use Alt+Winkey+B.
Using the keybind to turn it back on after starting will severely impact the framerate if using a FSE mode lower than the desktop resolution.
Change difficulty
- After selecting your difficulty upon first creating a new profile, it isn't obvious as to how to adjust the difficulty for all races moving forward.
- Start a single-player race, either in the "DiRT TOUR" career mode or regular single-player.
- Wait for the pre-race menu to appear.
- In the pre-race menu, go to "Difficulty and Assists". Here, you'll be able to adjust the difficulty to your liking. Under the Advanced settings, you'll be able to fine tune difficulty settings, such as driving assists and AI opponent difficulty.
Other information
API
| Technical specs | Supported | Notes |
|---|---|---|
| Direct3D | 9.0c, 11 |
| Executable | 32-bit | 64-bit | Notes |
|---|---|---|---|
| Windows | |||
| macOS (OS X) | This 32-bit-only macOS game does not work on macOS Catalina (10.15) or later. |
Force DirectX 9
| Change line in config file[10] |
|---|
|
Middleware
| Middleware | Notes | |
|---|---|---|
| Audio | OpenAL | Rapture3D can be installed and used optionally. |
| Cutscenes | Bink Video | |
| Multiplayer | Games for Windows - LIVE, Steamworks |
Disable the narration
| Instructions[11] |
|---|
|
- Instant menu transition with no delay.
- You'll be kicked from party automatically each time before online race start.
| Use DiRT 3 CE Super Fast Menus Mod |
|---|
System requirements
| Windows | ||
|---|---|---|
| Minimum | Recommended | |
| Operating system (OS) | XP, Vista, 7, 8 | |
| Processor (CPU) | Intel Pentium D 2.8 GHz AMD Athlon 64 X2 2.8 GHz |
Intel Core i7 AMD Phenom II |
| System memory (RAM) | 2 GB | 3 GB |
| Hard disk drive (HDD) | 15 GB | |
| Video card (GPU) | Nvidia GeForce 8000 series ATI Radeon HD 2000 256 MB of VRAM DirectX 9.0c compatible | AMD Radeon HD 6000 series 1 GB of VRAM DirectX 11 compatible |
| Sound (audio device) | DirectX compatible | |
| macOS (OS X) | ||
|---|---|---|
| Minimum | Recommended | |
| Operating system (OS) | 10.9.5 | 10.10.2 |
| Processor (CPU) | Intel 2.0 GHz | Intel 2.4 GHz |
| System memory (RAM) | 4 GB | 8 GB |
| Hard disk drive (HDD) | 14 GB | |
| Video card (GPU) | Nvidia GeForce GT 120 ATI Radeon HD 4670 Intel HD Graphics 4000 256 MB of VRAM | Nvidia GeForce GTX 650 AMD Radeon HD 6970 Intel Iris Pro 1 GB of VRAM |
- The game is optimized for AMD/ATI graphics cards.
Notes
- ↑ Games for Windows - LIVE DRM features: SSA activation, supports local profiles.
- ↑ 2.0 2.1 Notes regarding Steam Play (Linux) data:
- File/folder structure within this directory reflects the path(s) listed for Windows and/or Steam game data.
- Games with Steam Cloud support may also store data in
~/.steam/steam/userdata/<user-id>/44320/. - Use Wine's registry editor to access any Windows registry paths.
- The app ID (44320) may differ in some cases.
- Treat backslashes as forward slashes.
- See the glossary page for details on Windows data paths.
References
- ↑ dirt-3 - Games For Windows - last accessed on 2022-11-16
- ↑ 2.0 2.1 Released! DiRT™ 3® Complete Edition pulls its best stunt yet. | Feral News
- ↑ DiRT 3 Complete Edition Available Now [Free upgrade for existing DiRT 3 owners] :: DiRT 3 Complete Edition General Discussions - last accessed on 9 June 2023
- ↑ Skip Intro Dirt 3 | SkipGameIntro
- ↑ DiRT 3 - D-Box Catalogue - last accessed on November 5, 2023
- ↑ Verified by User:Yuuyatails on November 5, 2023
- ↑ DiRT3 | Blue Ripple Sound
- ↑ DiRT 3 - Игровой архив - last accessed on 2022-12-27
- ↑ Verified by User:SargeCassidy on 2022-01-14
- Tested on a GTX 1060 3GB. After selecting QCSAA, I was greeted with the letterboxed green screen that made playing the game impossible, confirming the issue. After making the change described below, I was able to play again.
- ↑ Verified by User:SargeCassidy on 2022-01-21
- ↑ Steam Community :: Guide :: How to disable the unskippable voiceovers - last accessed on 2016-11-05

