BioShock Infinite
 |
|
| Developers | |
|---|---|
| Irrational Games | |
| 2K Australia | |
| Iron Galaxy Studios | |
| macOS (OS X) | Aspyr Media |
| Linux | Virtual Programming |
| Publishers | |
| 2K Games | |
| OS X | Aspyr Media |
| Russia | 1C-SoftClub |
| Engines | |
| Unreal Engine 3 | |
| Release dates | |
| Windows | March 26, 2013 |
| macOS (OS X) | August 29, 2013 |
| Linux | March 17, 2015 |
| Reception | |
| Metacritic | 94 |
| IGDB | 93 |
| Taxonomy | |
| Monetization | One-time game purchase, DLC |
| Modes | Singleplayer |
| Pacing | Real-time |
| Perspectives | First-person |
| Controls | Direct control |
| Genres | Shooter |
| Themes | Sci-fi, Steampunk |
| Series | BioShock |
| BioShock | |
|---|---|
| BioShock | 2007 |
| BioShock 2 | 2010 |
| BioShock Infinite | 2013 |
| BioShock Remastered | 2016 |
| BioShock 2 Remastered | 2016 |
Warnings
- The macOS (OS X) version of this game does not work on macOS Catalina (version 10.15) or later due to the removal of support for 32-bit-only apps.
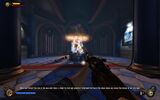
BioShock Infinite is a singleplayer first-person shooter game in the BioShock series.
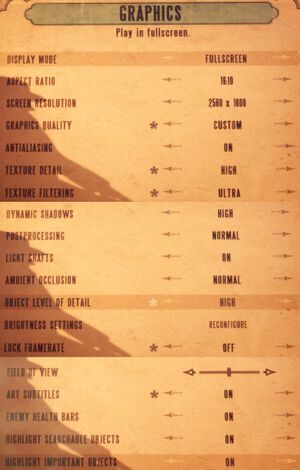
The PC version was noted as a quality port, including graphics and control options.[1][2]
The game has a built-in benchmark mode which can be accessed through launcher in Advanced menu. On Linux, however, the command line argument DefaultPCBenchmarkMap.xcmap -unattended needs to be included to access it. Aim-assist is on by default even when not using a controller, but can be fixed.
General information
- Port Report: BioShock Infinite
- 2K Games Forums
- Official support knowledgebase
- GOG.com Community Discussions for game series
- GOG.com Support Page
- Steam Community Discussions
Availability
| Source | DRM | Notes | Keys | OS |
|---|---|---|---|---|
| Retail | 3 DVDs. | |||
| Developer website | ||||
| Amazon.co.uk | ||||
| Epic Games Store | Complete Edition. Requires 2K Launcher. | |||
| GamersGate | ||||
| Sold by 2K Games. | ||||
| Sold by Aspyr Media. | ||||
| GOG.com | Complete Edition. | |||
| Green Man Gaming | ||||
| Humble Store | ||||
| Steam | As of 31 August 2022, 2K Launcher is required. | |||
| Amazon.com (unavailable) | ||||
| Mac App Store (unavailable) |
- Windows versions use Custom Executable Generation DRM on Steam.
- All Linux versions require Steam DRM.
Monetization
DLC and expansion packs
| Name | Notes | |
|---|---|---|
| Season Pass | ||
| Early Bird Special Pack | Exclusive to the Season Pass. | |
| Columbia's Finest | ||
| Clash in the Clouds | Part of the Season Pass. | |
| Burial At Sea: Episode One | Part of the Season Pass. | |
| Burial At Sea: Episode Two | Part of the Season Pass. |
Essential improvements
Enable GUI scaling
- By default, GUI elements do not scale with resolution, making these elements smaller the higher the resolution is.
| GUI scaling tweak[3] |
|---|
|
Skip intro videos
| Replace files[citation needed] |
|---|
|
| Edit Configuration File[citation needed] |
|---|
StartupMovies=2KLogoSweep720p2997
StartupMovies=IrrationalLogoTest
StartupMovies=UE3AnimatedLogo_ProRes
StartupMovies=AMDLogo720p
StartupMovies=LoopingMovieUntilStartupFinishes |
Skip launcher
Use the "BioShockInfinite" -run %command% command line argument on Steam.
|
|---|
| Epic Games Store[4][5] |
|---|
|
Game data
Configuration file(s) location
| System | Location |
|---|---|
| Windows | %USERPROFILE%\Documents\My Games\BioShock Infinite\XGame\Config\ |
| macOS (OS X) | |
| Linux | $XDG_DATA_HOME/irrationalgames/bioshockinfinite/GameDocuments/My Games/BioShock Infinite/ |
- This game follows the XDG Base Directory Specification on Linux.
- Key mappings are encrypted which prevents sharing key bind files or creating custom commands.[6]
Save game data location
| System | Location |
|---|---|
| Windows | %USERPROFILE%\Documents\My Games\BioShock Infinite\XGame\SaveData |
| macOS (OS X) | |
| Steam | <Steam-folder>/userdata/<user-id>/8870/ |
- Game creates an automatic permanent save at the beginning of each chapter. These saves are automatically overwritten if replaying from a previous chapter.
- Only one save game is able to be played at any one time.[7]
Save game cloud syncing
| System | Native | Notes |
|---|---|---|
| Epic Games Launcher | ||
| GOG Galaxy | ||
| OneDrive | Requires enabling backup of the Documents folder in OneDrive on all computers. | |
| Steam Cloud |
Video
| Graphics feature | State | WSGF | Notes |
|---|---|---|---|
| Widescreen resolution | |||
| Multi-monitor | Full 3xLandscape. HUD may not be centred by default; see Multi-monitor. | ||
| Ultra-widescreen | |||
| 4K Ultra HD | GUI may be too small; see Enable GUI scaling. | ||
| Field of view (FOV) | Limited FOV adjustment of 15°. See Field of view (FOV). | ||
| Windowed | |||
| Borderless fullscreen windowed | On Windows, set fullscreen mode to "Fullscreen (Windowed)". | ||
| Anisotropic filtering (AF) | |||
| Anti-aliasing (AA) | FXAA only. | ||
| Vertical sync (Vsync) | Option is called "Lock Framerate". | ||
| 60 FPS and 120+ FPS | |||
| High dynamic range display (HDR) | See the glossary page for potential alternatives. | ||
Multi-monitor
- The HUD may not be centred automatically for multi-monitor setups.[citation needed]
| Centering HUD on multi-monitor setups[citation needed] |
|---|
|
Field of view (FOV)
- There is an FOV slider in the game options, however it only increases/decreases FOV by 15% from the default value of 70° (59.5° - 80.5°).
| FOV slider expansion[citation needed] |
|---|
|
| Maximum FoV by slider | MaxUserFOVOffsetPercent value |
|---|---|
| 85 | 21.43 |
| 90 | 28.57 |
| 95 | 35.71 |
| 100 | 42.86 |
| 105 | 50.00 |
| 110 | 57.14 |
| 120 | 60.00 |
Increase light shaft quality
- Makes light shafts higher resolution.
| Edit configuration file |
|---|
|
Increase shadow quality past maximum setting
- Makes shadows retain high quality even when cast by small objects or viewed close by.
| Edit configuration file |
|---|
|
Disable depth of field
- Does not provide any performance gains.
| Edit configuration file |
|---|
|
Disable lens flare and dirt effect
- Both effects are controlled by a single setting.
| Disable lens flare and dirt effect[citation needed] |
|---|
|
Disable all post-processing effects
- Some of the post-processing effects can only be disabled in the game's XEngine.ini file. These effects include depth of field, light bloom, and color correction.
| Disabling post-processing[citation needed] |
|---|
|
Turn off texture streaming
- May cause game to enter an infinite loading loop. If it does, turn texture streaming back on, leave that area of the game, and turn it off again once you leave the area.
| Edit Configuration File[citation needed] |
|---|
MipFadeInSpeed0=0 MipFadeOutSpeed0=0 MipFadeInSpeed1=0 MipFadeOutSpeed1=0 OnlyStreamInTextures=True PoolSize=0 LoadMapTimeLimit=999 LightmapStreamingFactor=0 ShadowmapStreamingFactor=0 bAllowSwitchingStreamingSystem=False UseDynamicStreaming=False |
Input
| Keyboard and mouse | State | Notes |
|---|---|---|
| Remapping | Some keys cannot be rebound in the Burial at Sea DLC. "F" is always "take all" when looting. ↵ Enter, ← Backspace, Tab ↹, and Esc are reserved for menu commands and cannot be bound. | |
| Mouse acceleration | ||
| Mouse sensitivity | Precise customization only available through INI edits. | |
| Mouse input in menus | ||
| Mouse Y-axis inversion | ||
| Controller | ||
| Controller support | ||
| Full controller support | ||
| Controller remapping | Can choose between a handful of presets. | |
| Controller sensitivity | ||
| Controller Y-axis inversion |
| Controller types |
|---|
| XInput-compatible controllers | ||
|---|---|---|
| Xbox button prompts | ||
| Impulse Trigger vibration | Use X1nput[8] |
| PlayStation controllers | See the glossary page for potential workarounds. |
|---|
| Generic/other controllers | See the glossary page for potential workarounds. |
|---|
| Additional information | ||
|---|---|---|
| Controller hotplugging | ||
| Haptic feedback | ||
| Digital movement supported | ||
| Simultaneous controller+KB/M | Rapidly changes button prompts |
Mouse speed slider tweak
- Slider for mouse speed is set to very wide range, which can be unsuitable for high precision mice.
| Mouse slider tweak[citation needed] |
|---|
|
Change aim down sights behaviour from toggle to hold
| AutoHotkey script for hold to aim[citation needed] |
|---|
#IfWinActive BioShock Infinite
$mbutton::
  Send {mbutton}
  KeyWait, mbutton
Return
mbutton Up::Send {mbutton}
Notes
|
Change aim down sights behaviour from toggle to hold - Version that solves getting stuck with reversed controls
| AutoHotkey script for hold to aim[citation needed] |
|---|
#NoEnv  ; Recommended for performance and compatibility with future AutoHotkey releases.
#Warn  ; Enable warnings to assist with detecting common errors.
SendMode Input  ; Recommended for new scripts due to its superior speed and reliability.
SetWorkingDir %A_ScriptDir%  ; Ensures a consistent starting directory.

#IfWinActive BioShock Infinite
ShiftKeyPressed := false

RButton::
	Send {RButton}
	ShiftKeyPressed := false
	While (GetKeyState("RButton", "P"))
	{
		if (GetKeyState("LShift", "D"))
		{
			ShiftKeyPressed := true

			break
		}
	}

RButton Up::
	if(ShiftKeyPressed) {
		return
	} else {
		Send {RButton}
		ShiftKeyPressed := false
		return
	}

LShift::
	Send {LShift}
	While (GetKeyState("LShift", "P"))
	{
		if (GetKeyState("RButton", "D"))
		{
			break
		}
	}

LShift Up::
	Send {LShift}
Notes
|
Audio
| Audio feature | State | Notes |
|---|---|---|
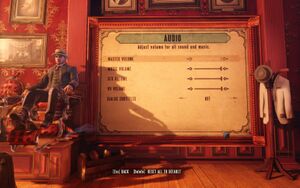
| Separate volume controls | Master, music, SFX and voice. | |
| Surround sound | Auto configures up to 5.0 output.[9] | |
| Subtitles | ||
| Closed captions | ||
| Mute on focus lost | ||
| EAX support | Linux only. In alsoft-config set HRTF Mode to Force On at the HRTF tab. | |
| Royalty free audio |
Localizations
| Language | UI | Audio | Sub | Notes |
|---|---|---|---|---|
| English | ||||
| Traditional Chinese | ||||
| French | ||||
| German | ||||
| Hungarian | Fan translation. | |||
| Italian | ||||
| Japanese | ||||
| Korean | ||||
| Polish | ||||
| Brazilian Portuguese | ||||
| Russian | Official UI/subtitles localization by «1C-Softclub». Fan (audio) localization by CGInfo | |||
| Spanish | ||||
| Turkish | Fan translation. |
VR support
| 3D modes | State | GG3D | Notes | |
|---|---|---|---|---|
| Nvidia 3D Vision | Use Helix Mod: Bioshock Infinite. | |||
| TriDef 3D | ||||
| vorpX | G3D, DirectVR Officially supported game, see official vorpx game list. |
|||
| Devices | |||
|---|---|---|---|
| 3RD Space Gaming Vest | |||
Issues unresolved
Windows
Freezing and crashing
- There have been reports of crashing and freezing, possibly related to i7 processors.[10][11] 2K is aware of this issue and there should be patch soon.[citation needed]
| Possible fixes[citation needed] |
|---|
|
Issues fixed
Stuttering during gameplay
| Texture Pool Size Fix[13][14] |
|---|
|
Texture streaming quality problems
- When the game can't detect or detects wrong video memory size, it automatically enables only Very Low and Low options for texture quality.
- There is also an issue on some systems that selecting Very High or Ultra for texture quality will cause to textures never load properly and game tries to load them over and over.[15]
| Low texture quality and streaming fix[16] |
|---|
[TextureStreaming] UseTextureFileCache=False TexturePoolSizeReductionMB=1500 PoolSize=3000 LowPCTexturePoolSizeMB=3000 |
FPS dropping
- Nvidia cards experience FPS drops in certain areas when
Dynamic Shadowsis set to Very High or Ultra.
| Vsync bug fix[17][18] |
|---|
VsyncTo60WhenUnder30=False to VsyncTo60WhenUnder30=True |
Make the Game Hor+
| Edit Configuration File[citation needed] |
|---|
AspectRatioAxisConstraint=AspectRatio_MaintainYFOV |
Disable aim-assist
- Aim-assist is on by default even when using keyboard and mouse.[19]
- There are some auto aim variables in the .ini files but these variables are reverted to True every time you start the game.[20] There is no permanent fix yet.
| Permanent Partial Solution[21] |
|---|
|
| Temporary auto aim fix[22] |
|---|
|
Windows
Crash on start for some Windows 7 and 8 users
| Force start in Windowed Mode[citation needed] |
|---|
|
| Run Steam as an administrator and the game itself NOT as an administrator[citation needed] |
|---|
Change the Documents folder back to default if it has been moved[citation needed]
|
|---|
Cannot restore game after Alt-Tab
| Exit TeamViewer[23] |
|---|
Xbox controls even with no controller attached
- Bioshock Infinite auto-detects any controllers/joysticks attached to the system including virtual ones. This could make the game uncontrollable, cause the camera to spin, and label the menu with Xbox prompts.
| Remove all controllers[citation needed] |
|---|
|
Microstuttering
| Adaptive and dynamic V-Sync[citation needed] |
|---|
|
- Mice with high polling rates can sometimes cause microstuttering.
| Fix for Razer mice[26] |
|---|
|
Audio crackling
| Update GPU drivers[27][citation needed] |
|---|
| Run the game in compatibility mode[28] |
|---|
|
Audio stutter may also be fixed by enabling compatibility mode for
|
Linux
Game starts on the wrong screen
| Start with a a command line option[citation needed] |
|---|
|
Game starts on the wrong screen, wrong aspect ratio
- In a multi-monitor configuration where 1 monitor is portrait and 1 monitor landscape and where game starts on portrait monitor and is forced to run on the landscape monitor using
--eon_force_display, game does not recognize landscape monitor's aspect ratio and will only allow portrait aspect ratios/resolutions. - No real fix is available at this time.
| Pending fix[citation needed] |
|---|
|
| Wayland fix[citation needed] |
|---|
|
On Wayland, an alternative solution is to use gamescope acting as a virtual single monitor, to avoid issues caused by a multi-monitor setup. Install or build gamecope and add the following to Bioshock: Infinites launch options in Steam: |
Game uses system mouse acceleration
- The game uses mouse acceleration, even if mouse acceleration is turned off in-game.
| Disable mouse acceleration in the system before game launches[citation needed] |
|---|
Notes
|
Other information
API
| Technical specs | Supported | Notes |
|---|---|---|
| Direct3D | 10, 11 | |
| OpenGL | 3.3, 4.1, 4.2 | 3.3 on OS X, 4.1/4.2 on Linux. |
| Shader Model support | 4, 5 |
| Executable | 32-bit | 64-bit | Notes |
|---|---|---|---|
| Windows | |||
| macOS (OS X) | 32-bit only.[29] | ||
| Linux |
Middleware
| Middleware | Notes | |
|---|---|---|
| Physics | PhysX | |
| Audio | Wwise, OpenAL | OpenAL is used in Linux |
| Interface | Autodesk Gameware, SDL | SDL is used in Linux |
| Input | SDL | Linux only, for gamepads. |
| Cutscenes | Bink Video |
Gameplay overhaul mod
- Works with Steam, EGS, and GOG game versions.
| The mod implements FOV and sensitivity scaling, sprint normalization, hitmarker sounds, a better DOF calculation, health and salts regeneration and the option to remove the head bobbing effect.[30] |
|---|
Options
|
System requirements
| Windows | ||
|---|---|---|
| Minimum | Recommended | |
| Operating system (OS) | Vista SP2 | 7 SP1 |
| Processor (CPU) | Intel Core 2 Duo 2.4 GHz AMD Athlon X2 2.7 GHz |
Quad Core |
| System memory (RAM) | 2 GB | 4 GB |
| Hard disk drive (HDD) | 20 GB | 30 GB |
| Video card (GPU) | Nvidia GeForce 8800 GT ATI Radeon HD 3870 Intel HD Graphics 3000 512 MB of VRAM DirectX 10 compatible | Nvidia GeForce GTX 560 AMD Radeon HD 6950 1 GB of VRAM DirectX 11 compatible |
| Sound (audio device) | DirectX compatible | |
| macOS (OS X) | ||
|---|---|---|
| Minimum | Recommended | |
| Operating system (OS) | 10.12 | |
| Processor (CPU) | Intel Core 2 Duo 2.2 GHz | |
| System memory (RAM) | 4 GB | |
| Hard disk drive (HDD) | 30 GB | |
| Video card (GPU) | Nvidia GeForce 640M ATI Radeon HD 3870 Intel HD Graphics 4000 512 MB of VRAM | Nvidia GeForce GTX 775M ATI Radeon HD 5870 |
| Linux | ||
|---|---|---|
| Minimum | Recommended | |
| Operating system (OS) | Ubuntu 14.10, Mint 17.1 | |
| Processor (CPU) | Intel Core 2 Duo 2.4 GHz AMD Athlon X2 2.7 GHz |
Intel Core i5 3 GHz |
| System memory (RAM) | 4 GB | 8 GB |
| Hard disk drive (HDD) | 20 GB | 30 GB |
| Video card (GPU) | Nvidia or AMD OpenGL 4.1 compatible | OpenGL 4.2 compatible |
References
- ↑ Port Report: BioShock Infinite - The Port Report - last accessed on May 2023
- ↑ PC Specifications for BioShock Infinite Announced! - Irrational Games Blog - last accessed on May 2023
- ↑ BioShock Infinite PC Performance Thread - NeoGAF.com - last accessed on May 2023
- ↑ Reddit - Bioshock Epic Store 2K Launcher bypass - last accessed on 2023-06-09
- ↑ Verified by User:Harmiess on 2023-06-09
- ↑ Although configuration files are in plain text, there is a base-64 encoded section for user key mappings which prevents custom command creation. When decoded, the section contains a number of strings corresponding to command names from the .ini files, and approximately 300 or so bytes of binary data of unknown purpose - Comment from Port Report: BioShock Infinite - The Port Report
- ↑ Bioshock Infinite: Multiple Savegames Workaround Guide | gamefront.com
- ↑ Custom Xinput DLL with Impulse Trigger support on Xbox One Controllers - last accessed on May 2023
- ↑ PC Gaming Surround Sound Round-up - last accessed on May 2023
- ↑ Bluescreen and freez/crash - Steam Community Discussions for BioShock Infinite - last accessed on May 2023
- ↑ game freezes every 5-10 min! please help! - Irrational Games Forums
- ↑ Game crashing after 5-10 minutes - Steam Community Discussions - last accessed on May 2023
- ↑ BioShock Infinite: Fixing Lag / VSYNC - Steam Users' Forums (retrieved)
- ↑ Verified by User:TGrreny on 7 April 2013
- ↑ Bioshock Infinite texture streaming problem - YouTube - last accessed on May 2023
- ↑ Verified by User:LDK on 28 March 2013
- ↑ "Vsync Bug Fixed :D" posted by shankly1985 - OverClocker - last accessed on May 2023
- ↑ Verified by User:DoctorPacman on 17 November 2013
- ↑ "BioShock Infinite - Auto Aim on PC Version" - ThreePi on YouTube - last accessed on May 2023
- ↑ How to remove auto-aim - Steam Community Discussions for BioShock Infinite - last accessed on May 2023
- ↑ BioShock Infinite - Auto Aim on PC - Fix | Gameguru Mania
- ↑ KB+M Player and don't like Aim Assist? Try this. - Steam Community Discussions for BioShock Infinite - last accessed on May 2023
- ↑ Bioshock Infinite Alternate Tabbing Issues - 2K Forums - last accessed on May 2023
- ↑ Micro-Stuttering: Adaptive VSync (Nvidia) - Tom's Hardware
- ↑ Micro-Stuttering: Dynamic V-Sync (AMD) - Tom's Hardware
- ↑ [1]
- ↑ Audio Crackling - Irrational Games Forums - last accessed on May 2023
- ↑ [2]
- ↑ MacOS Catalina, 64-bit, 32-bit, and related Questions – Aspyr Support - last accessed on 9 June 2023
- ↑ Modern Warfare - A Modern Gameplay Mod - last accessed on May 2023

