This page is for the original release. For the updated Redux version, see Metro 2033 Redux.
General information
- Official manual
- Official Discord server for game series
- Last Light Forum - Unofficial forums
- Steam Community Discussions
Availability
| Source |
DRM |
Notes |
Keys |
OS |
| Retail |
|
|
|
|
| Steam (unavailable) |
|
|
|
|
- All versions require Steam DRM.
Monetization
DLC and expansion packs
| Name |
Notes |
|
| Gun Unlock |
|
|
| Ranger Pack |
|
|
| JP DLC 1 |
|
|
Essential improvements
Skip intro videos
Game data
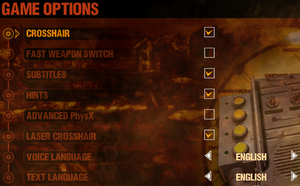
In-game general settings.
Configuration file(s) location
- A local copy of the settings is stored in
%LOCALAPPDATA%\4A Games\Metro 2033\user.cfg
- Contents of both instances of
user.cfg are identical, but only changes made to the Steam instance will be saved.
- A
user.cfg also exists in the installation folder but is only used on the first launch.
Save game data location
Game will overwrite user.cfg
| System |
Native |
Notes |
| OneDrive |
|
Requires enabling backup of the Documents folder in OneDrive on all computers. |
| Steam Cloud |
|
Approx. 1 MB available. |
Video
- This game uses vertical FOV. See FOV Calculator for help.
|
Edit user.cfg sick_fov[3]
|
- Edit this file:
- Change
sick_fov 45 to a number between 1 and 90 (inclusive) (the game runs best at 60-70 FOV). Remember, this is vertical rather than horizontal FOV.
|
|
Use Flawless Widescreen
|
- Download and install Flawless Widescreen.
- Download the Metro 2033 FWS Plugin.
- Unzip the archive into FWS installation folder.
- Launch FWS, select Metro 2033 from Installed Plugins section, adjust world FOV and hands FOV to your preference.
|
|
Edit user.cfg r_fullscreen[4]
|
- Edit this file:
- Change
r_fullscreen on to r_fullscreen off
|
- Off by default.
|
Edit user.cfg r_vsync[citation needed]
|
- Edit this file:
- Change
r_vsync off to r_vsync on
|
Resolution Issues
Some users have encountered issues such as not being able to set their native resolution; the game resetting their chosen resolution to a lower one; or the game's maximum available resolution being lower than their monitor's native resolution.[6] Such cases may be caused by the presence of multiple monitors attached to the computer, or attempting to play the game on an attached TV where larger resolutions may not be available. Possible solutions include unplugging any extra monitors[7] or setting the multi-monitor display mode in Windows to "Computer Only".
If the game won't show your native resolution and you are playing on a 4K TV with HDR, you will have to turn off HDR on the TV (turning off HDR in Windows won't work), and then the game will allow you to select a higher resolution from the in-game options.
Input
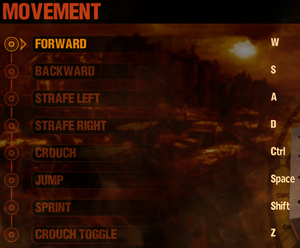
In-game key map settings.
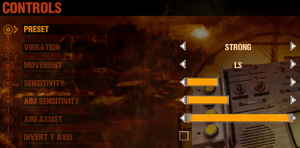
In-game general gamepad settings.
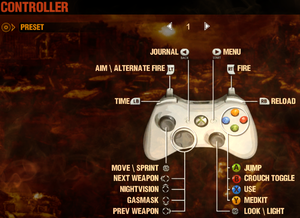
In-game gamepad layout settings.
Disable Xbox 360 Controller
|
Disable Xbox 360 Controller[8]
|
- A plugged in controller is automatically enabled and can't be easily turned off.
- Download the NoX360 archive.
- Extract it to the installation folder.
|
Audio
| Audio feature |
State |
Notes |
| Separate volume controls |
|
Master and Music levels only; to adjust further see Separate volume controls. |
| Surround sound |
|
Autodetection without setting. 7.1 audio supported. |
| Subtitles |
|
Conversations only; speech outside of conversation has no subtitles.[9] |
| Closed captions |
|
|
| Mute on focus lost |
|
|
| Royalty free audio |
|
|
Separate volume controls
- Game doesn't offer very detailed sound settings.
|
Better audio control[citation needed]
|
- Go to
<Steam-folder>\userdata\<user-id>\43110\remote\user.cfg.
- Edit
user.cfg.
- Change
s_dialogs_volume, s_effects_volume, s_master_volume and s_music_volume to your liking.
|
Localizations
| Language |
UI |
Audio |
Sub |
Notes |
| English |
|
|
|
|
| Czech |
|
|
|
|
| Dutch |
|
|
|
|
| French |
|
|
|
|
| German |
|
|
|
|
| Hungarian |
|
|
|
Fan translation. |
| Italian |
|
|
|
|
| Brazilian Portuguese |
|
|
|
Fan translation, download. |
| Japanese |
|
|
|
Retail only. |
| Polish |
|
|
|
|
| Russian |
|
|
|
|
| Spanish |
|
|
|
|
| Turkish |
|
|
|
Fan translation. Details missing—please edit this page
and add it. |
VR support
Issues fixed
Depistory glitched (High frame rate issues)
- High frame rate may create a collision bug that makes it impossible to enter the hole in the wall in depository level
|
Limit the Framerate to 60 FPS[10]
|
- Set max frame rate to 60 FPS in the video driver control panel or other software limiters.
|
Crash on startup
|
Install dependencies[11]
|
- Go to
install in the installation folder.
- Run the installers located there and try installing/launching again.
- If the problem still persists and refers to a missing
PhysXLoader.dll, install the latest NVIDIA PhysX System Software and manually copy the files from C:\Program Files (x86)\NVIDIA Corporation\PhysX\Common to the Metro 2033 installation folder.[12]
- If you keep seeing
nvcuda.dll related errors in the Event viewer (Windows Logs > Applications), copy the nvcuda.dll from C:\Windows\system32 into the game installation directory. If that doesn't help, try an older version of nvcuda.dll (such as 6.14.13.142 which can be found on ddl-files.com).
Notes
- It may be necessary to uninstall PhysX before reinstalling. There may also be stray copies of
PhysXLoader.dll in folders such as c:\windows\sysWow64\.
|
|
Crash to Desktop fix 2 Faulting module name: MSVCR80.dll
|
|
Occasionally the game will not relaunch, especially on Windows 10. Faulting module name: MSVCR80.dll in the Event viewer (Windows Logs > Applications), Fix by deleting the user.cfg %LOCALAPPDATA%\4A Games\Metro 2033\user.cfg
|
|
Disable Lucid Virtu MVP control panel[citation needed]
|
|
If you're running Lucid Virtu MVP, you will need to disable the control panel entirely, not just uncheck Metro 2033 from the application list.
|
|
Correct Windows date and time settings[13]
|
Crash during Depot level
|
How to fix[14]
|
|
This may be due to crouching while your companion is being dragged off the cart. Just don't do that.
|
Game crash after level loading
|
Restart the chapter[citation needed]
|
Vertical black bar lines appear
|
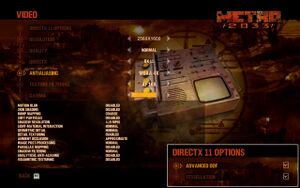
Disable Advanced DOF in DirectX 11 Options
|
|
Switch from DirectX 11 to 9[15]
|
Low FPS fix
|
Eliminate demanding commands by renaming user.cfg in the install folder[16]
|
- Go the the game's install directory and rename the user.cfg file to user.txt. Then delete the user.cfg located in
%LOCALAPPDATA%\4A Games\Metro 2033\.
- Run the game to allow it to regenerate the user.cfg file in
%LOCALAPPDATA%\4A Games\Metro 2033\.
- Then open the new user.cfg file in
%LOCALAPPDATA%\4A Games\Metro 2033\ and copy over all the commands from user.txt that start with bind (they're usually at the beginning of the file).
|
|
Set priority to High or Realtime in Task Manager[citation needed]
|
- Setting can be saved with Process Lasso.
- A priority of Realtime can cause audio glitches.
|
|
Set Max pre-rendered frames between 1-4 (Nvidia) or FlipQueueSize between 1-3 (AMD)[citation needed]
|
|
Might not be selectable in the builtin control panels on newer driver versions from either manufacturer. For Nvidia, this can be worked around by using Nvidia Profile Inspector. For AMD, open Regedit and go to HKEY_LOCAL_MACHINE\SYSTEM\CurrentControlSet\Control\Class\{4D36E968-E325-11CE-BFC1-08002BE10318}\0000\UMD, create a new binary value called FlipQueueSize with a (hex) value of 3x 00, with x being a value between 1-3.
|
Black screen
|
Deactivate second monitor[citation needed]
|
Mouse sensitivity issues
- The game applies different sensitivities for vertical and horizontal movement. It also has sensitivity settings that are too high for some players who prefer slower movement.
|
Use DInputWrapper[17]
|
|
Install DInputWrapper.
- You must place both the dinput8.dll and one of the sensitivity files in your installation folder. Ensure that you rename the sensitivity file to sensitivity.txt
|
Toggle aim down sights
|
Create AutoHotkey script
|
- Download AutoHotkey
- Copy the code to the clipboard (CTRL+C).
- Open AutoHotkey, go to File>Edit script, paste the code in Notepad.
- Change "Fallout4" to Metro 2033 in the Notepad, save.
- Reload Script in AutoHotkey
|
Stretched display to 16:9 on 21:9 monitors
Other information
API
| Technical specs |
Supported |
Notes |
| Direct3D |
9.0c, 10, 11 |
|
| Shader Model support |
3.0, 4.0, 5.0 |
|
Middleware
System requirements
| Windows |
|
Minimum |
Recommended |
| Operating system (OS) |
XP, Vista |
7 |
| Processor (CPU) |
Dual Core
| Dual Core 3.0 GHz
Quad Core |
| System memory (RAM) |
1 GB |
2 GB |
| Hard disk drive (HDD) |
12 GB | |
| Video card (GPU) |
Nvidia GeForce 8800
Nvidia GeForce GT220
DirectX 9 compatible
Shader model 3.0 support |
Nvidia GeForce GTX 260
DirectX 10 compatible |
Notes
- ↑ 1.0 1.1 Notes regarding Steam Play (Linux) data:
References


