
Difference between revisions of "Call of Duty: Black Ops III"
From PCGamingWiki, the wiki about fixing PC games
Feliciano12 (talk | contribs) m |
AlphaYellow (talk | contribs) |
||
| (44 intermediate revisions by 14 users not shown) | |||
| Line 15: | Line 15: | ||
{{Infobox game/row/reception|OpenCritic|1514/call-of-duty-black-ops-iii|79}} | {{Infobox game/row/reception|OpenCritic|1514/call-of-duty-black-ops-iii|79}} | ||
{{Infobox game/row/reception|IGDB|call-of-duty-black-ops-iii|77}} | {{Infobox game/row/reception|IGDB|call-of-duty-black-ops-iii|77}} | ||
| + | |taxonomy = | ||
| + | {{Infobox game/row/taxonomy/monetization | One-time game purchase, DLC }} | ||
| + | {{Infobox game/row/taxonomy/microtransactions | }} | ||
| + | {{Infobox game/row/taxonomy/modes | Singleplayer, Multiplayer }} | ||
| + | {{Infobox game/row/taxonomy/pacing | Real-time }} | ||
| + | {{Infobox game/row/taxonomy/perspectives | First-person }} | ||
| + | {{Infobox game/row/taxonomy/controls | Direct control }} | ||
| + | {{Infobox game/row/taxonomy/genres | Action, FPS, Shooter }} | ||
| + | {{Infobox game/row/taxonomy/sports | }} | ||
| + | {{Infobox game/row/taxonomy/vehicles | Flight }} | ||
| + | {{Infobox game/row/taxonomy/art styles | Realistic }} | ||
| + | {{Infobox game/row/taxonomy/themes | Sci-fi }} | ||
| + | {{Infobox game/row/taxonomy/series | Call of Duty: Black Ops }} | ||
|steam appid = 311210 | |steam appid = 311210 | ||
|steam appid side = 366843,366841,437350,437351 | |steam appid side = 366843,366841,437350,437351 | ||
|gogcom id = | |gogcom id = | ||
|hltb = 27127 | |hltb = 27127 | ||
| + | |lutris = call-of-duty-black-ops-iii | ||
|strategywiki = Call of Duty: Black Ops III | |strategywiki = Call of Duty: Black Ops III | ||
|mobygames = call-of-duty-black-ops-iii | |mobygames = call-of-duty-black-ops-iii | ||
|wikipedia = Call of Duty: Black Ops III | |wikipedia = Call of Duty: Black Ops III | ||
|winehq = 18474 | |winehq = 18474 | ||
| + | |license = | ||
}} | }} | ||
| − | |||
'''Key points''' | '''Key points''' | ||
{{++}} Features split-screen with multi-monitor support (one monitor per player). | {{++}} Features split-screen with multi-monitor support (one monitor per player). | ||
| − | {{++}} Official modding tools and unranked dedicated servers available.<ref> | + | {{++}} Official modding tools and unranked dedicated servers available.<ref>{{Refurl|url=https://steamcommunity.com/games/311210/announcements/detail/845939098881203473|title=Update 15.1 / Mod Tools Open Beta - Patch Notes|date=17 May 2023}}</ref><ref name="DediStuff">[https://www.pcgamer.com/call-of-duty-black-ops-3-gets-unranked-dedicated-servers/ Call of Duty: Black Ops 3 gets unranked dedicated servers | PC Gamer]</ref> |
| − | |||
{{--}} By default, some settings are restricted depending on graphics card, but a fix is available [[#Make all settings available|here]]. | {{--}} By default, some settings are restricted depending on graphics card, but a fix is available [[#Make all settings available|here]]. | ||
{{--}} There may be some performance issues, but a fix is available [[#Issues_fixed|here]]. | {{--}} There may be some performance issues, but a fix is available [[#Issues_fixed|here]]. | ||
| Line 40: | Line 53: | ||
==Availability== | ==Availability== | ||
{{Availability| | {{Availability| | ||
| − | {{Availability/row| Retail | | Steam | Contains 6 | + | {{Availability/row| Retail | | Steam | Contains 6 DVDs. | | Windows }} |
{{Availability/row| Amazon.com | B00WRGU0FA | Steam | Digital Deluxe Edition. | | Windows, OS X }} | {{Availability/row| Amazon.com | B00WRGU0FA | Steam | Digital Deluxe Edition. | | Windows, OS X }} | ||
{{Availability/row| Steam | 311210 | Steam | | | Windows, OS X }} | {{Availability/row| Steam | 311210 | Steam | | | Windows, OS X }} | ||
| Line 63: | Line 76: | ||
==Essential improvements== | ==Essential improvements== | ||
| − | {{ii}} All of the following tweaks are applicable also for [[Call of Duty: Black Ops IIII|Black Ops 4]], and they may have similar names. This is due to the fact that in both games a relatively identical engine is used and it has been modified further for this game. | + | {{ii}} All of the following tweaks are applicable also for [[Call of Duty: Black Ops IIII|Black Ops 4]], and they may have similar names. This is due to the fact that in both games, a relatively identical engine is used and it has been modified further for this game. |
| + | |||
===Skip intro videos=== | ===Skip intro videos=== | ||
| − | {{Fixbox|description=Delete {{file|BO3_Global_Logo_LogoSequence.mkv}} found in | + | {{Fixbox|description=Delete {{file|BO3_Global_Logo_LogoSequence.mkv}} found in {{folder|{{P|game}}\video\}}|ref=<ref>{{Refurl|url=https://www.reddit.com/r/blackops3/comments/3rwlry/pc_any_way_to_get_rid_of_the_opening_video/cwrxbt6/|title=Sethos88 commented on Any way to get rid of the opening video?|date=17 May 2023}}</ref>}} |
| − | {{ii}} | + | {{ii}} Other videos can also be deleted to reduce the waiting time between level changes. |
===Increased loading speed levels=== | ===Increased loading speed levels=== | ||
| − | |||
{{Fixbox|description=Edit config.ini|ref={{cn|date=March 2019}}|fix= | {{Fixbox|description=Edit config.ini|ref={{cn|date=March 2019}}|fix= | ||
# Go to the [[#Game data|configuration file location]]. | # Go to the [[#Game data|configuration file location]]. | ||
| − | # Open | + | # Open {{file|config.ini}}. |
# Find the line <code>MaxFPS</code> and set the value to <code>0</code>. | # Find the line <code>MaxFPS</code> and set the value to <code>0</code>. | ||
| − | # Save | + | # Save the changes. |
| − | |||
| − | |||
| − | + | '''Notes''' | |
| − | {{ii}} | + | {{ii}} Changing this option disables FPS limiting altogether, which increases the loading speed of the levels and also allows the game to get a little more FPS than it was even at 1000. |
| − | |||
| − | |||
| − | |||
| − | |||
| − | |||
| − | |||
| − | |||
}} | }} | ||
| Line 92: | Line 96: | ||
{{--}} Many graphics cards are able to handle high graphical settings, but by default the game hides/restricts some settings. | {{--}} Many graphics cards are able to handle high graphical settings, but by default the game hides/restricts some settings. | ||
| − | {{Fixbox|description=Edit config.ini<ref> | + | {{Fixbox|description=Edit config.ini<ref>{{Refurl|url=https://twitter.com/pcdev/status/715244291992469504|title=pcdev on Twitter: @JarnoSomers You can edit your config.ini in the players folder and change RestrictGraphicsOptions to 0|date=9 June 2023}}</ref>|fix= |
# Go to the [[#Game data|configuration file location]]. | # Go to the [[#Game data|configuration file location]]. | ||
| − | # Open | + | # Open {{file|config.ini}}. |
# Find the line <code>RestrictGraphicsOptions</code> and edit the value from <code>1</code> to <code>0</code>. | # Find the line <code>RestrictGraphicsOptions</code> and edit the value from <code>1</code> to <code>0</code>. | ||
| − | # Save | + | # Save the changes. |
'''Notes''' | '''Notes''' | ||
| − | {{ii}} If the game is installed in the default folder | + | {{ii}} If the game is installed in the default folder, the chosen file editor might need to be run as administrator. |
}} | }} | ||
| Line 106: | Line 110: | ||
{{Fixbox|description=Start the game in mod mode|fix= | {{Fixbox|description=Start the game in mod mode|fix= | ||
| − | + | * Add <code>+set fs_game offlinemp</code> to the game's start parameters. | |
| − | {{ii}} "offlinemp" here is just chosen | + | {{ii}} "offlinemp" here is just chosen as an example, any name will work. The game thereby creates a new mod directory under \players\mods\ with separate configuration files. |
}} | }} | ||
| Line 125: | Line 129: | ||
===[[Glossary:Save game cloud syncing|Save game cloud syncing]]=== | ===[[Glossary:Save game cloud syncing|Save game cloud syncing]]=== | ||
{{Save game cloud syncing | {{Save game cloud syncing | ||
| − | |discord | + | |discord = |
| − | |discord notes | + | |discord notes = |
| − | |epic games | + | |epic games launcher = |
| − | |epic games | + | |epic games launcher notes = |
| − | |gog galaxy | + | |gog galaxy = |
| − | |gog galaxy notes | + | |gog galaxy notes = |
| − | |origin | + | |origin = |
| − | |origin notes | + | |origin notes = |
| − | |steam cloud | + | |steam cloud = true |
| − | |steam cloud notes | + | |steam cloud notes = Some settings only. |
| − | | | + | |ubisoft connect = |
| − | | | + | |ubisoft connect notes = |
| − | |xbox cloud | + | |xbox cloud = |
| − | |xbox cloud notes | + | |xbox cloud notes = |
}} | }} | ||
| Line 158: | Line 162: | ||
|ultrawidescreen notes = HUD and menu is stretched. Attempting to change resolutions during gameplay will result in stretching/compression. Hub sections are stretched, but missions work fine. | |ultrawidescreen notes = HUD and menu is stretched. Attempting to change resolutions during gameplay will result in stretching/compression. Hub sections are stretched, but missions work fine. | ||
|4k ultra hd = true | |4k ultra hd = true | ||
| − | |4k ultra hd notes = <ref name="Gamescom">[https:// | + | |4k ultra hd notes = <ref name="Gamescom">[https://www.treyarch.com/blog/2015-08/pc-update-from-gamescom-2015 PC Update from Gamescom 2015 | Community]</ref> |
|fov = true | |fov = true | ||
| − | |fov notes = 65-120° with 80º as default value.<ref> | + | |fov notes = 65-120° with 80º as default value.<ref>{{Refurl|url=https://twitter.com/pcdev/status/661995983044243456|title=pcdev on Twitter: BlackOps3 PC FOV range is 65-120; default 80.|date=17 May 2023}}</ref> |
|windowed = true | |windowed = true | ||
|windowed notes = | |windowed notes = | ||
| Line 166: | Line 170: | ||
|borderless windowed notes = | |borderless windowed notes = | ||
|anisotropic = true | |anisotropic = true | ||
| − | |anisotropic notes = Named as '''Texture Filtering''' in the options (Low = 2x, Medium = Per Material, and High = 16x) | + | |anisotropic notes = Named as '''Texture Filtering''' in the options (Low = 2x, Medium = Per Material, and High = 16x). |
|antialiasing = true | |antialiasing = true | ||
|antialiasing notes = [[FXAA]], [[SMAA]] (1x and Temporal 2x), Filmic [[SMAA]] (1x and Temporal 2x), and [[SSAA]] through '''Render Resolution''' option. SMAA T2X and Filmic SMAA options are disabled for SLI/Crossfire systems. | |antialiasing notes = [[FXAA]], [[SMAA]] (1x and Temporal 2x), Filmic [[SMAA]] (1x and Temporal 2x), and [[SSAA]] through '''Render Resolution''' option. SMAA T2X and Filmic SMAA options are disabled for SLI/Crossfire systems. | ||
| + | |upscaling = false | ||
| + | |upscaling tech = | ||
| + | |upscaling notes = | ||
|vsync = true | |vsync = true | ||
| − | |vsync notes = Double | + | |vsync notes = Double buffering. See [[#Triple buffering|here]] for triple buffering. |
|60 fps = true | |60 fps = true | ||
|60 fps notes = | |60 fps notes = | ||
|120 fps = true | |120 fps = true | ||
| − | |120 fps notes = Multiplayer is capped at 60 FPS | + | |120 fps notes = Multiplayer is capped at 60 FPS because VSync is enabled by default. Disabling VSync allows the FPS cap to go up to 240 FPS in Multiplayer using in-game menu. Cap can be unlimited by changing <code>com_maxfps</code> value to 0 in the config file or with in-game console while using any mod. |
| − | Unlimited in Zombies and Single Player.<ref> | + | Unlimited in Zombies and Single Player.<ref>{{Refurl|url=https://twitter.com/pcdev/status/629379184561926144|title=pcdev on Twitter: @thebadbadrobot Up to 200 in ranked mp, unlimited everywhere else.|date=9 June 2023}}</ref> |
| − | |hdr = | + | |hdr = false |
|hdr notes = | |hdr notes = | ||
| + | |ray tracing = false | ||
| + | |ray tracing notes = | ||
|color blind = true | |color blind = true | ||
|color blind notes = | |color blind notes = | ||
| Line 185: | Line 194: | ||
{{Fixbox|description=Edit config.ini|ref={{cn|date=February 2018}}|fix= | {{Fixbox|description=Edit config.ini|ref={{cn|date=February 2018}}|fix= | ||
# Go to the [[#Game data|configuration file location]]. | # Go to the [[#Game data|configuration file location]]. | ||
| − | # Open | + | # Open {{file|config.ini}}. |
# Find the line <code>BackbufferCount</code> and edit the value from <code>2</code> to <code>3</code>. | # Find the line <code>BackbufferCount</code> and edit the value from <code>2</code> to <code>3</code>. | ||
| − | # Save | + | # Save the changes. |
}} | }} | ||
| Line 202: | Line 211: | ||
|invert mouse y-axis = true | |invert mouse y-axis = true | ||
|invert mouse y-axis notes = | |invert mouse y-axis notes = | ||
| − | |touchscreen = | + | |touchscreen = false |
|touchscreen notes = | |touchscreen notes = | ||
|controller support = true | |controller support = true | ||
| Line 237: | Line 246: | ||
|other button prompts notes= | |other button prompts notes= | ||
|button prompts = Xbox, DualShock | |button prompts = Xbox, DualShock | ||
| − | |button prompts notes = Natively supports both the Xbox One and the DualShock 4 controller without any 3rd party tools required. | + | |button prompts notes = Natively supports both the Xbox One and the DualShock 4 (V1 only) controller without any 3rd party tools required. |
|controller hotplug = true | |controller hotplug = true | ||
|controller hotplug notes = | |controller hotplug notes = | ||
| Line 243: | Line 252: | ||
|haptic feedback notes = | |haptic feedback notes = | ||
|simultaneous input = true | |simultaneous input = true | ||
| − | |simultaneous input notes = Aiming down sights using both causes camera to zoom in and out<ref> | + | |simultaneous input notes = Aiming down sights using both causes camera to zoom in and out<ref>{{Refurl|url=https://www.reddit.com/r/SteamController/comments/46pjr9/support_recent_black_ops_3_update_broke_config/?st=j9u99mi0&sh=555a6842|title=Recent Black Ops 3 update broke config|date=May 2023}}</ref>. |
|steam input api = unknown | |steam input api = unknown | ||
|steam input api notes = | |steam input api notes = | ||
| Line 277: | Line 286: | ||
|mute on focus lost notes = | |mute on focus lost notes = | ||
|eax support = | |eax support = | ||
| − | |eax support notes = | + | |eax support notes = |
| + | |royalty free audio = unknown | ||
| + | |royalty free audio notes = | ||
}} | }} | ||
| Line 366: | Line 377: | ||
|audio = true | |audio = true | ||
|subtitles = true | |subtitles = true | ||
| − | |notes = | + | |notes = |
| + | |fan = | ||
| + | }} | ||
| + | {{L10n/switch | ||
| + | |language = Spanish - Latin America | ||
| + | |interface = true | ||
| + | |audio = true | ||
| + | |subtitles = true | ||
| + | |notes = See [[#Latin American Spanish audio mods|Latin American Spanish audio mods]]. | ||
|fan = | |fan = | ||
}} | }} | ||
| + | }} | ||
| + | |||
| + | ===Latin American Spanish audio mods=== | ||
| + | {{Fixbox|description=Full Game: File replacement|fix= | ||
| + | * Replace the Castilian Spanish audio files with the Latin American Spanish audio files of the PlayStation 4 version following this [https://steamcommunity.com/sharedfiles/filedetails/?id=2819323099 guide]. | ||
| + | |||
| + | '''Notes''' | ||
| + | {{++}} All game modes available. | ||
| + | {{--}} Has some minor sound bugs. | ||
| + | }} | ||
| + | |||
| + | {{Fixbox|description=Zombies Maps: Workshop mods|fix= | ||
| + | * Download the collection of audio mods in Latin American Spanish of all Zombies maps [https://steamcommunity.com/sharedfiles/filedetails/?id=2822435465 here]. | ||
| + | |||
| + | '''Notes''' | ||
| + | {{++}} It also includes subtitles in Latin American Spanish. | ||
| + | }} | ||
| + | |||
| + | ==Network== | ||
| + | {{Image|BLOPS3Network.png|Network settings.}} | ||
| + | {{Image|BLOPS3ChatVoice.png|Voice Chat settings.}} | ||
| + | {{Image|BLOPS3ChatText.png|Text Chat settings.}} | ||
| + | {{Network/Multiplayer | ||
| + | |local play = true | ||
| + | |local play players = 2 | ||
| + | |local play modes = Co-op, Versus | ||
| + | |local play notes = <ref name="Gamescom"/> | ||
| + | |lan play = true | ||
| + | |lan play players = | ||
| + | |lan play modes = | ||
| + | |lan play notes = Must have an active internet connection regardless for DRM purposes. | ||
| + | |online play = true | ||
| + | |online play players = 18 | ||
| + | |online play modes = Co-op, Versus | ||
| + | |online play notes = Co-op is limited to 4 players. | ||
| + | |asynchronous = | ||
| + | |asynchronous notes = | ||
| + | }}{{Network/Connections | ||
| + | |matchmaking = true | ||
| + | |matchmaking notes = | ||
| + | |p2p = true | ||
| + | |p2p notes = | ||
| + | |dedicated = true | ||
| + | |dedicated notes = For Ranked matches<ref name="Gamescom"/><ref>{{Refurl|url=https://twitter.com/pcdev/status/592767945794785283|title=pcdev on Twitter: BlackOps3 PC will use 100% dedicated servers for all ranked matches. (Same as previous BlackOps PC titles.) This is how we do it.|date=17 May 2023}}</ref>. | ||
| + | |self-hosting = true | ||
| + | |self-hosting notes = Unranked only<ref name="DediStuff"/>. | ||
| + | |direct ip = false | ||
| + | |direct ip notes = | ||
| + | }}{{Network/Ports | ||
| + | |tcp = 27014-27050 | ||
| + | |udp = 3478, 4379-4380, 27000-27031, 27036 | ||
| + | |upnp = true | ||
}} | }} | ||
| Line 413: | Line 484: | ||
|play area room-scale = | |play area room-scale = | ||
|play area room-scale notes = | |play area room-scale notes = | ||
| − | |||
| − | |||
| − | |||
| − | |||
| − | |||
| − | |||
| − | |||
| − | |||
| − | |||
| − | |||
| − | |||
| − | |||
| − | |||
| − | |||
| − | |||
| − | |||
| − | |||
| − | |||
| − | |||
| − | |||
| − | |||
| − | |||
| − | |||
| − | |||
| − | |||
| − | |||
| − | |||
| − | |||
| − | |||
| − | |||
| − | |||
| − | |||
| − | |||
| − | |||
| − | |||
| − | |||
}} | }} | ||
| Line 455: | Line 490: | ||
{{ii}} Remove outdated file library | {{ii}} Remove outdated file library | ||
{{Fixbox|description=Delete d3dcompiler_46.dll|ref={{cn|date=May 2019}}|fix= | {{Fixbox|description=Delete d3dcompiler_46.dll|ref={{cn|date=May 2019}}|fix= | ||
| − | # Go to | + | # Go to {{folder|{{p|game}}}}. |
| − | # Remove | + | # Remove {{file|d3dcompiler_46.dll}}. |
| + | |||
| + | '''Notes''' | ||
{{ii}} Deleting this file does not affect the stability of the launch of the game. However, it is clearly outdated and does not allow the game to gain access to a newer version of the library from the Windows system, and blocks access to it, since it is located next to the game execution file. | {{ii}} Deleting this file does not affect the stability of the launch of the game. However, it is clearly outdated and does not allow the game to gain access to a newer version of the library from the Windows system, and blocks access to it, since it is located next to the game execution file. | ||
}} | }} | ||
| − | + | ===Game does not take advantage of the entire VRAM amount available=== | |
{{Fixbox|description=Edit config.ini|ref={{cn|date=January 2019}}|fix= | {{Fixbox|description=Edit config.ini|ref={{cn|date=January 2019}}|fix= | ||
# Go to the [[#Game data|configuration file location]]. | # Go to the [[#Game data|configuration file location]]. | ||
| − | # Open | + | # Open {{file|config.ini}}. |
# Find the line <code>VideoMemory</code> and edit the value from <code>0.75</code> or <code>0.90</code> to <code>1</code>. | # Find the line <code>VideoMemory</code> and edit the value from <code>0.75</code> or <code>0.90</code> to <code>1</code>. | ||
# Also check the parameter <code>StreamMinResident</code> and change its value if required from <code>1</code> to <code> 0</code>. | # Also check the parameter <code>StreamMinResident</code> and change its value if required from <code>1</code> to <code> 0</code>. | ||
| − | # Save | + | # Save the changes. |
'''Notes''' | '''Notes''' | ||
| Line 473: | Line 510: | ||
}} | }} | ||
| − | + | ===Frame rate isn't smooth=== | |
{{Fixbox|description=Edit config.ini|ref={{cn|date=January 2019}}|fix= | {{Fixbox|description=Edit config.ini|ref={{cn|date=January 2019}}|fix= | ||
# Go to the [[#Game data|configuration file location]]. | # Go to the [[#Game data|configuration file location]]. | ||
| − | # Open | + | # Open {{file|config.ini}}. |
# Find the line <code>SmoothFramerate</code> and set the value to <code>0</code> from <code>1</code>. | # Find the line <code>SmoothFramerate</code> and set the value to <code>0</code> from <code>1</code>. | ||
| − | # Save | + | # Save the changes. |
| + | |||
| + | '''Notes''' | ||
{{ii}} This setting helps to prevent a strong drop in frame rates at certain points and also increases the smoothness of the gameplay. | {{ii}} This setting helps to prevent a strong drop in frame rates at certain points and also increases the smoothness of the gameplay. | ||
{{--}} May increase input lag and possibly performance degradation. | {{--}} May increase input lag and possibly performance degradation. | ||
}} | }} | ||
| − | + | ===Game isn't responsive enough=== | |
{{Fixbox|description=Edit config.ini|ref={{cn|date=March 2019}}|fix= | {{Fixbox|description=Edit config.ini|ref={{cn|date=March 2019}}|fix= | ||
# Go to the [[#Game data|configuration file location]]. | # Go to the [[#Game data|configuration file location]]. | ||
| − | # Open | + | # Open {{file|config.ini}}. |
# Find the line <code>MaxFrameLatency</code> and set the value to <code>4</code> or <code>0</code>. | # Find the line <code>MaxFrameLatency</code> and set the value to <code>4</code> or <code>0</code>. | ||
| − | # Save | + | # Save the changes. |
| − | # | + | # Also use [https://community.pcgamingwiki.com/files/file/84-d3doverrider/ D3DOverrider] to force triple buffering on. |
| + | |||
| + | '''Notes''' | ||
{{ii}} This greatly increases the smoothness and also greatly prevents a drop in the frame rate. | {{ii}} This greatly increases the smoothness and also greatly prevents a drop in the frame rate. | ||
| − | {{--}} Usually the use of triple buffering only works with vertical sync enabled. But instead of using vertical synchronization, | + | {{--}} Usually the use of triple buffering only works with vertical sync enabled. But instead of using vertical synchronization, FastSync can be used in the settings of the Nvidia video card driver, as well as turning off vertical synchronization in the settings of the game itself. A similar option for AMD owners is called Enhanced Sync. This mode will not limit the FPS, but also allows the user to activate triple buffering. |
{{--}} The use of a larger number of prepared frames and the use of a triple buffer may increase input lags. | {{--}} The use of a larger number of prepared frames and the use of a triple buffer may increase input lags. | ||
}} | }} | ||
| − | + | ===CPU usage sometimes goes too high on some configurations=== | |
{{Fixbox|description=Edit config.ini|ref={{cn|date=January 2019}}|fix= | {{Fixbox|description=Edit config.ini|ref={{cn|date=January 2019}}|fix= | ||
# Go to the [[#Game data|configuration file location]]. | # Go to the [[#Game data|configuration file location]]. | ||
| − | # Open | + | # Open {{file|config.ini}}. |
# Find the line <code>SerializeRender</code> and edit the value from <code>0</code> to <code>2</code>. | # Find the line <code>SerializeRender</code> and edit the value from <code>0</code> to <code>2</code>. | ||
| − | # Save | + | # Save the changes. |
| − | {{ii}} | + | |
| + | '''Notes''' | ||
| + | {{ii}} This might cause a slight decrease in FPS, but will make it stable and reduce the frametime, as well as improving the responsiveness in general. | ||
| + | }} | ||
| + | |||
| + | ===FPS drops=== | ||
| + | {{ii}} This is for copies on the Steam version of the game. | ||
| + | |||
| + | {{Fixbox|description=Launching the game in offline mode|fix= | ||
| + | # Open Steam and select the Steam menu in the top left. | ||
| + | # Select "Go Offline...". | ||
| + | # Select "ENTER OFFLINE MODE". | ||
| + | # Launch the game. | ||
| + | |||
| + | '''Notes''' | ||
| + | {{--}} As the title suggests, online services will be unavailable such as multiplayer. | ||
}} | }} | ||
===Game changes microphone gain at launch=== | ===Game changes microphone gain at launch=== | ||
| − | {{Fixbox|description=Modify microphone gain ingame|ref=<ref> | + | {{Fixbox|description=Modify microphone gain ingame|ref=<ref>{{Refurl|url=https://www.youtube.com/watch?v=jV4ogDophAc|title=Black Ops 3 (PC) Microphone Volume Fix - YouTube|date=May 2023}}</ref>|fix= |
# Start up the game and open the menu, select {{key|OPTIONS}} and after select {{key|CHAT}} that has a headset icon. | # Start up the game and open the menu, select {{key|OPTIONS}} and after select {{key|CHAT}} that has a headset icon. | ||
| − | # Change {{code|Voice Chat Record Level}} to | + | # Change {{code|Voice Chat Record Level}} to the preferred microphone gain. |
}} | }} | ||
===Game crashes on startup=== | ===Game crashes on startup=== | ||
| − | {{Fixbox|description=Add anti-virus exclusion|ref=<ref> | + | {{ii}} Antivrus software like AVG or Avast! are known to cause the game to crash. |
| − | + | {{Fixbox|description=Add anti-virus exclusion|ref=<ref>{{Refurl|url=https://steamcommunity.com/app/311210/discussions/0/357285562497030286/|title=Steam Community|date=9 June 2023}}</ref>|fix= | |
| − | # Add the entire installation folder to the exclusion list on either | + | # Add the entire installation folder to the exclusion list on either antivirus. |
| − | {{ii}} For better | + | {{ii}} For better results, uninstall the antivirus and disable the built-in Windows Defender. |
}} | }} | ||
| + | {{ii}} If either Actual Window Minimizer or Actual Window Manager are installed, they will cause the game to crash. | ||
{{Fixbox|description=Add exception for Actual Window Minimizer or Actual Window Manager|fix= | {{Fixbox|description=Add exception for Actual Window Minimizer or Actual Window Manager|fix= | ||
| − | + | * Add the main executable file to the exclusion list on either of the programs to fix. | |
| − | |||
}} | }} | ||
| − | ===The game causes | + | ===The game causes the entire system to hang and the computer itself completely before rebooting=== |
{{Fixbox|description=Move the paging file|ref={{cn|date=January 2019}}|fix= | {{Fixbox|description=Move the paging file|ref={{cn|date=January 2019}}|fix= | ||
| − | #Right | + | # Right click Computer → Choose Properties. |
| − | #Click Advanced System Settings. | + | # Click Advanced System Settings. |
| − | #Performance Tab | + | # Click Performance Tab → Click Settings. |
| − | #Advanced Settings Tab | + | # Click "Advanced Settings Tab → Virtual Memory". |
| − | #Uncheck Automaticaly manage page file. | + | # Click "Change". |
| − | #Clicking on disk will allow | + | # Uncheck "Automaticaly manage page file". |
| − | #Set System managed size. | + | # Clicking on disk will allow the paging file to be set on any disk, except system. |
| − | #Save | + | # Set "System managed size". |
| + | # Save the changes and reboot Windows. | ||
| + | |||
| + | '''Notes''' | ||
{{ii}} In fact, this problem is mainly related to the use of a cheap and low-quality SSD disk based on the type of TLC memory or hard disk with errors. | {{ii}} In fact, this problem is mainly related to the use of a cheap and low-quality SSD disk based on the type of TLC memory or hard disk with errors. | ||
| + | }} | ||
| + | |||
| + | ===Scoreboard and Pause Menu not working using controller=== | ||
| + | {{Fixbox|description=Reset controls to default|fix= | ||
| + | # Click on the on-screen {{key|Menu}} button. | ||
| + | # Select {{key|OPTIONS}} Tab and after it, select {{key|CONTROLS}}. | ||
| + | # Select {{key|Reset to Default}}. | ||
}} | }} | ||
| Line 560: | Line 626: | ||
|windows 32-bit exe = false | |windows 32-bit exe = false | ||
|windows 64-bit exe = true | |windows 64-bit exe = true | ||
| + | |windows arm app = | ||
|windows exe notes = | |windows exe notes = | ||
|mac os x powerpc app = | |mac os x powerpc app = | ||
| − | |macos intel 32-bit app = | + | |macos intel 32-bit app = false |
|macos intel 64-bit app = true | |macos intel 64-bit app = true | ||
| + | |macos arm app = | ||
|macos app notes = <ref name="osx release"/> | |macos app notes = <ref name="osx release"/> | ||
| − | |linux 32-bit executable= | + | |linux 32-bit executable= |
| − | |linux 64-bit executable= | + | |linux 64-bit executable= |
| + | |linux arm app = | ||
|linux executable notes = | |linux executable notes = | ||
}} | }} | ||
Latest revision as of 17:12, 19 January 2024
 |
|
| Developers | |
|---|---|
| Treyarch | |
| macOS (OS X) | Aspyr Media[1] |
| Publishers | |
| Activision | |
| Engines | |
| IW engine | |
| Release dates | |
| Windows | November 6, 2015 |
| macOS (OS X) | April 4, 2019[1] |
| Reception | |
| Metacritic | 73 |
| OpenCritic | 79 |
| IGDB | 77 |
| Taxonomy | |
| Monetization | One-time game purchase, DLC |
| Modes | Singleplayer, Multiplayer |
| Pacing | Real-time |
| Perspectives | First-person |
| Controls | Direct control |
| Genres | Action, FPS, Shooter |
| Vehicles | Flight |
| Art styles | Realistic |
| Themes | Sci-fi |
| Series | Call of Duty: Black Ops |
| Call of Duty: Black Ops | |
|---|---|
| Subseries of Call of Duty | |
| Call of Duty: World at War | 2008 |
| Call of Duty: Black Ops | 2010 |
| Call of Duty: Black Ops II | 2012 |
| Call of Duty: Black Ops III | 2015 |
| Call of Duty: Black Ops IIII | 2018 |
| Call of Duty: Black Ops Cold War | 2020 |
Key points
- Features split-screen with multi-monitor support (one monitor per player).
- Official modding tools and unranked dedicated servers available.[2][3]
- By default, some settings are restricted depending on graphics card, but a fix is available here.
- There may be some performance issues, but a fix is available here.
General information
- CallofDutyMaps - A detailed Website for all included multiplayer maps.
- GeForce Graphics Guide
- Steam Community Discussions
Availability
| Source | DRM | Notes | Keys | OS |
|---|---|---|---|---|
| Retail | Contains 6 DVDs. | |||
| Amazon.com | Digital Deluxe Edition. | |||
| Steam |
- All versions require Steam and Arxan Anti-Tamper DRM.
Version differences
- Multiplayer Starter Pack: Starter edition, contains Multiplayer, no campaign and Zombies. Can be upgraded to Zombies Chronicles Edition or Zombies Deluxe.
- Zombies Chronicles Edition: Basic edition, contains the base game and Zombies Chronicles.
- Zombies Deluxe: Deluxe edition, contains the base game, the Season Pass, Zombies Chronicles and 3 personalization packs.
DLC and expansion packs
| Name | Notes | |
|---|---|---|
| Season Pass | ||
| Awakening | Included in the Season Pass. | |
| Descent | Included in the Season Pass. | |
| Eclipse | Included in the Season Pass. | |
| The Giant Zombies Map | Included in the Season Pass. | |
| NUK3TOWN Bonus Map | Originally a pre-order bonus, later made free. | |
| Salvation | Included in the Season Pass. | |
| Zombies Chronicles |
Essential improvements
- All of the following tweaks are applicable also for Black Ops 4, and they may have similar names. This is due to the fact that in both games, a relatively identical engine is used and it has been modified further for this game.
Skip intro videos
Delete BO3_Global_Logo_LogoSequence.mkv found in <path-to-game>\video\[4]
|
|---|
- Other videos can also be deleted to reduce the waiting time between level changes.
Increased loading speed levels
| Edit config.ini[citation needed] |
|---|
Notes
|
Make all settings available
- Many graphics cards are able to handle high graphical settings, but by default the game hides/restricts some settings.
| Edit config.ini[5] |
|---|
Notes
|
Enable offline multiplayer with bots
- By default it's not possible to start multiplayer matches with bots in offline mode.
| Start the game in mod mode |
|---|
|
Game data
Configuration file(s) location
| System | Location |
|---|---|
| Windows | <path-to-game>\players\[Note 1] |
| macOS (OS X) | |
| Steam Play (Linux) | <SteamLibrary-folder>/steamapps/compatdata/311210/pfx/[Note 2] |
Save game data location
| System | Location |
|---|---|
| Windows | <path-to-game>\players\[Note 1] |
| macOS (OS X) | |
| Steam Play (Linux) | <SteamLibrary-folder>/steamapps/compatdata/311210/pfx/[Note 2] |
Save game cloud syncing
| System | Native | Notes |
|---|---|---|
| Steam Cloud | Some settings only. |
Video

Video settings.

Advanced video settings.

Gameplay video settings.
| Graphics feature | State | WSGF | Notes |
|---|---|---|---|
| Widescreen resolution | |||
| Multi-monitor | HUD and menu is stretched. | ||
| Ultra-widescreen | HUD and menu is stretched. Attempting to change resolutions during gameplay will result in stretching/compression. Hub sections are stretched, but missions work fine. | ||
| 4K Ultra HD | [6] | ||
| Field of view (FOV) | 65-120° with 80º as default value.[7] | ||
| Windowed | |||
| Borderless fullscreen windowed | |||
| Anisotropic filtering (AF) | Named as Texture Filtering in the options (Low = 2x, Medium = Per Material, and High = 16x). | ||
| Anti-aliasing (AA) | FXAA, SMAA (1x and Temporal 2x), Filmic SMAA (1x and Temporal 2x), and SSAA through Render Resolution option. SMAA T2X and Filmic SMAA options are disabled for SLI/Crossfire systems. | ||
| High-fidelity upscaling | See the glossary page for potential workarounds. | ||
| Vertical sync (Vsync) | Double buffering. See here for triple buffering. | ||
| 60 FPS and 120+ FPS | Multiplayer is capped at 60 FPS because VSync is enabled by default. Disabling VSync allows the FPS cap to go up to 240 FPS in Multiplayer using in-game menu. Cap can be unlimited by changing com_maxfps value to 0 in the config file or with in-game console while using any mod.
Unlimited in Zombies and Single Player.[8] |
||
| High dynamic range display (HDR) | See the glossary page for potential alternatives. | ||
| Ray tracing (RT) | |||
| Color blind mode | |||
Triple buffering
| Edit config.ini[citation needed] |
|---|
|
Input
| Keyboard and mouse | State | Notes |
|---|---|---|
| Remapping | ||
| Mouse acceleration | ||
| Mouse sensitivity | ||
| Mouse input in menus | ||
| Mouse Y-axis inversion | ||
| Controller | ||
| Controller support | ||
| Full controller support | ||
| Controller remapping | Only presets. | |
| Controller sensitivity | ||
| Controller Y-axis inversion |
| Controller types |
|---|
| XInput-compatible controllers |
|---|
| PlayStation controllers |
|---|
| Generic/other controllers |
|---|
| Additional information | ||
|---|---|---|
| Button prompts | Natively supports both the Xbox One and the DualShock 4 (V1 only) controller without any 3rd party tools required. | |
| Controller hotplugging | ||
| Haptic feedback | ||
| Digital movement supported | ||
| Simultaneous controller+KB/M | Aiming down sights using both causes camera to zoom in and out[9]. |
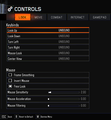
Look Controls settings.

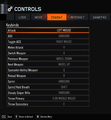
Move Controls settings.
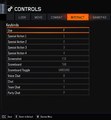
Combat Controls settings.
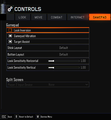
Interact Controls settings.
Gamepad Controls settings.


Audio

In-game audio settings.
| Audio feature | State | Notes |
|---|---|---|
| Separate volume controls | Master, Voice, Music, SFX Volume. | |
| Surround sound | 5.1 | |
| Subtitles | Subtitles option is available only when using English audio. | |
| Closed captions | ||
| Mute on focus lost | ||
| Royalty free audio |
Localizations
| Language | UI | Audio | Sub | Notes |
|---|---|---|---|---|
| English | ||||
| Simplified Chinese | ||||
| Traditional Chinese | ||||
| French | ||||
| German | ||||
| Italian | ||||
| Japanese | Users can't change the language to others. | |||
| Polish | ||||
| Brazilian Portuguese | ||||
| Russian | ||||
| Spanish | ||||
| Latin American Spanish | See Latin American Spanish audio mods. |
Latin American Spanish audio mods
| Full Game: File replacement |
|---|
Notes
|
| Zombies Maps: Workshop mods |
|---|
Notes
|
Network

Network settings.

Voice Chat settings.

Text Chat settings.
Multiplayer types
| Type | Native | Players | Notes | |
|---|---|---|---|---|
| Local play | 2 | Co-op, Versus [6] |
||
| LAN play | Must have an active internet connection regardless for DRM purposes. | |||
| Online play | 18 | Co-op, Versus Co-op is limited to 4 players. |
||
Connection types
| Type | Native | Notes |
|---|---|---|
| Matchmaking | ||
| Peer-to-peer | ||
| Dedicated | For Ranked matches[6][10]. | |
| Self-hosting | Unranked only[3]. | |
| Direct IP |
Ports
| Protocol | Port(s) and/or port range(s) |
|---|---|
| TCP | 27014-27050 |
| UDP | 3478, 4379-4380, 27000-27031, 27036 |
- This game supports Universal Plug and Play (UPnP) for automatic port configuration.
VR support
| 3D modes | State | Notes | |
|---|---|---|---|
| vorpX | Z3D Officially supported game, see official vorpx game list. |
||
Issues fixed
Stuttering
- Remove outdated file library
| Delete d3dcompiler_46.dll[citation needed] |
|---|
Notes
|
Game does not take advantage of the entire VRAM amount available
| Edit config.ini[citation needed] |
|---|
Notes
|
Frame rate isn't smooth
| Edit config.ini[citation needed] |
|---|
Notes
|
Game isn't responsive enough
| Edit config.ini[citation needed] |
|---|
Notes
|
CPU usage sometimes goes too high on some configurations
| Edit config.ini[citation needed] |
|---|
Notes
|
FPS drops
- This is for copies on the Steam version of the game.
| Launching the game in offline mode |
|---|
Notes
|
Game changes microphone gain at launch
| Modify microphone gain ingame[11] |
|---|
|
Game crashes on startup
- Antivrus software like AVG or Avast! are known to cause the game to crash.
| Add anti-virus exclusion[12] |
|---|
|
- If either Actual Window Minimizer or Actual Window Manager are installed, they will cause the game to crash.
| Add exception for Actual Window Minimizer or Actual Window Manager |
|---|
|
The game causes the entire system to hang and the computer itself completely before rebooting
| Move the paging file[citation needed] |
|---|
Notes
|
Scoreboard and Pause Menu not working using controller
| Reset controls to default |
|---|
|
Other information
API
| Technical specs | Supported | Notes |
|---|---|---|
| Direct3D | 11 | |
| Metal support | [1] |
| Executable | 32-bit | 64-bit | Notes |
|---|---|---|---|
| Windows | |||
| macOS (OS X) | [1] |
System requirements
| Windows | ||
|---|---|---|
| Minimum | Recommended | |
| Operating system (OS) | 7 | 8, 8.1 |
| Processor (CPU) | Intel Core i3-530 2.93 GHz AMD Phenom II X4 810 2.60 GHz | |
| System memory (RAM) | 6 GB | |
| Hard disk drive (HDD) | 100 GB | |
| Video card (GPU) | Nvidia GeForce GTX 470 AMD Radeon HD 6970 1 GB of VRAM DirectX 11 compatible | |
| Sound (audio device) | DirectX Compatible | |
- A 64-bit operating system is required.
| macOS (OS X) | ||
|---|---|---|
| Minimum | ||
| Operating system (OS) | 10.13.6 | |
| Processor (CPU) | Intel Core i5 2.3 GHz Quad-Core | |
| System memory (RAM) | 8 GB | |
| Hard disk drive (HDD) | 150 GB | |
| Video card (GPU) | AMD Radeon R9 M295X 2 GB of VRAM |
|
- A 64-bit operating system is required.
Notes
- ↑ 1.0 1.1 When running this game without elevated privileges (Run as administrator option), write operations against a location below
%PROGRAMFILES%,%PROGRAMDATA%, or%WINDIR%might be redirected to%LOCALAPPDATA%\VirtualStoreon Windows Vista and later (more details). - ↑ 2.0 2.1 Notes regarding Steam Play (Linux) data:
- File/folder structure within this directory reflects the path(s) listed for Windows and/or Steam game data.
- Games with Steam Cloud support may also store data in
~/.steam/steam/userdata/<user-id>/311210/. - Use Wine's registry editor to access any Windows registry paths.
- The app ID (311210) may differ in some cases.
- Treat backslashes as forward slashes.
- See the glossary page for details on Windows data paths.
References
- ↑ 1.0 1.1 1.2 1.3 Call of Duty: Black Ops III launches on Mac with 64-bit and Metal support - last accessed on 2019-04-05
- ↑ Update 15.1 / Mod Tools Open Beta - Patch Notes - last accessed on 17 May 2023
- ↑ 3.0 3.1 Call of Duty: Black Ops 3 gets unranked dedicated servers | PC Gamer
- ↑ Sethos88 commented on Any way to get rid of the opening video? - last accessed on 17 May 2023
- ↑ pcdev on Twitter: @JarnoSomers You can edit your config.ini in the players folder and change RestrictGraphicsOptions to 0 - last accessed on 9 June 2023
- ↑ 6.0 6.1 6.2 PC Update from Gamescom 2015 | Community
- ↑ pcdev on Twitter: BlackOps3 PC FOV range is 65-120; default 80. - last accessed on 17 May 2023
- ↑ pcdev on Twitter: @thebadbadrobot Up to 200 in ranked mp, unlimited everywhere else. - last accessed on 9 June 2023
- ↑ Recent Black Ops 3 update broke config - last accessed on May 2023
- ↑ pcdev on Twitter: BlackOps3 PC will use 100% dedicated servers for all ranked matches. (Same as previous BlackOps PC titles.) This is how we do it. - last accessed on 17 May 2023
- ↑ Black Ops 3 (PC) Microphone Volume Fix - YouTube - last accessed on May 2023
- ↑ Steam Community - last accessed on 9 June 2023