Difference between revisions of "Hype: The Time Quest"
m (→API: updated template usage) |
AlphaYellow (talk | contribs) (→Video) |
||
| (46 intermediate revisions by 8 users not shown) | |||
| Line 1: | Line 1: | ||
{{Infobox game | {{Infobox game | ||
| − | |cover = | + | |cover = Hype The Time Quest Box Art.jpg |
|developers = | |developers = | ||
| − | {{Infobox game/row/developer| | + | {{Infobox game/row/developer|Ubisoft Montreal}} |
|publishers = | |publishers = | ||
| − | {{Infobox game/row/publisher| | + | {{Infobox game/row/publisher|Playmobil Interactive}} |
|engines= | |engines= | ||
{{Infobox game/row/engine|Ubisoft OpenSpace}} | {{Infobox game/row/engine|Ubisoft OpenSpace}} | ||
|release dates= | |release dates= | ||
| − | {{Infobox game/row/date|Windows|1999}} | + | {{Infobox game/row/date|Windows|November 20, 1999}} |
| + | |taxonomy = | ||
| + | {{Infobox game/row/taxonomy/modes | Singleplayer }} | ||
| + | {{Infobox game/row/taxonomy/pacing | Real-time }} | ||
| + | {{Infobox game/row/taxonomy/perspectives | First-person, Third-person }} | ||
| + | {{Infobox game/row/taxonomy/controls | Direct control }} | ||
| + | {{Infobox game/row/taxonomy/genres | Action, Adventure, Puzzle, Platform, RPG }} | ||
| + | {{Infobox game/row/taxonomy/art styles | Stylized }} | ||
| + | {{Infobox game/row/taxonomy/themes | Medieval, Fantasy }} | ||
| + | {{Infobox game/row/taxonomy/series | Playmobil }} | ||
|steam appid = | |steam appid = | ||
|gogcom id = | |gogcom id = | ||
| + | |hltb = 4561 | ||
| + | |igdb = hype-the-time-quest | ||
| + | |mobygames = hype-the-time-quest | ||
|strategywiki = | |strategywiki = | ||
|wikipedia = Hype: The Time Quest | |wikipedia = Hype: The Time Quest | ||
| Line 17: | Line 29: | ||
}} | }} | ||
| − | + | {{Introduction | |
| − | {{ | + | |introduction = |
| + | |||
| + | |release history = | ||
| + | |||
| + | |current state = | ||
| + | }} | ||
==Availability== | ==Availability== | ||
{{Availability| | {{Availability| | ||
| − | {{Availability/row| | + | {{Availability/row| retail | | disc | {{DRM|SafeDisc}}. | | Windows }} |
}} | }} | ||
{{ii}} This game is not available digitally. | {{ii}} This game is not available digitally. | ||
| Line 38: | Line 55: | ||
}} | }} | ||
| − | ==Video | + | ==Video== |
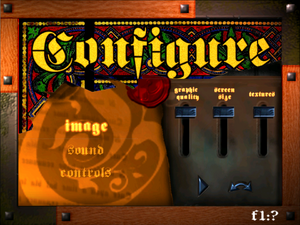
{{Image|Hype The Time Quest - video settings.png|Video settings.}} | {{Image|Hype The Time Quest - video settings.png|Video settings.}} | ||
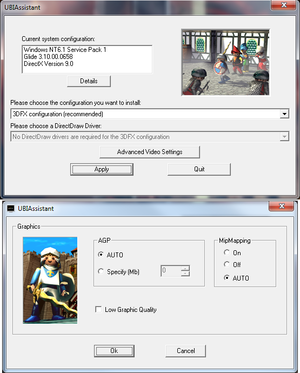
{{Image|Hype The Time Quest - configuration tool.png|Ubisoft Configuration tool.}} | {{Image|Hype The Time Quest - configuration tool.png|Ubisoft Configuration tool.}} | ||
| − | {{Video | + | {{Video |
|wsgf link = | |wsgf link = | ||
|widescreen wsgf award = | |widescreen wsgf award = | ||
| Line 47: | Line 64: | ||
|ultrawidescreen wsgf award = | |ultrawidescreen wsgf award = | ||
|4k ultra hd wsgf award = | |4k ultra hd wsgf award = | ||
| − | |widescreen resolution = | + | |widescreen resolution = hackable |
| − | |widescreen resolution notes= | + | |widescreen resolution notes = See [https://community.pcgamingwiki.com/files/file/2489-hype-the-time-quest-widescreen-fix/ Widescreen Patch]. |
|multimonitor = false | |multimonitor = false | ||
|multimonitor notes = | |multimonitor notes = | ||
| − | |ultrawidescreen = | + | |ultrawidescreen = hackable |
| − | |ultrawidescreen notes = | + | |ultrawidescreen notes = See [https://community.pcgamingwiki.com/files/file/2489-hype-the-time-quest-widescreen-fix/ Widescreen Patch]. |
| − | |4k ultra hd = | + | |4k ultra hd = hackable |
| − | |4k ultra hd notes = | + | |4k ultra hd notes = See [https://community.pcgamingwiki.com/files/file/2489-hype-the-time-quest-widescreen-fix/ Widescreen Patch]. |
| − | |fov = | + | |fov = hackable |
| − | |fov notes = | + | |fov notes = See [https://community.pcgamingwiki.com/files/file/2489-hype-the-time-quest-widescreen-fix/ Widescreen Patch]. |
|windowed = hackable | |windowed = hackable | ||
| − | |windowed notes = The game can be forced to run in Windowed mode, when using [http://dege.freeweb.hu/ | + | |windowed notes = The game can be forced to run in Windowed mode, when using [http://dege.freeweb.hu/ dgVoodoo2]. |
|borderless windowed = false | |borderless windowed = false | ||
|borderless windowed notes = | |borderless windowed notes = | ||
|anisotropic = false | |anisotropic = false | ||
|anisotropic notes = | |anisotropic notes = | ||
| − | |antialiasing = | + | |antialiasing = false |
| − | |antialiasing notes = | + | |antialiasing notes = |
| − | |vsync = | + | |vsync = false |
| − | |vsync notes = | + | |vsync notes = |
| − | |60 fps = | + | |60 fps = hackable |
| − | |60 fps notes = Capped at | + | |60 fps notes = Capped at 48 FPS in-game and 50 FPS in menus (on both D3D6 and 3DFX rendering). See [[#High frame rate|High frame rate]]. |
| − | |120 fps = | + | |120 fps = hackable |
| − | |120 fps notes = | + | |120 fps notes = See [[#High frame rate|High frame rate]]. |
| − | |hdr = | + | |hdr = false |
|hdr notes = | |hdr notes = | ||
|color blind = false | |color blind = false | ||
|color blind notes = | |color blind notes = | ||
}} | }} | ||
| − | |||
| − | ==Input | + | ===[[Glossary:Frame rate (FPS)|High frame rate]]=== |
| − | {{Input | + | {{Fixbox|description=Remove FPS cap|ref=<ref>{{Refurl|url=https://raymanpc.com/forum/viewtopic.php?p=1445783#p1445783|title=Rayman Pirate Community Thread|date=May 2023}}</ref>|fix= |
| + | # Open {{file|MaiDFXvr_bleu.exe}} with a hex editor such as [https://mh-nexus.de/en/downloads.php?product=HxD HxD]. | ||
| + | # Press {{key|Ctrl|R}} and set '''Datatype''' to '''Hex-values'''. | ||
| + | # Search for {{code|320000002564202066707300}} and replace the {{code|32}} at the start with the desired framerate (in hexadecimal). | ||
| + | # Search for {{code|8B483883C40485C9740C}}, it should be followed by {{code|E8 XX XX XX XX 6A 01}} (the XX might be different depending on the localization - for the English .exe, it's {{code|4E 7E 14 00}}). | ||
| + | # Replace the last {{code|01}} with {{code|00}} to completely disable the frame limit in the menus. | ||
| + | # Save the file. | ||
| + | |||
| + | '''Notes''' | ||
| + | {{--}} Too high framerates ingame and menus cause game speed to be way too high, resulting in sped up gameplay and menu navigation. | ||
| + | }} | ||
| + | |||
| + | ==Input== | ||
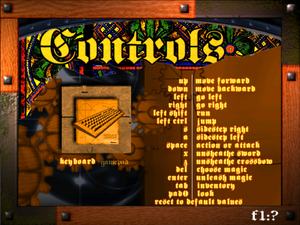
| + | {{Image|Hype The Time Quest Keyboard Settings.png|Keyboard Settings}} | ||
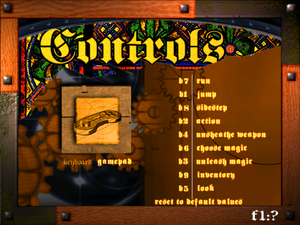
| + | {{Image|Hype The Time Quest Gamepad Settings.png|Gamepad Settings}} | ||
| + | {{Input | ||
|key remap = true | |key remap = true | ||
|key remap notes = | |key remap notes = | ||
|acceleration option = n/a | |acceleration option = n/a | ||
|acceleration option notes = The game doesn't support mouse. | |acceleration option notes = The game doesn't support mouse. | ||
| − | |mouse sensitivity = | + | |mouse sensitivity = false |
|mouse sensitivity notes = | |mouse sensitivity notes = | ||
|mouse menu = false | |mouse menu = false | ||
| Line 90: | Line 121: | ||
|invert mouse y-axis = n/a | |invert mouse y-axis = n/a | ||
|invert mouse y-axis notes = | |invert mouse y-axis notes = | ||
| − | |touchscreen = | + | |touchscreen = false |
|touchscreen notes = | |touchscreen notes = | ||
|controller support = true | |controller support = true | ||
| Line 142: | Line 173: | ||
}} | }} | ||
| − | ==Audio | + | ==Audio== |
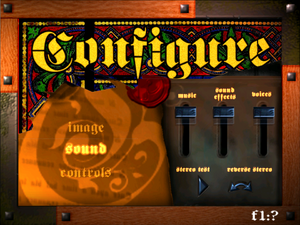
{{Image|Hype The Time Quest - audio settings.png|Sound settings.}} | {{Image|Hype The Time Quest - audio settings.png|Sound settings.}} | ||
| − | {{Audio | + | {{Audio |
|separate volume = true | |separate volume = true | ||
|separate volume notes = | |separate volume notes = | ||
| Line 150: | Line 181: | ||
|surround sound notes = | |surround sound notes = | ||
|subtitles = true | |subtitles = true | ||
| − | |subtitles notes = Intro and outro are lacking subtitles. Aside from it | + | |subtitles notes = Intro and outro are lacking subtitles. Aside from it, subtitles are always enabled in-game. |
|closed captions = false | |closed captions = false | ||
|closed captions notes = | |closed captions notes = | ||
| Line 198: | Line 229: | ||
|subtitles = true | |subtitles = true | ||
|notes = | |notes = | ||
| + | |fan = | ||
| + | }} | ||
| + | {{L10n/switch | ||
| + | |language = Portuguese | ||
| + | |interface = true | ||
| + | |audio = true | ||
| + | |subtitles = true | ||
| + | |notes = "Hype: O Cavaleiro do Tempo".<ref>{{Refcheck|user=DarkSonicPT|date=2023-03-18|comment=https://wikidobragens.fandom.com/pt/wiki/Hype:_O_Cavaleiro_do_Tempo}}</ref> | ||
|fan = | |fan = | ||
}} | }} | ||
| Line 211: | Line 250: | ||
==Issues fixed== | ==Issues fixed== | ||
| − | ===Crash after the intro when using | + | ===Crash after the intro when using Glide wrapper=== |
| − | {{Fixbox|description=Disable movies in configuration file|ref={{ | + | {{ii}} Game needs to have been run in admin mode at least once, since it needs special privileges to write its settings in {{file|ubi.ini}}, which is in {{folder|{{p|windir}}\UbiSoft\}}. |
| − | # | + | {{Fixbox|description=Disable movies in configuration file|ref=<ref>{{Refcheck|user=AlphaYellow|date=2022-12-24}}</ref>|fix= |
| − | # Under section <code>[Hype - The Time Quest]</code> find | + | # Open [[#Game data|{{file|ubi.ini}}]]. |
| + | # Under the section <code>[Hype - The Time Quest]</code>, find the line <code>PlayVideo=1</code> and change to <code>PlayVideo=0</code>. | ||
}} | }} | ||
| − | ===Black screen when using | + | ===Black screen when using Glide wrapper=== |
| − | {{Fixbox|description=Install compatibility fixes|ref={{ | + | {{Fixbox|description=Install compatibility fixes|ref=<ref>{{Refcheck|user=AlphaYellow|date=2022-12-24}}</ref>|fix= |
| − | # Download [https://community.pcgamingwiki.com/files/file/193-hype-the-time-quest-installation-package/ installation package for Hype: The Time Quest] and extract it. | + | # Download the [https://community.pcgamingwiki.com/files/file/193-hype-the-time-quest-installation-package/ installation package for Hype: The Time Quest] and extract it. |
| − | # Go to | + | # Go to {{folder|Compatibility}} and run {{file|PatchInstall.bat}} to add the compatibility entries to the system's database. |
}} | }} | ||
| + | |||
| + | ===Game crashes on Alt+Tab=== | ||
| + | {{Fixbox|description=Install [[dgVoodoo 2]]|ref=<ref>{{Refcheck|user=AlphaYellow|date=2024-01-27}}</ref>}} | ||
==Other information== | ==Other information== | ||
===API=== | ===API=== | ||
{{API | {{API | ||
| − | |direct3d versions = 6 | + | |direct3d versions = 6 |
|direct3d notes = | |direct3d notes = | ||
|directdraw versions = | |directdraw versions = | ||
| Line 232: | Line 275: | ||
|opengl versions = | |opengl versions = | ||
|opengl notes = | |opengl notes = | ||
| − | |glide versions = 3. | + | |glide versions = 3.10 |
|glide notes = | |glide notes = | ||
| − | |software mode = | + | |software mode = |
|software mode notes = | |software mode notes = | ||
|mantle support = | |mantle support = | ||
| Line 246: | Line 289: | ||
|windows 32-bit exe = true | |windows 32-bit exe = true | ||
|windows 64-bit exe = false | |windows 64-bit exe = false | ||
| + | |windows arm app = | ||
|windows exe notes = | |windows exe notes = | ||
| − | |macos 32-bit app | + | |macos intel 32-bit app = |
| − | |macos 64-bit app | + | |macos intel 64-bit app = |
|macos app notes = | |macos app notes = | ||
|linux 32-bit executable= | |linux 32-bit executable= | ||
| Line 263: | Line 307: | ||
'''Notes''' | '''Notes''' | ||
{{ii}} Alternative installer only works with '''English''', '''German''' and '''Polish''' version of the game. | {{ii}} Alternative installer only works with '''English''', '''German''' and '''Polish''' version of the game. | ||
| − | {{ii}} For documentation and common problems, see [[User:Suicide machine/Hype: The Time Quest - Alternative Installer|Hype: The Time Quest - Alternative Installer]] | + | {{ii}} For documentation and common problems, see [[User:Suicide machine/Hype: The Time Quest - Alternative Installer|Hype: The Time Quest - Alternative Installer]]. |
}} | }} | ||
{{Fixbox|description=Manual installation|ref=<ref>Developed by [[User:Suicide machine|Suicide machine]] - tested on Polish and English version of the game, on 2 different PCs with Windows 7 (64bit) and Windows 8 (64bit)</ref>|fix= | {{Fixbox|description=Manual installation|ref=<ref>Developed by [[User:Suicide machine|Suicide machine]] - tested on Polish and English version of the game, on 2 different PCs with Windows 7 (64bit) and Windows 8 (64bit)</ref>|fix= | ||
| − | # Create a folder named | + | # Create a folder named {{folder|Hype}} somewhere on the drive (from now on, we'll be referring to it as {{folder|{{p|game}}}}). |
| − | # From the root directory | + | # From the CD's root directory, copy {{file|DSETUP.DLL}}, {{file|DSETUP16.DLL}} and {{file|DSETUP32.DLL}} to {{folder|{{p|game}}}}. |
| − | # Copy | + | # Copy {{folder|DLL}}, {{folder|Gamedata}} and {{folder|InstData}} to {{folder|{{p|game}}}}. |
| − | # Go to | + | # Go to {{folder|exe}} on the CD. |
| − | # Copy | + | # Copy {{file|Gli.ini}} to {{folder|{{p|game}}}}. |
| − | # Copy | + | # Copy {{file|MaiD3Dvr_bleu.exe}} from {{folder|D3D}} to {{folder|{{p|game}}}}. |
| − | # Copy | + | # Copy {{file|MaiDFXvr_bleu.exe}} from {{folder|Glide 3x}} to {{folder|{{p|game}}}}. |
| − | # Copy all files from | + | # Copy all files from {{folder|UbiConfig}} to {{folder|{{p|game}}}}. |
| − | # Go back to | + | # Go back to the CD's root folder, and go to {{folder|LangData\<current language>\world\}}. |
| − | # Copy folder | + | # Copy {{folder|levels}} to {{folder|{{p|game}}\Gamedata\World\}}. |
#* When asked about scaling folders, answer yes. | #* When asked about scaling folders, answer yes. | ||
| − | # Go to the Windows directory ( | + | # Go to the Windows directory ({{folder|{{p|windir}}}}). |
| − | # | + | # Inside it, create a folder named {{folder|UbiSoft}}. |
| − | # From the root directory | + | # From the CD's root directory, copy {{file|DSETUP.DLL}}, {{file|DSETUP16.DLL}}, {{file|DSETUP32.DLL}} and {{file|SetupUbi.exe}} to a newly created directory: {{folder|{{p|windir}}\UbiSoft\}}. |
| − | #* It may be possible that the folder already exists, as it's shared with other Ubisoft | + | #* It may be possible that the folder already exists, as it's shared with other Ubisoft games of the same era. In such case, '''do not''' replace any of the files. |
| − | # From | + | # From the {{folder|InstData}} directory on the CD, copy {{file|strings.eng}} to {{folder|{{p|windir}}\UbiSoft\}}. |
| − | # Download [https://community.pcgamingwiki.com/files/file/193-hype-the-time-quest-installation-package/ installation package for Hype: The Time Quest] and extract it. | + | # Download the [https://community.pcgamingwiki.com/files/file/193-hype-the-time-quest-installation-package/ installation package for Hype: The Time Quest] and extract it. |
| − | # From config | + | # From {{folder|config}}, copy {{file|ubi.ini}} to {{folder|{{p|windir}}\UbiSoft\}}. |
| − | #* If | + | #* If there are other Ubisoft games already installed that use the same file, {{file|ubi.ini}} has to be manually edited by adding <code>[Hype - The Time Quest]</code> under <code>[INSTALLED PRODUCTS]</code> as well as the section responsible for game configuration (just copy the lines from <code>[Hype - The Time Quest]</code> to <code>[OSD]</code> from {{file|ubi.ini}} provided in the installation package). |
| − | # If | + | # If the current language is different from English, edit {{file|ubi.ini}}, find the line <code>Language=English</code> under the <code>[Hype - The Time Quest]</code> section, and change it to a language currently being used (e.g. for Polish it's <code>Language=Polish</code> - incorrect language will make all the characters mute). |
| − | # Go to | + | # Go to the folder where the files from the installation package were extracted to. |
| − | # | + | # Go to {{folder|Compatibility}} and run {{file|PatchInstall.bat}} to add the compatibility entries to system's database. |
| − | # Install [ | + | # Install the [https://www.zeus-software.com/downloads/nglide nGlide wrapper], if it's not already. |
| − | # Finally, go to {{p|game}} | + | # Finally, go to {{folder|{{p|game}}}}, run {{file|Ubiassistant.exe}} and choose '''3DFX configuration'''. |
| − | # Run the game using | + | # Run the game using {{file|MaiDFXvr_bleu.exe}}. |
}} | }} | ||
Latest revision as of 23:37, 6 March 2024
 |
|
| Developers | |
|---|---|
| Ubisoft Montreal | |
| Publishers | |
| Playmobil Interactive | |
| Engines | |
| Ubisoft OpenSpace | |
| Release dates | |
| Windows | November 20, 1999 |
| Taxonomy | |
| Modes | Singleplayer |
| Pacing | Real-time |
| Perspectives | First-person, Third-person |
| Controls | Direct control |
| Genres | Action, Adventure, Puzzle, Platform, RPG |
| Art styles | Stylized |
| Themes | Medieval, Fantasy |
| Series | Playmobil |
| Playmobil | |
|---|---|
| Laura's Happy Adventures | 1998 |
| Alex Builds His Farm | 1999 |
| Hype: The Time Quest | 1999 |
| Rescue from Rock Castle | 2004 |
| The Big Treasure Hunt | 2005 |
| Playmobil Alarm | 2007 |
| Playmobil Constructions | 2007 |
| Playmobil Knights | 2009 |
| Playmobil Pirates | 2009 |
| Playmobil: The Movie VR Adventures | Cancelled |
Warnings
- SafeDisc retail DRM does not work on Windows Vista and later (see Availability for affected versions).
Hype: The Time Quest is a singleplayer first-person and third-person action, adventure, puzzle, platform and RPG game in the Playmobil series.
Availability
- SafeDisc retail DRM does not work on Windows Vista and later (see above for affected versions).
- This game is not available digitally.
- A demo is available.
Game data
Configuration file(s) location
Save game data location
| System | Location |
|---|---|
| Windows | <path-to-game>\Gamedata\SaveGame[Note 2] |
Video
| Graphics feature | State | Notes | |
|---|---|---|---|
| Widescreen resolution | See Widescreen Patch. | ||
| Multi-monitor | |||
| Ultra-widescreen | See Widescreen Patch. | ||
| 4K Ultra HD | See Widescreen Patch. | ||
| Field of view (FOV) | See Widescreen Patch. | ||
| Windowed | The game can be forced to run in Windowed mode, when using dgVoodoo2. | ||
| Borderless fullscreen windowed | See the glossary page for potential workarounds. | ||
| Anisotropic filtering (AF) | See the glossary page for potential workarounds. | ||
| Anti-aliasing (AA) | See the glossary page for potential workarounds. | ||
| Vertical sync (Vsync) | See the glossary page for potential workarounds. | ||
| 60 FPS | Capped at 48 FPS in-game and 50 FPS in menus (on both D3D6 and 3DFX rendering). See High frame rate. | ||
| 120+ FPS | See High frame rate. | ||
| High dynamic range display (HDR) | |||
High frame rate
| Remove FPS cap[3] |
|---|
Notes
|
Input
| Keyboard and mouse | State | Notes |
|---|---|---|
| Remapping | ||
| Mouse acceleration | The game doesn't support mouse. | |
| Mouse sensitivity | ||
| Mouse input in menus | ||
| Mouse Y-axis inversion | ||
| Controller | ||
| Controller support | ||
| Full controller support | ||
| Controller remapping | Limited to remapping buttons. | |
| Controller sensitivity | ||
| Controller Y-axis inversion |
| Controller types |
|---|
| XInput-compatible controllers |
|---|
| PlayStation controllers |
|---|
| Generic/other controllers |
|---|
| Additional information | ||
|---|---|---|
| Controller hotplugging | ||
| Haptic feedback | ||
| Digital movement supported | ||
| Simultaneous controller+KB/M |
Audio
| Audio feature | State | Notes |
|---|---|---|
| Separate volume controls | ||
| Surround sound | ||
| Subtitles | Intro and outro are lacking subtitles. Aside from it, subtitles are always enabled in-game. | |
| Closed captions | ||
| Mute on focus lost |
Localizations
| Language | UI | Audio | Sub | Notes |
|---|---|---|---|---|
| English | ||||
| French | ||||
| German | ||||
| Italian | ||||
| Polish | ||||
| Portuguese | "Hype: O Cavaleiro do Tempo".[4] | |||
| Spanish |
Issues fixed
Crash after the intro when using Glide wrapper
- Game needs to have been run in admin mode at least once, since it needs special privileges to write its settings in
ubi.ini, which is in%WINDIR%\UbiSoft\.
| Disable movies in configuration file[5] |
|---|
|
Black screen when using Glide wrapper
| Install compatibility fixes[6] |
|---|
|
Game crashes on Alt+Tab
| Install dgVoodoo 2[7] |
|---|
Other information
API
| Technical specs | Supported | Notes |
|---|---|---|
| Direct3D | 6 | |
| Glide | 3.10 |
| Executable | 32-bit | 64-bit | Notes |
|---|---|---|---|
| Windows |
Installing on modern versions of Windows
64-bit versions of Windows can't run the CD installer due to it being a 16-bit application. Trying to run the installer in Windows 7 x64 will cause the process to freeze in the background and require the task manager to close.
| Alternative Installer[citation needed] |
|---|
Notes
|
| Manual installation[8] |
|---|
|
System requirements
| Windows | ||
|---|---|---|
| Minimum | Recommended | |
| Operating system (OS) | 95, 98, NT | |
| Processor (CPU) | 200 MHz with MMX | 233 MHz with MMX |
| System memory (RAM) | 32 MB | 64 MB |
| Hard disk drive (HDD) | 115 MB | 490 MB |
| Video card (GPU) | 4 MB of VRAM DirectX 6.1 compatible | Glide 3 compatible 3D Card 4 MB of VRAM |
Notes
- ↑ SafeDisc retail DRM does not work on Windows 10[1] or Windows 11 and is disabled by default on Windows Vista, Windows 7, Windows 8, and Windows 8.1 when the KB3086255 update is installed.[2]
- ↑ 2.0 2.1 When running this game without elevated privileges (Run as administrator option), write operations against a location below
%PROGRAMFILES%,%PROGRAMDATA%, or%WINDIR%might be redirected to%LOCALAPPDATA%\VirtualStoreon Windows Vista and later (more details).
References
- ↑ Not Loading in Windows 10; this will break thousands of - Microsoft Community - last accessed on 2017-01-16
- ↑ Microsoft - MS15-097: Description of the security update for the graphics component in Windows: September 8, 2015 - last accessed on 2018-02-16
- ↑ Rayman Pirate Community Thread - last accessed on May 2023
- ↑ Verified by User:DarkSonicPT on 2023-03-18
- ↑ Verified by User:AlphaYellow on 2022-12-24
- ↑ Verified by User:AlphaYellow on 2022-12-24
- ↑ Verified by User:AlphaYellow on 2024-01-27
- ↑ Developed by Suicide machine - tested on Polish and English version of the game, on 2 different PCs with Windows 7 (64bit) and Windows 8 (64bit)

