Star Wars: The Force Unleashed II
 |
|
| Developers | |
|---|---|
| LucasArts | |
| Windows | Aspyr Media |
| Publishers | |
| LucasArts | |
| Disney Interactive Studios | |
| Russia | 1C Company |
| Engines | |
| Ronin 2.0[1] | |
| Release dates | |
| Windows | October 26, 2010 |
| Reception | |
| Metacritic | 59 |
| IGDB | 65 |
| Taxonomy | |
| Monetization | One-time game purchase |
| Pacing | Real-time |
| Perspectives | Third-person |
| Controls | Direct control |
| Genres | Hack and slash |
| Themes | Sci-fi |
| Series | Star Wars: The Force Unleashed |
| Star Wars: The Force Unleashed | |
|---|---|
| Subseries of Star Wars | |
| Star Wars: The Force Unleashed | 2009 |
| Star Wars: The Force Unleashed II | 2010 |
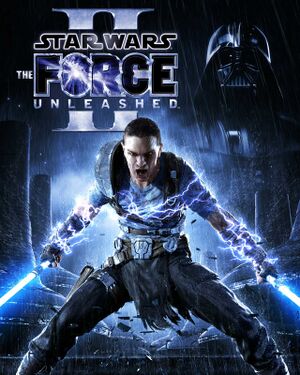
Star Wars: The Force Unleashed II is a third-person hack and slash game in the Star Wars: The Force Unleashed series.
A sequel to The Force Unleashed, it was ported to PC by Aspyr and released alongside the console versions on October 26, 2010.
Like the first game, it's capped at 30 FPS with physics issues arising at higher framerates (see this section for the fix). However, none of the console DLC was ever brought to PC, but it's possible to access most of it (the exceptions being the Endor and Character Pack DLCs) by modifying the game files (see Pre-order and Collector's Edition content for a guide).
General information
Availability
| Source | DRM | Notes | Keys | OS |
|---|---|---|---|---|
| Retail | SecuROM 7.42.0004 DRM. European copies use SecuROM 8 DRM. | |||
| GamersGate | ||||
| GOG.com | ||||
| Origin | Included with EA Play Pro. Currently only visible in the EA App's Browse menu. | |||
| Steam |
Downloadable content (DLC)
- The additional mission DLC Endor that follows the dark-side storyline as well as the Character Pack DLC were never released for the PC version.
Pre-order and Collector's Edition content
- There were several Pre-order and Collector's Edition bonuses for Xbox 360 and PlayStation 3 versions, not released for PC. But they are present in files of PC version as well, just locked in game config files.
Pre-Order and Collector's Edition bonuses unlock[2]
In order to unlock them you need to:
BUT last game version 1.1 is hardcoded to use persistent number (14) of saber crystals. So in order to unlock 2 additional you need to remove 2 crystals already present in vanilla game.
|
|---|
| Unused cinematic unlock[3] |
|---|
|
There is one cinematic for challenge which was cancelled, so cinematic is just laying in game files. You can restore it to extras menu of the game by editing |
Essential improvements
Skip intro videos
| Delete or rename movie files[4] |
|---|
|
| Skip intro videos[citation needed] |
|---|
|
Wet Clothes fix
| Restores wet clothes effect that was originally available for the console versions and was absent in the PC version. |
|---|
|
Patches
Patch 1.1
- GOG.com and Steam users are already patched to the latest version
- Patch 1.1 (Europe and Australia versions)
- Patch 1.1 (North America version)
- Patch 1.1 (Polish version)
- Patch 1.1 (Russian version)
Game data
Configuration file(s) location
| System | Location |
|---|---|
| Windows | %LOCALAPPDATA%\LucasArts\Star Wars The Force Unleashed 2\ |
| Steam Play (Linux) | <SteamLibrary-folder>/steamapps/compatdata/32500/pfx/[Note 1] |
Save game data location
| System | Location |
|---|---|
| Windows | %USERPROFILE%\Documents\LucasArts\Star Wars The Force Unleashed 2\Saves\ |
| Steam Play (Linux) | <SteamLibrary-folder>/steamapps/compatdata/32500/pfx/[Note 1] |
Save game cloud syncing
| System | Native | Notes |
|---|---|---|
| GOG Galaxy | ||
| Origin | ||
| OneDrive | Requires enabling backup of the Documents folder in OneDrive on all computers. | |
| Steam Cloud |
Video
| Graphics feature | State | WSGF | Notes |
|---|---|---|---|
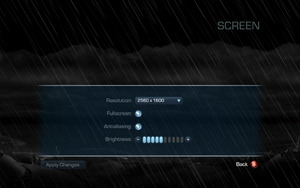
| Widescreen resolution | |||
| Multi-monitor | Game may crash on start if multiple monitors are enabled.[citation needed] | ||
| Ultra-widescreen | |||
| 4K Ultra HD | Certain parts of the interface scales poorly. | ||
| Field of view (FOV) | |||
| Windowed | |||
| Borderless fullscreen windowed | See the glossary page for potential workarounds. | ||
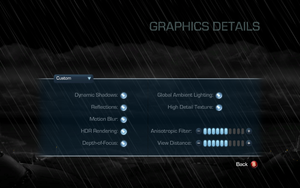
| Anisotropic filtering (AF) | The Game uses bars for anisotropic filtering but max is 16x. | ||
| Anti-aliasing (AA) | Directionally Localized Anti-Aliasing (proprietary post-processing method)[5] | ||
| Vertical sync (Vsync) | See Forcing Vsync. | ||
| 60 FPS | Capped at 30 FPS by default; use the FPS cap fix. | ||
| 120+ FPS | Capped at 30 FPS by default; use the FPS cap fix. | ||
| High dynamic range display (HDR) | Rendered image uses SDR color space. In-game HDR option refers only to HDR Rendering. | ||
High frame rate
| Use Patched EXE[citation needed] |
|---|
|
Use the FPS cap fix. Available options are 40 FPS, 50 FPS, 60 FPS, and unlimited. Notes
|
| Use a hex editor |
|---|
|
| Set custom display refresh rate |
|---|
|
Input
| Keyboard and mouse | State | Notes |
|---|---|---|
| Remapping | ||
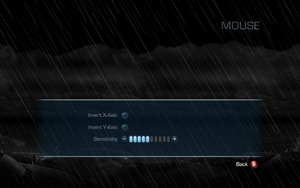
| Mouse acceleration | No mouse acceleration. | |
| Mouse sensitivity | ||
| Mouse input in menus | Menus do not have full mouse support if a controller is connected. | |
| Mouse Y-axis inversion | Invert x-axis also available. | |
| Controller | ||
| Controller support | ||
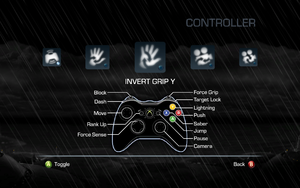
| Full controller support | Options' sub-menus can't be navigated. | |
| Controller remapping | See the glossary page for potential workarounds. | |
| Controller sensitivity | ||
| Controller Y-axis inversion | Invert x-axis also available. |
| Controller types |
|---|
| XInput-compatible controllers | ||
|---|---|---|
| Xbox button prompts | ||
| Impulse Trigger vibration |
| PlayStation controllers |
|---|
| Generic/other controllers |
|---|
| Additional information | ||
|---|---|---|
| Button prompts | ||
| Controller hotplugging | ||
| Haptic feedback | ||
| Digital movement supported | ||
| Simultaneous controller+KB/M |
Audio
| Audio feature | State | Notes |
|---|---|---|
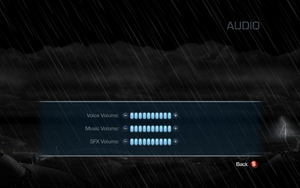
| Separate volume controls | Voice, Music, Sound Effects | |
| Surround sound | ||
| Subtitles | ||
| Closed captions | ||
| Mute on focus lost | ||
| Royalty free audio | The original Star Wars theme and other pieces composed by John Williams are present throughout the game. |
Localizations
| Language | UI | Audio | Sub | Notes |
|---|---|---|---|---|
| English | ||||
| French | ||||
| German | ||||
| Italian | ||||
| Polish | ||||
| Brazilian Portuguese | Translation. | |||
| Russian | Fan voiceover by "Kinatan" is available here. | |||
| Spanish |
Issues fixed
Crash on startup
- If your monitor resolution does not match the game's or you are using a second monitor it will crash on load. This seems most common when your desktop is set to 1920x1080.
- There is also a problem where if your monitor is set to a refresh rate of 59 instead of 60 the game may crash.
| Fix 1920x1080 crash[citation needed] |
|---|
|
| Fix 59 Hz crash[citation needed] |
|---|
|
| Fix dual screen crash[citation needed] |
|---|
Notes
|
| Set compatibility mode[citation needed] |
|---|
|
In game videos glitching or not playing
- The FMV files use the wmv3 and wmap codecs for video and audio, which are not well-supported by some alternative codec packs like DirectShow. The game uses your computer's own installed codecs to play the videos.
| Change WMV association[citation needed] |
|---|
|
Change the default .wmv video player to Windows Media Player. |
| Transcode FMV files with FFMPEG |
|---|
$convblock = {
	$path = "conv/"
	If(!(test-path $path)){
		  New-Item -ItemType Directory -Force -Path $path
	}
	$files = Get-ChildItem -File
	foreach ($file in $files){
		If(-NOT ($file.name -like "ffmpeg.exe")){
			./ffmpeg.exe -i "$($file.name)" -c:v libx264 -preset slow -crf 18 -c:a aac -b:a 256k "conv/$($file.name).mkv"
			Move-Item -Force "conv/$($file.name).mkv" "./$($file.name)"
		}
	}
	Remove-Item -LiteralPath "$path" -Force -Recurse
	Remove-Item "ffmpeg.exe"
}
Invoke-Command -ScriptBlock $convblock
The above code will automatically convert the videos, overwrite the old ones, and clean up after itself by removing the temporary conversion folder and ffmpeg.exe for you. However, note that the conversion process could take some time, up to a few hours on a low-end machine. The new files will use the h.264 video codec and the aac audio codec. |
| Disable in-game videos[citation needed] |
|---|
|
Rename FMV folder located in <path-to-game>/Game/Disc/ (to FMV_old, for example). |
Other information
API
| Technical specs | Supported | Notes |
|---|---|---|
| Direct3D | 9.0c | |
| Shader Model support | 3.0 |
| Executable | 32-bit | 64-bit | Notes |
|---|---|---|---|
| Windows |
Middleware
| Middleware | Notes | |
|---|---|---|
| Physics | Havok | |
| Cutscenes | Windows Media Video 9 |
System requirements
| Windows | ||
|---|---|---|
| Minimum | Recommended | |
| Operating system (OS) | XP SP3, Vista SP2 | 7 |
| Processor (CPU) | Intel Core 2 Duo 2.4 GHz AMD Athlon X2 5200+ |
Intel Core 2 Duo 2.8 GHz AMD Athlon X2 6000+ |
| System memory (RAM) | 2 GB | 4 GB |
| Hard disk drive (HDD) | 10 GB + 1 GB Swap File | |
| Video card (GPU) | ATI Radeon HD 2600 Nvidia GeForce 8600 GT 256 MB of VRAM DirectX 9.0c compatible Shader model 3.0 support |
ATI Radeon HD 4800 Nvidia GeForce GTX 260 512 MB of VRAM |
| Sound (audio device) | DirectX 9.0c compatible | |
Notes
- ↑ 1.0 1.1 Notes regarding Steam Play (Linux) data:
- File/folder structure within this directory reflects the path(s) listed for Windows and/or Steam game data.
- Games with Steam Cloud support may also store data in
~/.steam/steam/userdata/<user-id>/32500/. - Use Wine's registry editor to access any Windows registry paths.
- The app ID (32500) may differ in some cases.
- Treat backslashes as forward slashes.
- See the glossary page for details on Windows data paths.
References
- ↑ Star Wars: The Force Unleashed 2 Pt. 2 (Page 3) - CVG UK - last accessed on May 2023
- ↑ How to Unlock DLC - Steam Community - last accessed on 2024-03-13
- ↑ Reference
- ↑ Verified by User:Baronsmoki on 2019-04-10
- ↑ Eurogamer.net - Lucas explains Force Unleashed II tech - last accessed on 2023-01-30

