This page is for the original release. For the Director's Cut, see Deadlight: Director's Cut.
General information
- Steam Community Discussions
Availability
Game data
Configuration file(s) location
Save game data location
| System |
Native |
Notes |
| OneDrive |
|
Requires enabling backup of the Documents folder in OneDrive on all computers. |
| Steam Cloud |
|
|
Video
|
Bind F1 - F5 as FOV hotkeys[1]
|
- Open
%USERPROFILE%\Documents\My Games\UnrealEngine3\LOTDGame\Config\LOTDInput.ini.
- Add these lines under
[Engine.PlayerInput]:
Bindings=(Name="F1",Command="FOV 70",Control=False,Shift=False,Alt=False)Bindings=(Name="F2",Command="FOV 86",Control=False,Shift=False,Alt=False)Bindings=(Name="F3",Command="FOV 100",Control=False,Shift=False,Alt=False)Bindings=(Name="F4",Command="FOV 110",Control=False,Shift=False,Alt=False)Bindings=(Name="F5",Command="FOV 124",Control=False,Shift=False,Alt=False)
- Save changes.
- Press F1 - F5 in-game to switch between FOV values.
|
|
Use GeDoSaTo[citation needed]
|
- Install GeDoSaTo.
- Add LOTDGame to the user whitelist.
- Create a new profile for the game with this setting:
forceBorderlessFullscreen 1
- Run the game in fullscreen mode.
|
- By default Deadlight doesn't support anti-aliasing.
|
Enable Anti-alasing[citation needed]
|
- Download and open Nvidia Profile Inspector.
- Press the Create new profile button (shown in green below). Use a profile name like Deadlight for convenience.

- Press the Add application to current profile button (shown in blue above).
- Go to
<path-to-game>\Binaries\Win32
- Select
LOTDGame.exe
- Modify the entry for Antialiasing compatibility to show
0x080100C5
- Modify the entry for Antialiasing - Mode to show
Override any application setting
- Modify Antialiasing - Setting as you wish, for example to show
16xQ [16x CSAA (8 color + 8 cv samples)].
- You may also modify Antialiasing - Transparency Supersampling, for example to show
4x Sparse Grid Supersampling.
- Click Apply changes at the top right of the application.
|
|
Change frame rate smoothing[citation needed]
|
- Go to the configuration file(s) location.
- Open
LOTDEngine.ini.
- Search and change
bSmoothFrameRate to FALSE or raise MaxSmoothedFrameRate value.
- Save file.
- For more information, see the Unreal Engine 3 page.
|
Input
Audio
| Audio feature |
State |
Notes |
| Separate volume controls |
|
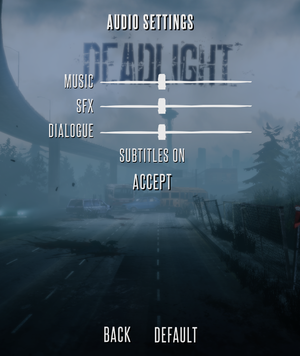
Music, effects and dialogue. |
| Surround sound |
|
Up to 7.0 output[2] |
| Subtitles |
|
|
| Closed captions |
|
|
| Mute on focus lost |
|
|
| Royalty free audio |
|
|
Localizations
| Language |
UI |
Audio |
Sub |
Notes |
| English |
|
|
|
|
| French |
|
|
|
|
| German |
|
|
|
|
| Italian |
|
|
|
|
| Japanese |
|
|
|
|
| Polish |
|
|
|
Fan translation, download. |
| Russian |
|
|
|
1) Fan translation by «ZoG Forum Team», download.
2) Fan translation by «ENPY Studio», download. |
| Spanish |
|
|
|
|
| Turkish |
|
|
|
Fan translation. Details missing—please edit this page
and add it. |
| Brazilian Portuguese |
|
|
|
Fan translation by Tribo Gamer, Download. |
VR support
Issues fixed
No audio in cutscenes
|
Enable shader initialization on demand[3]
|
- Go to the configuration file(s) location.
- Open
LOTDEngine.ini.
- Search and change
bInitializeShadersOnDemand to TRUE.
- Save file.
|
Other information
API
| Executable |
32-bit |
64-bit |
Notes |
| Windows |
|
|
|
Middleware
System requirements
| Windows |
|
Minimum |
Recommended |
| Operating system (OS) |
XP SP3, Vista, 7 | |
| Processor (CPU) |
2 GHz+ or better
| Intel Core 2 Duo 2 GHz+ or better |
| System memory (RAM) |
2 GB |
5 GB |
| Hard disk drive (HDD) |
5 GB | |
| Video card (GPU) |
Shader model 3.0 support |
512 MB of VRAM |
Notes
- ↑ 1.0 1.1 Notes regarding Steam Play (Linux) data:
References


