This page is for the original release. For the HD Collection re-release, see Devil May Cry HD Collection.
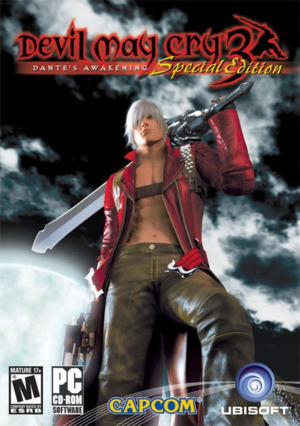
Devil May Cry 3: Special Edition is a singleplayer hack and slash action game developed and published by Capcom. It is part of the Devil May Cry series, and chronologically takes place before Devil May Cry.
The original game, Devil May Cry 3: Dante's Awakening, was released on PlayStation 2 in 2005. The enhanced Special Edition was released on PlayStation 2 between June and October 2006, adding new features such as retooled difficulty levels, mid-mission checkpoints, "GOLD mode", and a mode where players can play as Vergil. The Special Edition release was later ported to PC in-house by Capcom and released in several regions throughout 2006, starting in the UK by Mastertronic Games on June 28, in Japan by Sourcenext on June 30 and in North America by Ubisoft on October 16. It was later released worldwide on Steam on June 12, 2007.
The game suffers from bad performance caused by sound files.[2] See Poor performance.
It was delisted on Steam from January 31, 2024.
General information
- Steam Community Discussions
Availability
| Source |
DRM |
Notes |
Keys |
OS |
| Retail |
|
SecuROM 7 DRM disc check.
The Japanese retail disc and updates do not have DRM. |
|
|
 |
|
|
|
|
| Humble Store |
|
|
|
|
| Steam (unavailable) |
|
|
|
|
Essential improvements
Patches
- Latest version is 1.3.0. Digital distributed versions are already patched to the latest version.
- For the legacy version of the patch, if the app says
"the version that has been installed cannot be acquired/installation destination is not found" which prevents the update, use the Registry Fix first to properly locate your game folder in the registry and then use the Patch again.[3] Video tutorial on how to update the game.
- Updating the game makes it compatible with the Style Switcher mod and enables Windows Vista support.
- The update gives the Gamepad Configuration Tool (GPadCfg) that allows the user to assign keys for DInput controllers. Controller configurations will be saved at the bottom part in the
DMC3SE.ini.
Monetization
Microtransactions
Skip intro videos
|
Skip Ubisoft and Capcom intro[4]
|
- Install Style Switcher.
- Edit
StyleSwitcher.ini.
- Set
SkipIntro=1.
|
Modifications
- It is recommended to update the game version to 1.3 (for the retail version) before installing the mods.
Style Switcher
- Although no longer maintained by the original developers, an unofficial continuation of Style Switcher for the 2006 port of Devil May Cry 3 can be found here and can be applied on top of previous versions of Style Switcher.[5]
- Make sure to have a backup of the original save file first before using Style Switcher Mod.
- Offers many video options (including resolution, FOV and improved visual effects), optional gameplay modifications (including style switching), and XInput controller support.
- Game crashes if either Style/Weapon Switcher is Enabled when changing Style/Weapons in the Divinity Statue (happens on v3.1.6).
- When enabled, Weapon Switcher will unlock all Guns and Devil Arms even when starting a new progress. It also keeps the Gun Level at Lv. 1 (happens on v3.1.6).
- Weapon Switcher causes save file corruption after saving data with the feature enabled. Using Style Switcher alone will make the game crash after selecting certain missions unless both SS and WS are either enabled or disabled (happens on v3.1.6).
|
Install Style Switcher[citation needed]
|
- Download and install Visual C++ Redistributable 2015-2022 x86 and x64 and DirectX Redistributable (June 2010).
- Download Style Switcher and extract the files.
- Move the extracted files to the installation folder.
- Read the
documentation.html for additional information about the mod.
- Run
install.bat.
- Choose between
0. dinput8.dll for keyboard support or 1. dsound.dll for XInput support if using the XInput Plus method.
|
Devil May Cry 3 Starter Pack
- A preconfigured compilation of community made mods and fixes meant to fix the game while keeping the game vanilla.
- Includes Style Switcher v3 as a core, fixed HQ music, XInput controller support without necessity of using middleware software and different button prompts.
- The included version of Style Switcher is outdated.
- Has texture errors for Dante during certain cutscenes.
- Dante stays midair when riding down the elevator and the Temperance Wagon.
Game data
Configuration file(s) location
- If using the unofficial continuation of Style Switcher, it is recommended to move or delete
DMC3SE.ini.
Save game data location
Video
|
Change FPS limit[citation needed]
|
- Install Style Switcher.
- Open
StyleSwitcher.ini.
- Change
Resolution=1280x720@60 as desired; 60 represents FPS limit.
Notes
- The FPS limit must be within
0 to 255 for the mission timer to work correctly.
|
Input
|
Add XInput support[6]
|
- Run XInput Plus, click Select on Target Program and select
dmc3se.exe.
- Go to the DirectInput tab and tick the Enable DirectInput Output.
- Click the drop-down button beside LT/RT and select
Button 11/12.
- Click the drop-down button beside GUIDE and select
Button 13.
- Click Customize then the drop-down button beside Left Stick-X and select
Y_Axis.
Do this the same for Left Stick-Y and select X_Axis.
- OPTIONAL: Click Setting tab then go to Others tab and disable the Enable Init Beep.
- Click on Apply button, confirm everything and close XInput Plus. New files will appear in the game folder.
- Open and edit
DMC3SE.ini with Notepad and paste this controller config then Save.
[<insert Xbox Controller Name>]
START = 7
SELECT = 6
CIRCLE = 1
TRIANGLE = 3
SQUARE = 2
CROSS = 0
L1 = 4
R1 = 5
L2 = 10
R2 = 11
L3 = 8
R3 = 9
L<->R = 1
This template should work for most XInput devices. The string within the brackets is the name of the device. It has to match your device's name or the template will not be applied. To get a list of all connected game controllers, press ⊞ Win+R then enter joy.cpl. If the Right Analog makes the character move instead of Left Analog, change the value of L<->R to 0.
- Run the game to test the controls.
|
|
Adjust controller configuration[7]
|
- It is also highly recommended to update the game to v1.3 for the controller configurations to work properly.
- Some configurations like the Xbox controller will require an additional program to allow the triggers to be remapped as Q and E.
- Go to
Start > Control Panel > Hardware and Sound > Devices and Printers, left click your controller under Devices, select Game controller settings, and click Properties.
- It can also be opened by using the Run dialog ⊞ Win+R then entering
joy.cpl
- Go to
<path-to-game>.
- Edit
DMC3SE.ini and either remove all text or create a new definition (preferably at the top) using the following template.
[<controller name>]
START =
SELECT =
CIRCLE =
TRIANGLE =
SQUARE =
CROSS =
L1 =
R1 =
L2 =
R2 =
L3 =
R3 =
L<->R =
- Where it says
[<controller name>], enter the name of the controller as it appears in the Game Controllers window, for example [USB Joystick] or [Controller (XBOX ONE for Windows)].
- Using the Properties window, type in the number of the button you wish to map to a function, minus 1. Subtracting the number with 1 is important due to the zero-based numbering system. For example, if you wish to map TRIANGLE to Y, the Properties window says it is button 4 when pressed, so enter 3 for the line to read
TRIANGLE = 3. If the button you wish to assign is a trigger, enter the value as 255 instead.
- The method with the triggers does not work in the latest version (3.1.6) of Style Switcher and instead must use a middleware called XInput Plus.
- The line that reads L<->R = should be set to 1 if the right stick controls Dante. If the left stick controls Dante by default, you can delete the line.
- Alternatively, paste in the correct controller information below:
-
| Afterglow Controller for Xbox 360 |
|
[Controller (Afterglow Gamepad for Xbox 360)]
START = 7
SELECT = 6
CIRCLE = 1
TRIANGLE = 3
SQUARE = 2
CROSS = 0
L1 = 4
R1 = 5
L2 = 10
R2 = 11
L3 = 8
R3 = 9
L<->R = 1
|
-
| MadCatz GamePad |
|
[MadCatz GamePad (Controller)]
START = 7
SELECT = 6
CIRCLE = 1
TRIANGLE = 3
SQUARE = 2
CROSS = 0
L1 = 4
R1 = 5
L2 = 10
R2 = 11
L3 = 8
R3 = 9
L<->R = 1
|
-
| Wireless Xbox 360 Controller |
|
[Controller (XBOX 360 Wireless Receiver for Windows)]
START = 7
SELECT = 6
CIRCLE = 1
TRIANGLE = 3
SQUARE = 2
CROSS = 0
L1 = 4
R1 = 5
L2 = 10
R2 = 11
L3 = 8
R3 = 9
L<->R = 1
|
-
| Xbox 360 Wired Controller |
|
[Controller (XBOX 360 For Windows)]
START = 7
SELECT = 6
CIRCLE = 1
TRIANGLE = 3
SQUARE = 2
CROSS = 0
L1 = 4
R1 = 5
L2 = 10
R2 = 11
L3 = 8
R3 = 9
L<->R = 1
|
-
| Xbox One Controller |
|
[Controller (XBOX One For Windows)]
START = 7
SELECT = 6
CIRCLE = 1
TRIANGLE = 3
SQUARE = 2
CROSS = 0
L1 = 4
R1 = 5
L2 = 10
R2 = 11
L3 = 8
R3 = 9
L<->R = 1
|
-
| PS2 Controller with Twin USB Joystick Adapter |
|
[Twin USB Vibration Gamepad]
START = 9
SELECT = 8
CIRCLE = 1
TRIANGLE = 0
SQUARE = 3
CROSS = 2
L1 = 4
R1 = 5
L2 = 6
R2 = 7
L3 = 10
R3 = 11
L<->R = 1
|
-
| PS2 Controller with PS2 to PS3/USB Adapter / PS3 Controller |
|
[PLAYSTATION(R)3 Controller]
START = 9
SELECT = 8
CIRCLE = 1
TRIANGLE = 0
SQUARE = 3
CROSS = 2
L1 = 4
R1 = 5
L2 = 6
R2 = 7
L3 = 10
R3 = 11
L<->R = 0
|
-
| PS4/5 Controller |
|
[Wireless Controller]
START = 9
SELECT = 8
CIRCLE = 2
TRIANGLE = 3
SQUARE = 0
CROSS = 1
L1 = 4
R1 = 5
L2 = 6
R2 = 7
L3 = 10
R3 = 11
L<->R = 0
|
-
| DOBE Wireless Controller For Switch TNS-0117 |
|
[Gamepad]
START = 11
SELECT = 10
CIRCLE = 1
TRIANGLE = 4
SQUARE = 3
CROSS = 0
L1 = 6
R1 = 7
L2 = 8
R2 = 9
L3 = 13
R3 = 14
L<->R = 0
|
|
|
Adjust controller configuration via GPadCfg
|
- This app will only appear if the game is updated to v1.3. Recommended for DInput gamepads.
- Run the
GPadCfg.exe then assign the buttons.
- Double-click the Save icon to save.
- The controller configuration will be saved at the bottom part in the
DMC3SE.ini.
- Saving the controller configuration will be disabled if the user did not assign all buttons. An example is when using an Xbox controller. Due to the controller being an XInput device, the user cannot assign L2 and R2 since the app cannot read Triggers unless the XInput Plus method was applied. Editing
DMC3SE.ini manually will be the only option.
- Using XInput wrappers will fail to open GPadCfg since the app can only read 1 controller at a time. Apps such as XOutput, x360ce, and DS4Windows emulate a virtual Xbox Controller, making the system and GPadCfg think that 2 controllers are plugged in. Hiding the main controller using HidHide will bypass this error.
|
|
Generic Controller support[8]
|
- Although Generic Controllers (mostly the
USB\VID_0079&PID_0006 types) count as a DInput device, manually configuring it by using the methods above or with GPadCfg will be difficult since there are cases of Analog movement problems.
- Use XInput wrapper programs such as x360ce or XOutput to "convert" your Generic Controller into an Xbox controller. Using HidHide is also recommended to prevent "double inputs" and "hide" your main controller.
- Since the program emulates the Xbox controller, use the Xbox config template with the correct controller name and paste it to
DMC3SE.ini.
- Lastly, use programs like JoyToKey or Xpadder to assign LT/RT to Q/E or use the XInput Plus method.
|
Controller X-axis inversion
|
Set standard camera[citation needed]
|
- Install Style Switcher.
- Edit
StyleSwitcher.ini.
- Set
InvertCamera=1.
|
Xbox 360 Button Prompts Mod
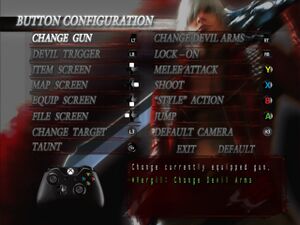
Xbox One Button Prompts Mod
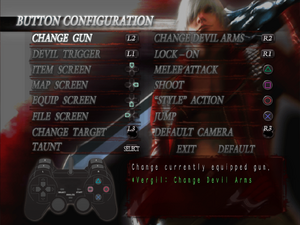
DualShock Button Prompts Mod
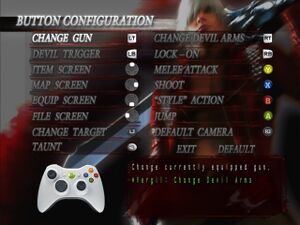
Generic Gamepad Button Prompts
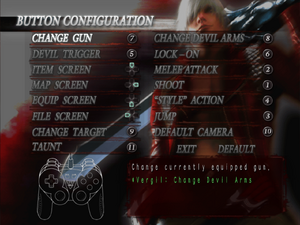
- The game uses numbered button/generic gamepad prompts by default.
Audio
| Audio feature |
State |
Notes |
| Separate volume controls |
|
|
| Surround sound |
|
|
| Subtitles |
|
|
| Closed captions |
|
|
| Mute on focus lost |
|
|
| Royalty free audio |
|
|
Localizations
| Language |
UI |
Audio |
Sub |
Notes |
| English |
|
|
|
|
| Japanese |
|
|
|
Available via registry edit. |
| German |
|
|
|
|
| French |
|
|
|
|
| Italian |
|
|
|
|
| Spanish |
|
|
|
|
| Polish |
|
|
|
Local retail version; download. |
| Russian |
|
|
|
Local retail version; download this for Steam version. |
| Simplified Chinese |
|
|
|
Local retail version. |
| Traditional Chinese |
|
|
|
Local retail version. |
| Brazilian Portuguese |
|
|
|
Fan translation. |
| Hungarian |
|
|
|
Fan translation. |
Issues unresolved
Gold Orb bug
- Gold Orbs in the Divinity Statue are actually bought as Yellow Orbs which is useless in Gold Mode. The Gold Orbs that are gathered along the way are the usable ones.
Graphical errors
- There are plenty of graphical errors that are not properly optimized in this port such as Gigapede's lightning attack, the background of Mission 18's boss fight sessions, and many more.
Tutorials from the "Files" section are frozen
- Video tutorial of certain actions cannot be played.
Save file year outdated
- Once you save your progress, the year in-game will always be 16 years behind.
Issues fixed
Force Feedback Driver (XInput) cause issues
- Force Feedback Driver (XInput) interfere with Style Switcher XInput causing issues.
|
Uninstall driver
|
- Uninstall Force Feedback Driver (XInput) if installed.
|
Xbox One Controller issues
- The built-in Xbox One controller drivers have issues.
|
Download and install the old drivers. Can also be used on Windows 7.
|
|
|
Missing music
- Some of the music that was present in the PlayStation 2 version is missing.
|
Add missing music[citation needed]
|
- Install Style Switcher.
- Download the missing music.
- Extract the files to the installation folder, overwrite files when prompted.
- Edit
StyleSwitcher.ini.
- Set
Volume.BGM=100 and Volume.SE=64 to balance audio.
|
|
Add missing music for Vanilla version
|
- Download the missing music in the link above.
- Delete the old "sound" folder in the game folder.
- Extract the new "sound" folder from the archive to the game folder.
- Inside the "sound" folder, run a terminal and enter the command
ren "*.ogg" "*.bin" to convert OGG to BIN.
|
Poor performance
- A number of sound files can cause severe frame rate drops.
|
Changing ForceMode0 value in Style Switcher
|
- Install Style Switcher.
- Edit
StyleSwitcher.ini.
- Set
ForceMode0=1.
|
|
Setting CPU Affinity
|
- Open a text editor like Notepad/Notepad++.
- Enter the following:
echo off
start /affinity 1 dmc3se.exe
- Save it as a
.bat file inside the game directory then run the batch file.
|
|
Delete sound files[7]
|
- Go to
<path-to-game>\sound.
- Delete the following files.
Battle_01.bin
Battle_01b.bin
Battle_03.bin
Battle_05.bin
Battle_06.bin
Battle_07.bin
Battle_08.bin
Boss_01b.bin
Boss_02b.bin
Boss_03b.bin
Boss_04b.bin
Boss_05b.bin
Boss_06b.bin
Boss_08b.bin
Jester.bin
Jikushinzou.bin
Kaze_01.bin
Kaze_02.bin
Kaze_03.bin
Kaze_04.bin
Kaze_05.bin
Kaze_06.bin
Maguma.bin
Mizu_01.bin
Mizu_02.bin
m_demo_04_004.bin
m_demo_04_004v.bin
m_demo_09_003.bin
m_demo_09_003v.bin
m_demo_10_002.bin
m_demo_10_002v.bin
m_demo_15_001.bin
m_demo_15_001v.bin
m_demo_19_001.bin
m_demo_19_016.bin
Nausica.bin
Room_01.bin
Stage_01.bin
Stage_02.bin
Stage_02b.bin
Stage_03.bin
Stage_04.bin
Stage_04b.bin
Stage_05.bin
Stage_05b.bin
Stage_06.bin
Stage_07.bin
Stage_08.bin
Stage_09.bin
T_bossb.bin
|
Change language
|
Using Registry Command for Vanilla version/Style Switcher v2.4.3[citation needed]
|
- Run Command Prompt as Administrator.
- Enter the following command:
For x86:
REG ADD "HKLM\SOFTWARE\CAPCOM\Devil May Cry 3 Special Edition" /v Language /t REG_DWORD /d ? /f
For x64:
REG ADD "HKLM\SOFTWARE\WOW6432Node\CAPCOM\Devil May Cry 3 Special Edition" /v Language /t REG_DWORD /d ? /f
? stands for the following:
0 = English
1 = Japanese
2 = German
3 = French
4 = Italian
5 = Spanish
|
|
Using Style Switcher v3.0+[citation needed]
|
- Install Style Switcher.
- Edit
StyleSwitcher.ini.
- Set
Language to the following:
0 = Japanese
1 = English
2 = French
3 = German
4 = Italian
5 = Spanish
---- Do not use the following numbers if you don't have these Language files ----
6 = Korean
7 = Simplified Chinese
8 = Traditional Chinese
9 = Russian
10 = Polish
|
Start the game in fullscreen
|
Force fullscreen[citation needed]
|
- Install Style Switcher.
- Edit
StyleSwitcher.ini.
- Set
Mode=1.
|
Hide mouse cursor
|
Hide cursor[citation needed]
|
- Install Style Switcher.
- Edit
StyleSwitcher.ini.
- Set
HideCursor=1.
|
Enable cutscenes
|
Enable cutscenes[citation needed]
|
- Install Style Switcher.
- Edit
StyleSwitcher.ini.
- Set
SkipCutscene=0.
|
|
Enable pre-rendered cutscenes for DMC3SE Vanilla
|
- Use the DMC3SE Registry Fix.
- Place the reg files inside the game folder and choose between x86 or x64 depending on your system.
|
Enable music and sound
|
Enables BGM and cutscene audio[citation needed]
|
- Install Style Switcher.
- Edit
StyleSwitcher.ini
- Set
DisableSoundDriver=0.
- Disabling the audio will prevent short lag transitions after entering doors.
|
Game has a short lag when loading a BGM track
- Fixes the short lag after entering a room.
- Fixes the BGM looping and is best used with Style Switcher.
- Still has bugs (e.g. Divinity Statue BGM not stopping).
|
Replace the original snd.drv file[citation needed]
|
- Download the files.
- Move the files in the
<path-to-game>.
|
Other information
API
| Technical specs |
Supported |
Notes |
| Direct3D |
9.0c |
|
| Shader Model support |
2 |
|
| Executable |
32-bit |
64-bit |
Notes |
| Windows |
|
|
|
Middleware
- No middleware information; you can edit this page to add it.
System requirements
| Windows |
|
Minimum |
Recommended |
| Operating system (OS) |
2000 |
XP |
| Processor (CPU) |
Intel Pentium III 1.0 GHz
| Intel Pentium 4 2.0 GHz |
| System memory (RAM) |
256 MB |
512 MB |
| Hard disk drive (HDD) |
2 GB |
4.7 GB |
| Video card (GPU) |
128 MB of VRAM
DirectX 9.0 compatible
Shader model 2.0 support |
Nvidia GeForce 7500
256 MB of VRAM |
Notes
References
