Difference between revisions of "Deadlight"
From PCGamingWiki, the wiki about fixing PC games
m (updated template usage) |
|||
| Line 87: | Line 87: | ||
===[[Glossary:Borderless fullscreen windowed|Borderless fullscreen windowed]]=== | ===[[Glossary:Borderless fullscreen windowed|Borderless fullscreen windowed]]=== | ||
| − | {{Fixbox| | + | {{Fixbox|description=Use GeDoSaTo|ref={{cn|date=July 2016}}|fix= |
| − | |||
# Install [https://community.pcgamingwiki.com/files/file/897-gedosato/ GeDoSaTo]. | # Install [https://community.pcgamingwiki.com/files/file/897-gedosato/ GeDoSaTo]. | ||
# Add '''LOTDGame''' to the user whitelist. | # Add '''LOTDGame''' to the user whitelist. | ||
| Line 98: | Line 97: | ||
{{--}} By default Deadlight doesn't support anti-aliasing, which can be noticeable and quite annoying on certain displays. | {{--}} By default Deadlight doesn't support anti-aliasing, which can be noticeable and quite annoying on certain displays. | ||
| − | {{Fixbox| | + | {{Fixbox|description=Enable Anti-alasing|ref={{cn|date=July 2016}}|fix= |
| − | |||
# Download and open [https://ci.appveyor.com/project/Orbmu2k/nvidiaprofileinspector/build/artifacts NVIDIA Profile Inspector]. | # Download and open [https://ci.appveyor.com/project/Orbmu2k/nvidiaprofileinspector/build/artifacts NVIDIA Profile Inspector]. | ||
# Press the '''Create new profile''' button (shown in green below). Use a profile name like '''Deadlight''' for convenience.<br>[[File:Inspector button2.jpg]] | # Press the '''Create new profile''' button (shown in green below). Use a profile name like '''Deadlight''' for convenience.<br>[[File:Inspector button2.jpg]] | ||
| Line 113: | Line 111: | ||
===[[Glossary:Frame rate (FPS)|High frame rate]]=== | ===[[Glossary:Frame rate (FPS)|High frame rate]]=== | ||
| − | {{Fixbox| | + | {{Fixbox|description=Change frame rate smoothing|ref={{cn|date=July 2016}}|fix= |
| − | |||
# Go to the [[#Game data|configuration file(s) location]]. | # Go to the [[#Game data|configuration file(s) location]]. | ||
# Open <code>LOTDEngine.ini</code>. | # Open <code>LOTDEngine.ini</code>. | ||
| Line 285: | Line 282: | ||
==Issues fixed== | ==Issues fixed== | ||
===No audio in cutscenes=== | ===No audio in cutscenes=== | ||
| − | {{Fixbox| | + | {{Fixbox|description=Use replacement binkw32.dll|ref=<ref name="noSoundFix">[https://steamcommunity.com/sharedfiles/filedetails/?id=166774038 Steam Community :: Guide :: Solution: "No sound in cutscenes" problem in Deadlight]</ref>|fix= |
| − | |||
# Download the [https://community.pcgamingwiki.com/files/file/653-dead-light-sound-fix/ newer version of binkw32.dll]. | # Download the [https://community.pcgamingwiki.com/files/file/653-dead-light-sound-fix/ newer version of binkw32.dll]. | ||
# Unpack the file to {{code|{{p|game}}\Binaries\Win32\}}. | # Unpack the file to {{code|{{p|game}}\Binaries\Win32\}}. | ||
}} | }} | ||
| − | {{Fixbox| | + | {{Fixbox|description=Enable shader initialization on demand|ref=<ref name="noSoundFix"/>|fix= |
| − | |||
# Go to the [[#Game data|configuration file(s) location]]. | # Go to the [[#Game data|configuration file(s) location]]. | ||
# Open <code>LOTDEngine.ini</code>. | # Open <code>LOTDEngine.ini</code>. | ||
Revision as of 22:17, 20 November 2017
 |
|
| Developers | |
|---|---|
| Tequila Works | |
| Publishers | |
| Microsoft Studios | |
| Engines | |
| Unreal Engine 3 | |
| Release dates | |
| Windows | October 25, 2012 |
| Deadlight | |
|---|---|
| Deadlight | 2012 |
| Deadlight: Director's Cut | 2016 |
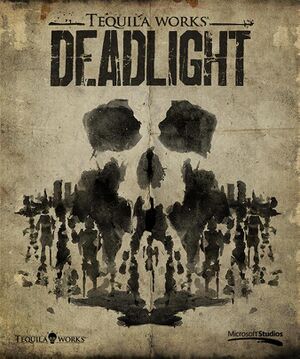
This page is for the original release. For the Director's Cut, see Deadlight: Director's Cut.
General information
Availability
| Source | DRM | Notes | Keys | OS |
|---|---|---|---|---|
| Amazon.com | ||||
| Steam |
Game data
Configuration file(s) location
Template:Game data/row
| System | Location |
|---|---|
| Steam Play (Linux) | <SteamLibrary-folder>/steamapps/compatdata/211400/pfx/[Note 1] |
Save game data location
Template:Game data/row
| System | Location |
|---|---|
| Steam Play (Linux) | <SteamLibrary-folder>/steamapps/compatdata/211400/pfx/[Note 1] |
Save game cloud syncing
| System | Native | Notes |
|---|---|---|
| Steam Cloud |
Video settings
Borderless fullscreen windowed
| Use GeDoSaTo[citation needed] |
|---|
|
Anti-aliasing (AA)
- By default Deadlight doesn't support anti-aliasing, which can be noticeable and quite annoying on certain displays.
| Enable Anti-alasing[citation needed] |
|---|
|
High frame rate
| Change frame rate smoothing[citation needed] |
|---|
|
Input settings
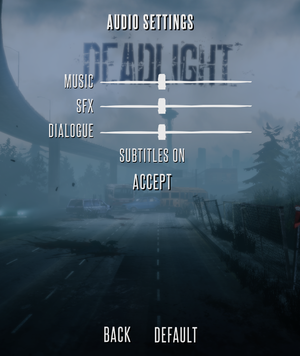
Audio settings
Localizations
| Language | UI | Audio | Sub | Notes |
|---|---|---|---|---|
| English | ||||
| German | ||||
| French | ||||
| Italian | ||||
| Spanish | ||||
| Japanese | ||||
| Turkish | ||||
| Russian |
VR support
| 3D modes | State | Notes | |
|---|---|---|---|
| Nvidia 3D Vision | See Helix Mod: Deadlight. | ||
Issues fixed
No audio in cutscenes
| Use replacement binkw32.dll[1] |
|---|
|
| Enable shader initialization on demand[1] |
|---|
|
Other information
API
| Executable | 32-bit | 64-bit | Notes |
|---|---|---|---|
| Windows |
System requirements
| Windows | ||
|---|---|---|
| Minimum | Recommended | |
| Operating system (OS) | XP SP3, Vista, 7 | |
| Processor (CPU) | 2GHz+ or better | Intel Core 2 Duo 2GHz+ or better |
| System memory (RAM) | 2 GB | 5 GB |
| Hard disk drive (HDD) | 5 GB | 5 GB |
| Video card (GPU) | Shader model 3.0 support | 512 MB of VRAM |
Notes
- ↑ 1.0 1.1 Notes regarding Steam Play (Linux) data:
- File/folder structure within this directory reflects the path(s) listed for Windows and/or Steam game data.
- Games with Steam Cloud support may also store data in
~/.steam/steam/userdata/<user-id>/211400/. - Use Wine's registry editor to access any Windows registry paths.
- The app ID (211400) may differ in some cases.
- Treat backslashes as forward slashes.
- See the glossary page for details on Windows data paths.

