General information
- Steam Community Discussions
Availability
- SafeDisc retail DRM does not work on Windows Vista and later (see above for affected versions).
Essential improvements
Patches
- The latest official patch is v1.03, available from Ubisoft's patch repository, Patches-Scrolls and ModDB.
- If Windows 10 blocks the installation of this patch[citation needed], install 7-zip, right-click the exe and choose "7Zip > Extract Here", then run
setup.exe.
Gift Pack
- A free map pack that adds Murdertown – Dark, CQB Training – Dark, and Calypso Casino to all Versus modes and Terrorist Hunt (these maps are already included in the Steam version). It can be downloaded from here.
- Also available is the Comcast Event Map, a multiplayer gift map that can be downloaded as an installer from Mediafire or Dropbox.[4]
Game data
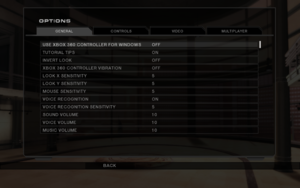
In-game general settings.
Configuration file(s) location
-
R6GameConfig.bin stores key bindings.
Save game data location
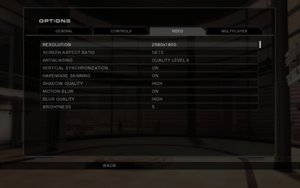
Video
|
DxWnd configuration[citation needed]
|
- Open DxWnd and add a new game.
- Click
... right of a Path field and navigate to installation folder.
- Switch a filter from
Application (*.exe) to All files (*.*).
- Select
game.dat and click OK.
- Click
... right of a Launch field and navigate to installation folder.
- Select
R6Vegas2_Game.exe.
- Under Position type in desired window width (W) and height (H). Make sure these values are the same as resolution set in game.
- Go to DirectX tab.
- Set DirectX Version Hook to
DirectX9.
- Make sure one of the Emulation options is selected.
- Click OK and launch the game.
|
Ambient Occlusion
- On Nvidia graphics cards, it can be enabled through the Nvidia Inspector. Use the
0x00000025 (Tom Clancy's EndWar) preset. This will result in noticable FPS drop in certain game areas.[citation needed]
Input
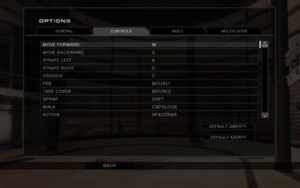
In-game key map settings.
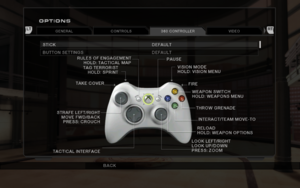
In-game gamepad settings.
Audio
| Audio feature |
State |
Notes |
| Separate volume controls |
|
|
| Surround sound |
|
|
| Subtitles |
|
|
| Closed captions |
|
|
| Mute on focus lost |
|
|
| EAX support |
|
[citation needed] |
| Royalty free audio |
|
|
Localizations
Change language
|
Edit configuration file[6]
|
- Go to
<path-to-game>\KellerGame\Config\PCKellerEngine.ini
- Change
lang=xyz (xyz being the name of any of the directories in <path-to-game>\KellerGame\Localization, all of which corresponds to a specific language: DEU for German, ESP for Spanish, FRA for French, INT for English, ITA for Italian, POL for Polish, and RUS for Russian.
|
Network
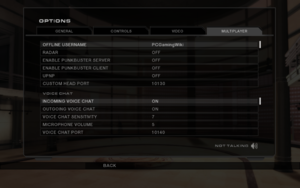
In-game multiplayer settings.
Multiplayer types
Connection types
Ports
| Protocol |
Port(s) and/or port range(s) |
| TCP |
3074, 10130 |
| UDP |
3074-3174, 10140 |
- This game supports Universal Plug and Play (UPnP) for automatic port configuration.
VR support
Issues unresolved
Cannot connect to Ubisoft's online service
A common error for players attempting to play Rainbow Six: Vegas 2 online is the message "Failed to initialize network service."
This error can potentially be fixed by setting the windows system locale settings to a non unicode language such as English. East Asian languages will cause this error.
The simplest way to bypass this issue is to use a Virtual Lan (VPN).[citation needed]
Issues fixed
Infinite gunfire loop
|
Instructions[citation needed]
|
- This is a known issue in several Ubisoft games. This may fix it but many users report that it does not.
- Download the sound bugfix here.
- Backup the original
eax.dll in <path-to-game>\Binaries\.
- Extract/copy the fixed
eax.dll from the bugfix zip to <path-to-game>\Binaries\.
- Turn off voice recognition ingame.
|
Xbox One Controller not detected
Quick and dirty method
Modify PCKellerJoysticks.ini (quick)[8]
|
- Go to
<path-to-game>\KellerGame\Config\.
- Open the
PCKellerJoysticks.ini file with Notepad or other text editor.
- Under the
[Joystick0] section, set VendorID to 1118 and ProductID to 736.
- Add
UseXInput=true under the ProductID line.
- Save the file and launch the game.
|
Full method
Modify PCKellerJoysticks.ini (full)[9]
|
- Go to
<path-to-game>\KellerGame\Config\.
- Open
PCKellerJoysticks.ini with Notepad or other text editor.
- Before the
[Configuration] section, copy and paste in the following:
[Joystick10]
ProductName=XBox One Controller
VendorID=1118
ProductID=721
UseXInput=true
Joy1=XboxTypeS_A
Joy2=XboxTypeS_B
Joy3=XboxTypeS_X
Joy4=XboxTypeS_Y
Joy5=XboxTypeS_RightShoulder
Joy6=XboxTypeS_LeftShoulder
Joy7=XboxTypeS_LeftThumbstick
Joy8=XboxTypeS_RightThumbstick
Joy9=XboxTypeS_Start
Joy10=XboxTypeS_Back
Joy11=
Joy12=
Joy13=
Joy14=
Joy15=
Joy16=
Axis_X=XboxTypeS_LeftX
Axis_Y=XboxTypeS_LeftY
Axis_Z=XboxTypeS_RightX
Axis_Rotation_X=
Axis_Rotation_Y=
Axis_Rotation_Z=XboxTypeS_RightY
Slider_0=XboxTypeS_RightTrigger
Slider_1=XboxTypeS_LeftTrigger
DPadUp=XboxTypeS_DPad_Up
DPadDown=XboxTypeS_DPad_Down
DPadLeft=XboxTypeS_DPad_Left
DPadRight=XboxTypeS_DPad_Right
4. Save the file and launch the game.
|
Use Xbox 360 controller emulator:
Download this file and copy the content in Binaries Folder if no one solution before works.
Link: https://mega.nz/#!DgByGYIC!1GzyiOQ7ynaU7xFdQpFn7mh1ohVWNzBl6fIOYPGP2zo
Hold to scope and/or crouch
- Rainbow Six: Vegas 2 only supports toggle for crouch/scope. Hold/release behaviour can be emulated via an AuthoHotkey script.
|
Download AutoHotkey and run the script
|
|
Warning! The script might result in a ban when playing online.
- Download and install AutoHotkey.
- Save the script below as
vegas2.ahk.
- Run the script.
- Start the game.
- Bind Crouch to
Left Control.
- Bind Scope to
Right Mouse Button.
- When done, close the script using the green
H tray icon.
SendMode Input
#Persistent
#IfWinActive ahk_exe R6Vegas2_Game.exe

; Scope by holding RIGHT MOUSE BUTTON
$rbutton::
send {rbutton down}{rbutton up}
KeyWait rbutton
send {rbutton down}{rbutton up}
return

; Crouch by holding LEFT CONTROL
$lctrl::
send {lctrl down}{lctrl up}
KeyWait lctrl
send {lctrl down}{lctrl up}
return
|
Other information
API
| Technical specs |
Supported |
Notes |
| Direct3D |
9.0c |
|
| Shader Model support |
3 |
|
| Executable |
32-bit |
64-bit |
Notes |
| Windows |
|
|
|
Middleware
AI Behavior Modification
- Stops enemies from rushing to the player's position, makes corpses stay.
|
Edit PCKellerInput.ini[10]
|
- Open
<path-to-game>\KellerGame\Config\PCKellerInput.ini.
- Add the following lines under
[Engine.PlayerInput] class:
Bindings=(Name="F8",Command="aiMods",Control=False,Shift=False,Axis=False,Alt=False)
Bindings=(Name="aiMods",Command="say m1k3: AI tweaks have been applied. | set R6TerroHuntManager m_bDisableSearching True | set R6TerroHuntManager m_bRandomSpawning True | set R6TerroHuntManage m_fBackZone 16000000.000000 | set R6AITemplate m_bLeaveDeadBody True",Control=False,Shift=False,Axis=False,Alt=False)
- Press F8 in-game.
|
System requirements
| Windows |
|
Minimum |
Recommended |
| Operating system (OS) |
XP SP2 |
Vista |
| Processor (CPU) |
Intel Pentium 4 3.0 GHz
AMD Athlon 3000+ |
Intel Pentium 4 3.5 GHz
AMD Athlon 3500+ |
| System memory (RAM) |
1 GB (XP)
2 GB (Vista) |
2 GB |
| Hard disk drive (HDD) |
7 GB | |
| Video card (GPU) |
Nvidia GeForce 6600
ATI Radeon X1600
128 MB of VRAM
DirectX 9.0c compatible
Shader model 3.0 support |
256 MB of VRAM |
Notes
- ↑ SafeDisc retail DRM does not work on Windows 10[1] or Windows 11 and is disabled by default on Windows Vista, Windows 7, Windows 8, and Windows 8.1 when the KB3086255 update is installed.[2]
- ↑ When running this game without elevated privileges (Run as administrator option), write operations against a location below
%PROGRAMFILES%, %PROGRAMDATA%, or %WINDIR% might be redirected to %LOCALAPPDATA%\VirtualStore on Windows Vista and later (more details).
- ↑ 3.0 3.1 File/folder structure within this directory reflects the path(s) listed for Windows and/or Steam game data (use Wine regedit to access Windows registry paths). Games with Steam Cloud support may store data in
~/.steam/steam/userdata/<user-id>/15120/ in addition to or instead of this directory. The app ID (15120) may differ in some cases. Treat backslashes as forward slashes. See the glossary page for details.
References


